Applying the alphabetic principal is the first step with phonics instruction. Once students learn these first sound-symbol relationships, they begin to read words. Good alphabet instruction systematically and explicitly teaches sound-symbol associations.
In order to learn the letters of the alphabet, students need to first be able to visually discriminate between the different letter shapes. I learned from David Kilpatrick that we do not memorize words through visual memory. The input is visual, but the storage of those words are orthographic, phonological, and semantic. (Read a blog post about that here.) However, learning the letters of the alphabet does take visual memory.
Students then need to match a sound to the letter or letters that represent that sound (developing sound-symbol awareness). As you know, many letters make more than one sound. When first teaching the alphabet, it is best to start with the most common sound first. Sounds, not letter names, are my focus. It’s not that I don’t mentioned or tell them the letter name. It’s just that I care a lot more about them learning the sound that a letter represents, not the letter name. As Diane Mcguinness says, “sounds, not letters, are the basis of the code”.
Why is Alphabet Instruction Important?
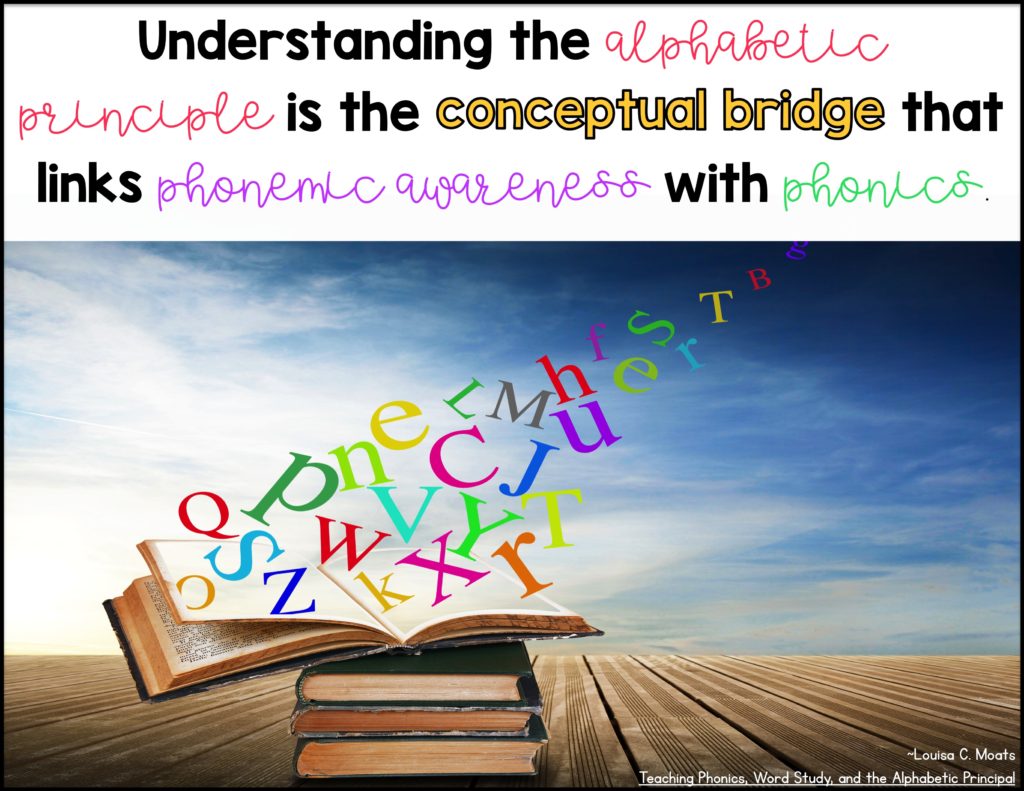
As I mentioned in my previous posts, there are several graphemes that students need to learn.
- Graphemes are simply sounds put into writing. A grapheme is the written representation of a sound.
- There are single-letter graphemes (letters of the alphabet) and multi-letter graphemes (th, igh, ea, etc.)
- There are 44 phonemes (sounds) in the English language and these sounds can be represented in multiple ways.
- The first graphemes our students are introduced to are the letters of the alphabet.
- Later, they learn that those same letters may represent more than one sound and that some of these letters can combine with other letters to represent new sounds. But first, begin with the most common sounds and systematically build from there.
Tips for Alphabet Instruction
There are a few things I’ve learned along the way, so I thought I would share them today.
#1: By Systematic with your Alphabet Instruction
To be systematic means to have a specific plan or sequence for introducing sound-symbol relationships.
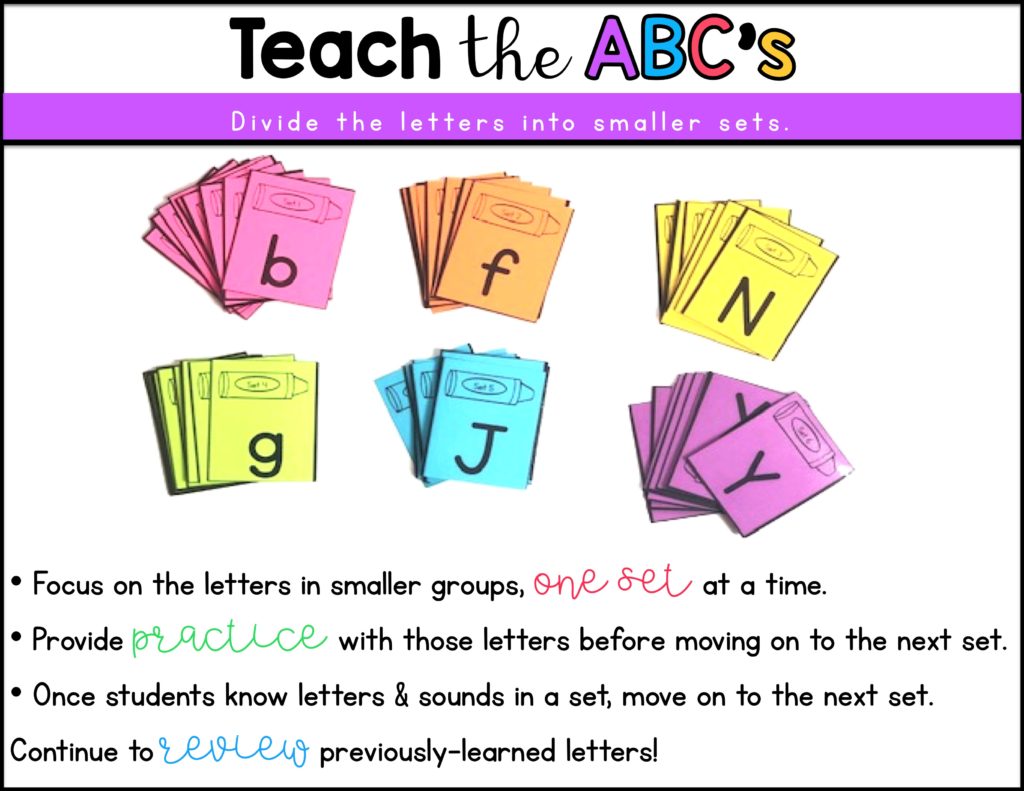
Dividing the letters of the alphabet into small sets has been such a huge help for my students. Breaking all the letters into smaller sets feels more manageable and allows them to have time to practice and master some letters before adding in more. My students aren’t overwhelmed and mixed up as much because I am not adding in more until one set is mastered. Also, for my intervention students who struggle to remember these sound-symbol associations, it allows for celebration at multiple intervals. Every set that is mastered called for a celebration!
If you are interested in the alphabet sequence I use, you can find that here.
#2: Start with Sounds and Connect to Symbol
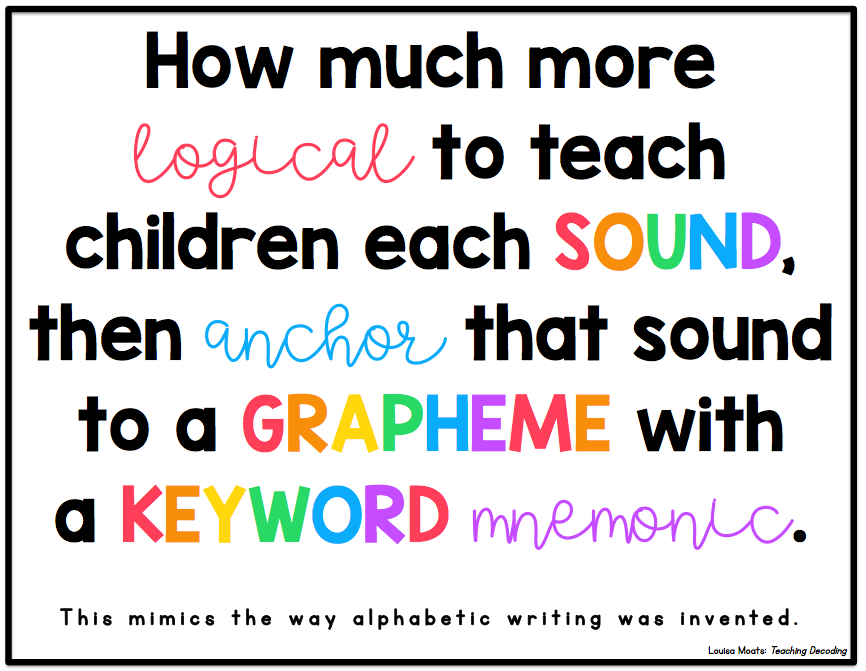
This one is new to me. I always taught the letter name first. In other words, I began with the symbol (letter) and then connected it with the most common sound. After a lot of reading and reflection, I now see how much more sense it makes to begin with the sound first, then connect it to the grapheme (letter or letters) that make that sound. (This goes beyond letters of the alphabet and includes multi-letter graphemes like th, igh, ea, ph, etc.)
We know that in order to “map” a word to become permanently stored in our long-term memory (becoming a “sight” word), we need to anchor the sequence of letters to its pronunciation and meaning. The sounds in a word are the familiar part. It’s the letter sequence that isn’t. So the same applies with learning letters of the alphabet. The sounds these letters make are the familiar part. It’s the shape of that letter and its connection to that sound that is not familiar yet.
- When introducing a letter, begin with the sound. For example, “Today we are going to learn how to read and write the sound, /b/, as in bird, ball, and bat. /b/. Let’s all make that sound.”
- I changed my language slightly to also say “One of the ways we can write that sound is with the letter...” The reason is because most sounds have more than one grapheme associated with it. They probably will not face those graphemes in kindergarten, but it sets the stage for the understanding that letters can make more than one sound and sounds can be represented by more than more letter.
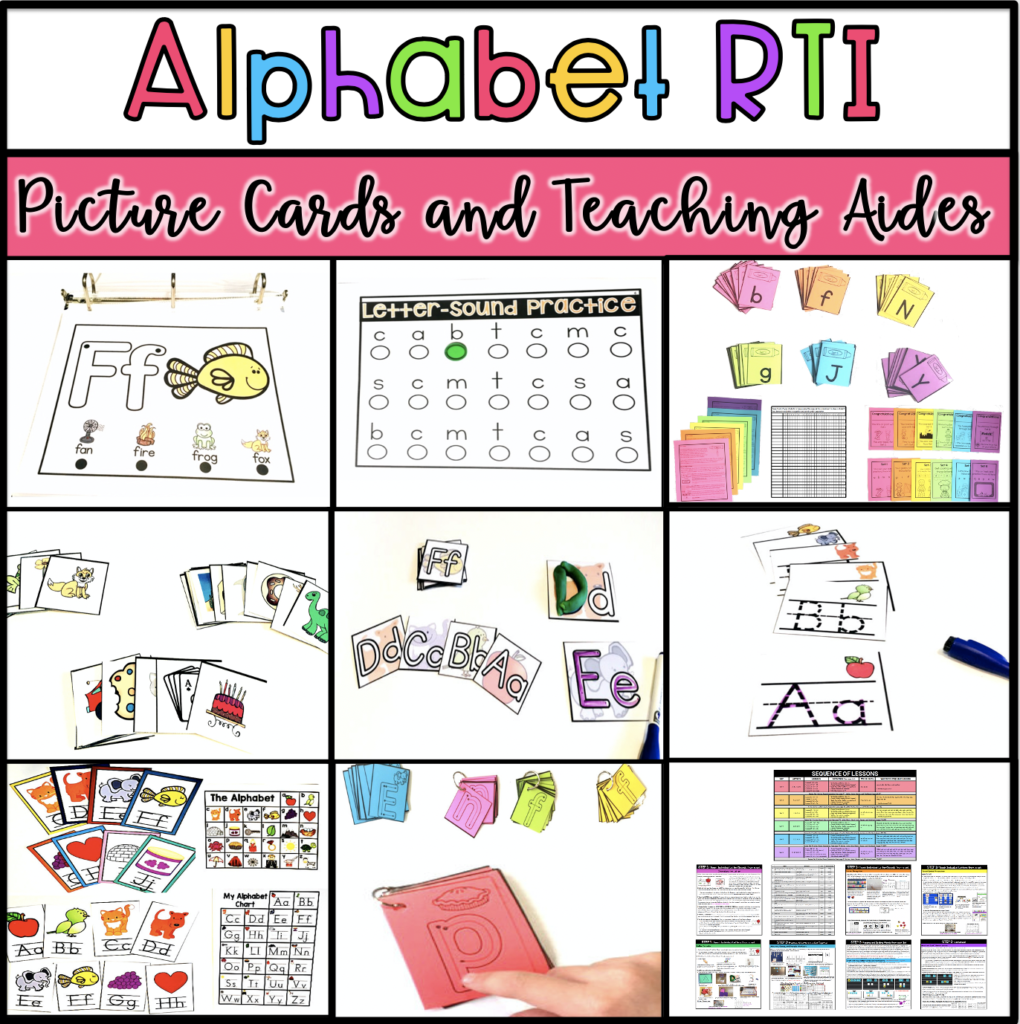
- For every letter, I have a picture that is associated to help anchor the sound to that letter.
- For example, bird is associated with the sound /b/ and letter B.
- We refer back to those key picture cards often.
Below are a few activities that I do to connect the sound to symbol (new letter):
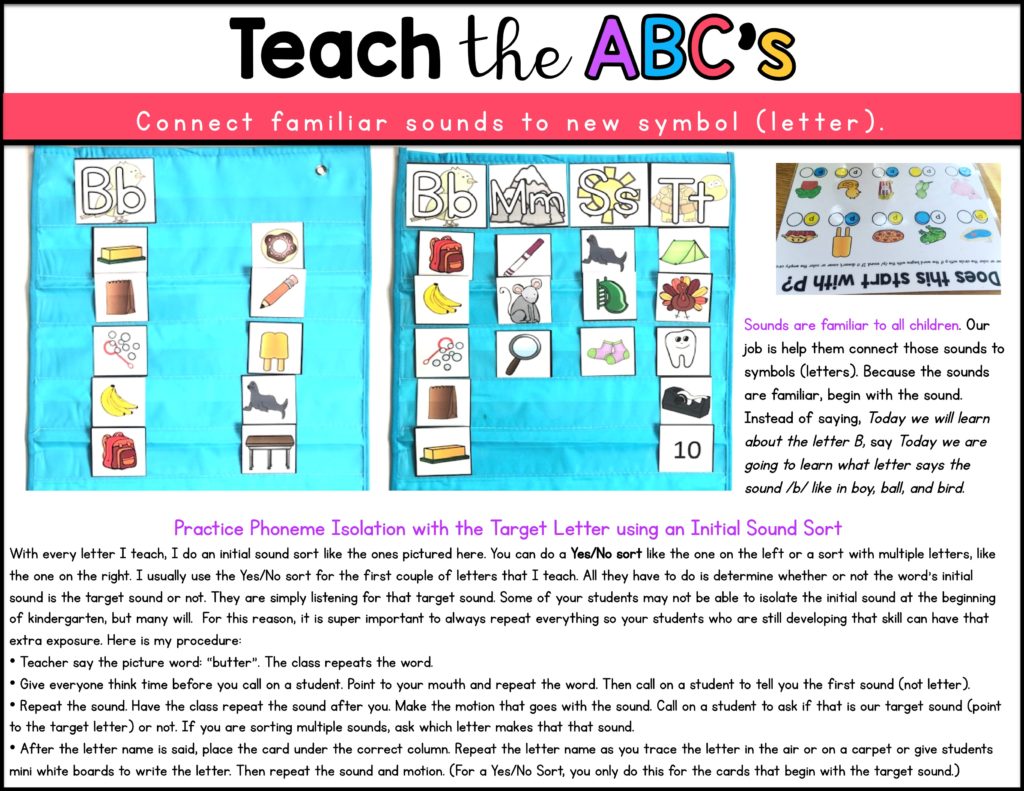
- Yes/No Sound Symbol Sort: The picture on the left shows just the new sound/symbol pair. For that activity, we are just listening for the key sound. The other column can have any sound, just not the target sound. (To get picture cards for sorting, click here.)
- Initial Sound Sort: The picture to the right shows what my sort looks like after I have introduced all four of those letters. That day, M is the new letter, so we are reviewing the letters previously taught but also practicing the new one. (To get picture cards for sorting, click here.)
- The third picture is from my Multi-sensory Alphabet mats. There is a page for every letter of the alphabet. It is same concept as the yes/no sort because they are just determining if the picture begins with the target sound. I’ve recently updated it so you can use it on Google Slides too! Find that here.
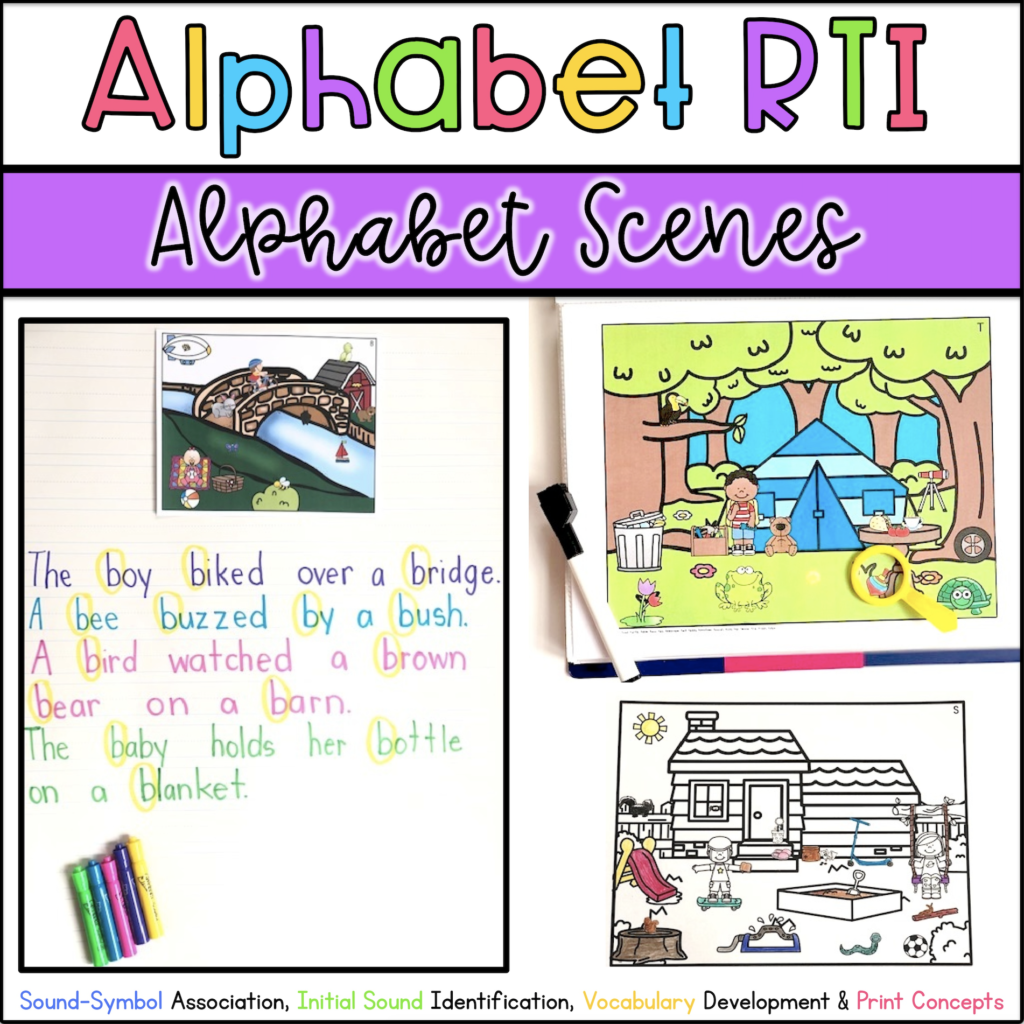
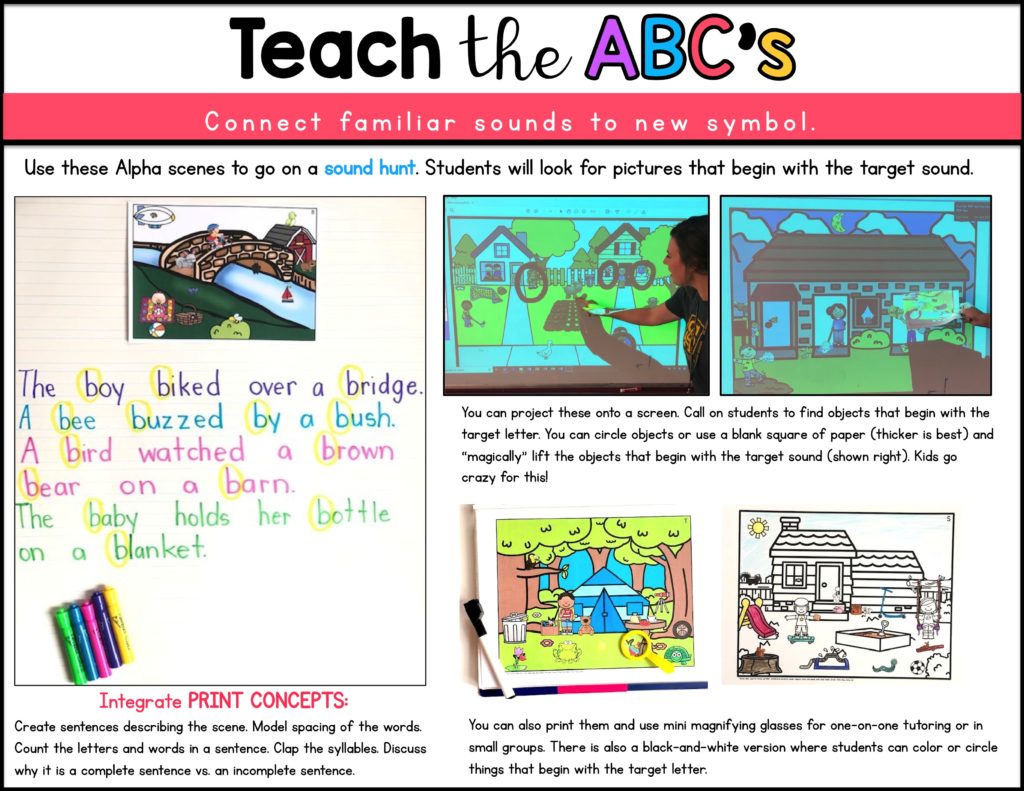
- Alpha Scenes: One of my favorite activities is the one shown below on the left. I have a set of scenes for each letter of the alphabet. The focus here is the sounds. I love this activity because it really helps connect sounds to letters in a meaningful way.
- You can print the page as I have done here and glue it to chart paper or you can project it like you see in the photos on the right.
- Begin by talking about the scene with your students. Tell them you are going to look for things in the scene that begin with our target sound. Connect back to your key word (in this case “bird”). Read below to find more ideas for how to use these.
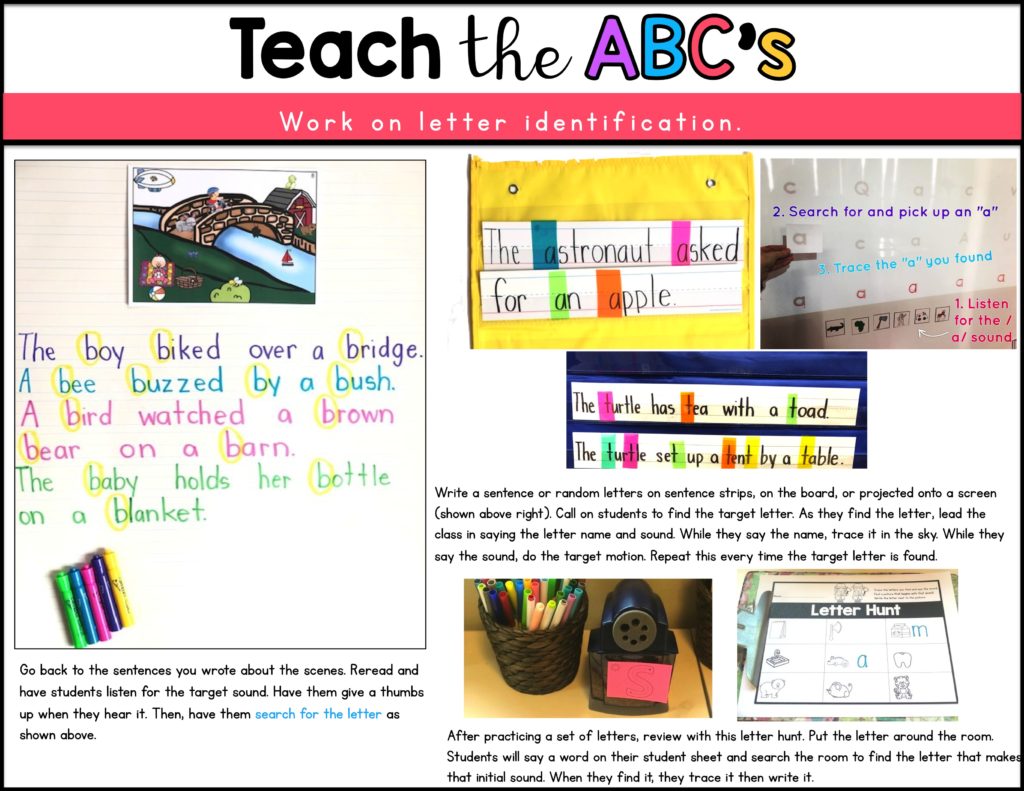
Once you’ve connected the sound to the symbol, then you can do more activities that focus on letter discrimination and that lead to remembering those symbols. Always try to connect back the sound though!
Tip #3: Be Direct with Your Alphabet Instruction
If you’ve been reading my blog for a while, I’m sure this one doesn’t surprise you at all. To be explicit means that you are clear, precise, and direct with your instruction.
In Essentials of Assessing, Preventing, and Overcoming Reading Difficulties, Kirkpatrick draws from tons of researchers when he says, “Teaching the code of English in a systematic and explicit manner has been empirically shown to have superior results compared to methods that do not explicit and systematic teach the code. (Brady 2001; Ehrin Nunes, Stahl & Willows 2001; NELP, 2008; NICHD, 2000; Share, 1995).
Below are things that I make sure to cover when teaching a new sound symbol relationship. This helps me be more explicit with my alphabet instruction.
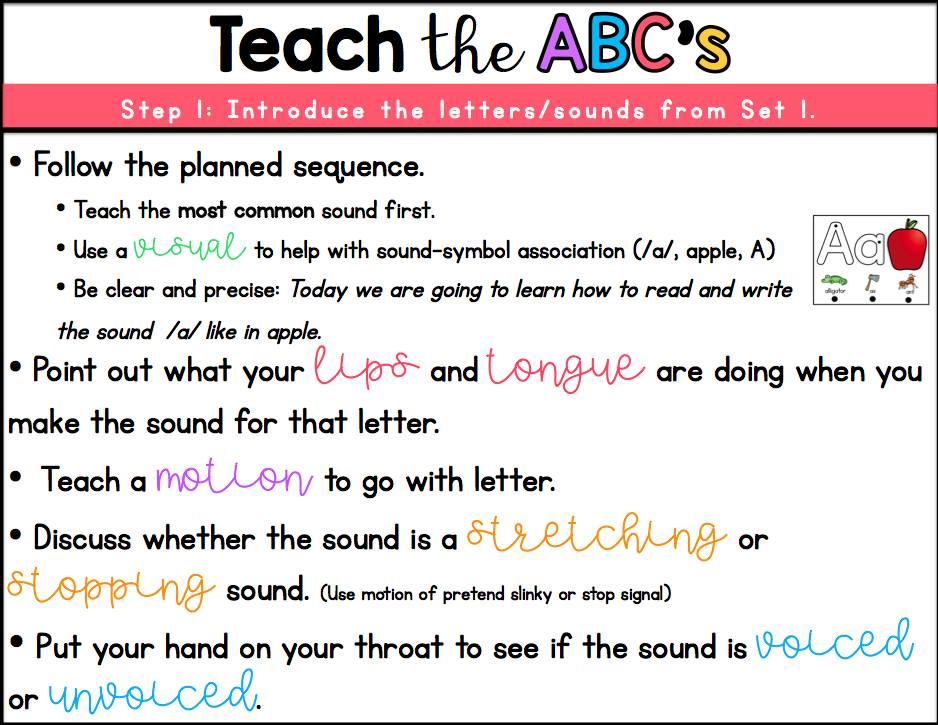
- I take time to point out what my lips, mouth, and tongue are doing when I make the sound for the letter. I also discuss whether or not is it a stopping sound or a stretching sound and if I use my voice or not.
- I’ve found that choosing a motion to go with each sound is super helpful for kindergarten students! Below are a few pictures of some of the motions that go with the sounds. Ignore my silly boy without a shirt. He is a good sport being my model, but at home he usually does not like to have a shirt on so part of the deal when he helps me is to come as he is. LOL!
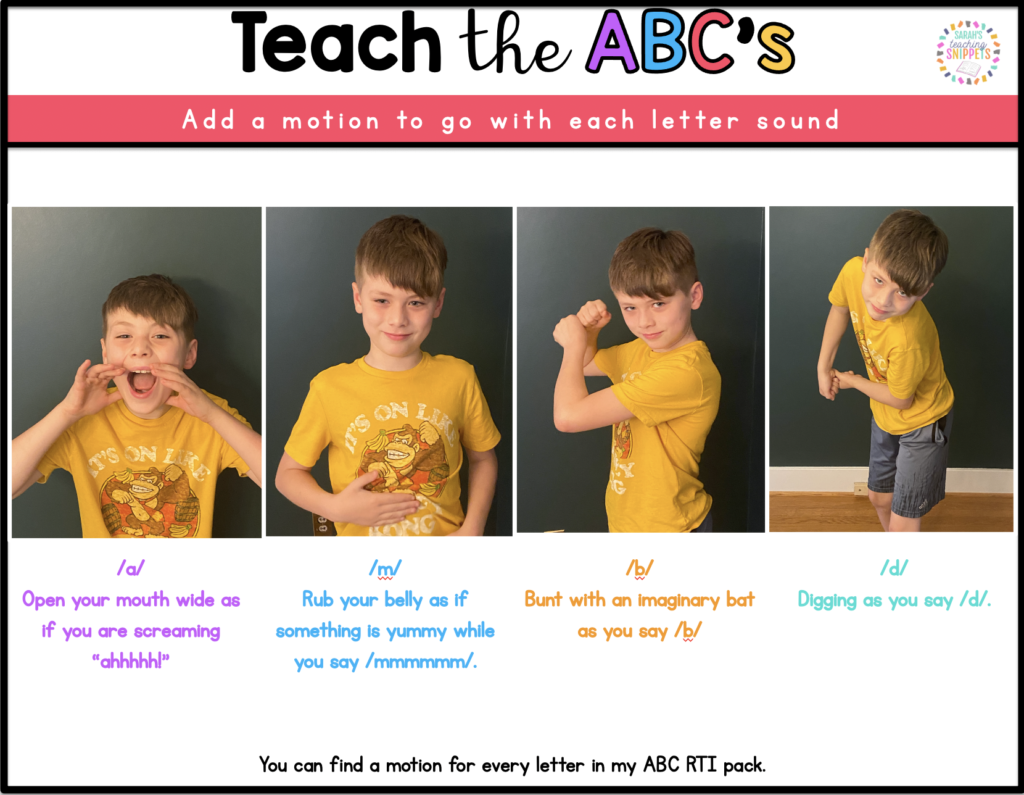
If you are interested in the motions I use to go along with each letter/sound pair, check out this resource.
Tip #4: Make your Alphabet Instruction Multi-Sensory
Multisensory learning involves the use of visual, auditory, and kinesthetic-tactile pathways simultaneously to enhance memory and learning of written language. (Click here to see the article from IDA that this quote came from.)
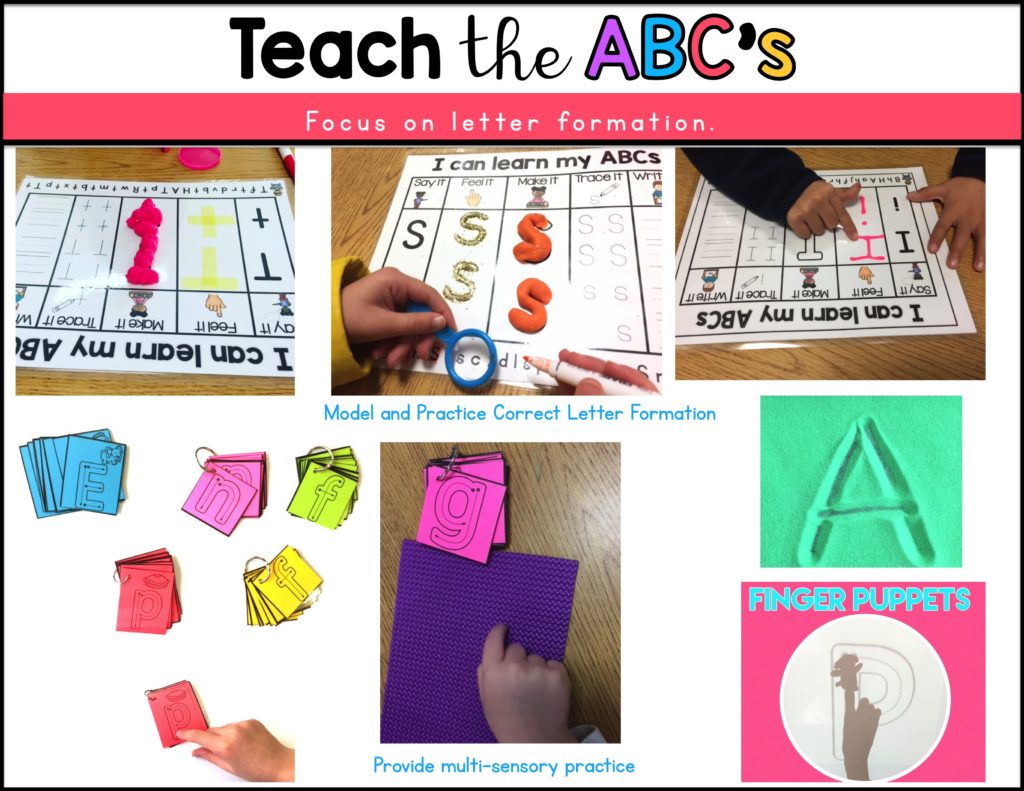
As fun as sand and play dough can be, you don’t need those things to make it a multi-sensory activity. As long as students are activating different senses at the same time, that counts! It can be as simple as saying a sound while looking the letter and tracing the letter on a table or rug. When segmenting a word, it can be as simple as just touching your head, shoulders, knees, and toes for each sound. The motions I talked about above are another way to get their bodies moving to help anchor those sound-symbol relationships.
I really love the TacScreen! It is a very thin material that you put on your ipad. There is an app that goes along with it for tracing letters. The screen is bumpy, getting that sand feel without the mess! Learn more about TacScreen Here.
Tip #5: Provide Lots of Opportunities to Practice
Students need dozens or even hundreds of exposures to letters and their names and sounds before they become permanently stored and automatically accessible. (Essentials of Assessing, Preventing, and Overcoming Reading Difficulties; David A. Kilpatrick).
Have you ever had a student where you felt like they may never remember the letters and their sounds? I definitely have! But eventually, they get there. It can be discouraging though! The repetition can feel monotonous after a while, so I’ve tried really hard to find different ways to practice.
As I mentioned above, putting the letters into smaller sets really helps! Once we have gone over and practiced each letter in a set (4-5 letters per set), I spend a lot of time reviewing that set with a variety of activities. Your whole class will not need the same amount of repetition, but you will likely have a small group that does need it.
Below are some ways that we practice a set of letters.
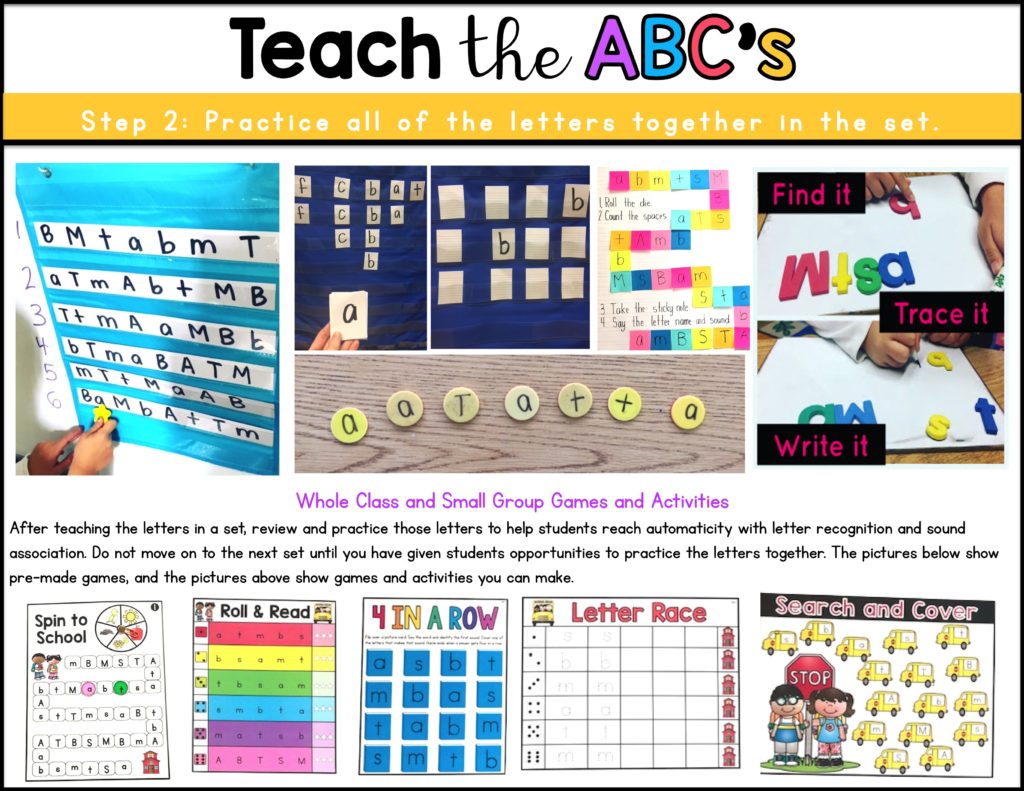
The activities from the image above on top from left to right:
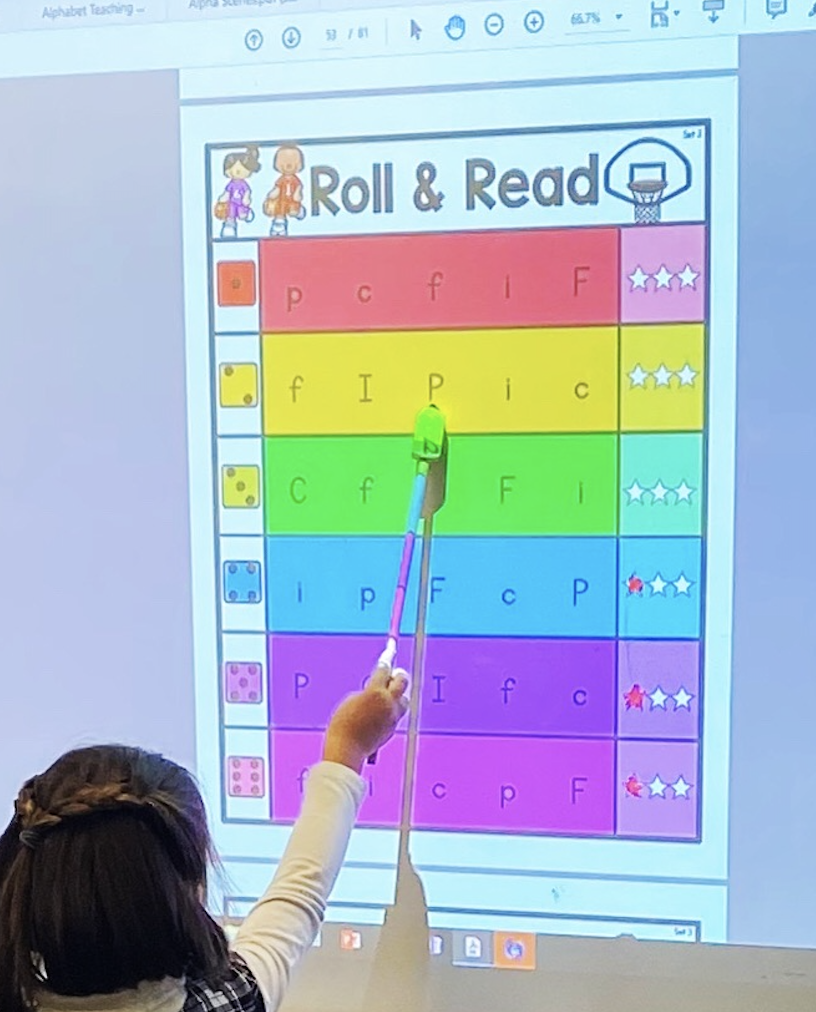
- Automaticity Drill: The picture on the top left is an automaticity drill. I write the letters from a set several times on a line. Students roll a die and “read” the letters from that row. They read the sounds, not the names of the letters. The picture below shows a student doing the same activity, but this is a ready-made version from my alphabet games that is projected onto the white board.
- Letter Sorting: The next picture is a sorting activity. They take turns flipping a card, saying the sound, key word, and letter name. As they say they sound, the rest of the group does the motion associated with the sound. As they say the letter name, the groups traces the shape in the air. Then, they place it in the correct column.
- Memory: Next to that is a simple game of memory. Students vs. teacher is usually how I do it. Students take turns flipping the card. They say the sound and do the associated motion. If its a match, they keep it.
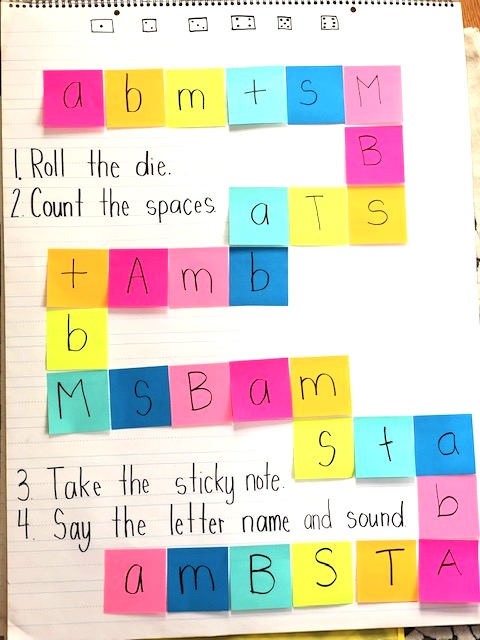
- Roll it, Say it, Take It: The sticky note chart is a game that can be played in parts (meaning that you can begin the game, stop, then continue later). Roll a die. Move that many spaces. Say the sound and name of the letter you land on and take that sticky note off the chart. The object is to remove all sticky notes.
- Shake and Spill: I write uppercase letters on one side of a math two-color counter and the lower case on the flip side. Shake all of the counters and “spill” then. Then say the sounds as fast as you can.
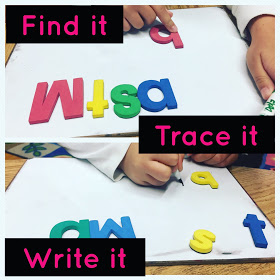
- Say it, Find it, Trace it: The last top picture to the right is an activity I do often. Simply put the letters on a magnet board or just cut up index cards and write one letter on each. Make sure you only put letters you have taught.
- Teacher will say a sound.
- Students will repeat the sound and pull down that letter.
- Teacher or students can say a word with that sound (could be the anchor key word or another word).
- To make it multi-sensory, trace the letter on the table (or if its a magnet, trace the magnet) as you say the letter sound and name.
- Write the letter on a white board.
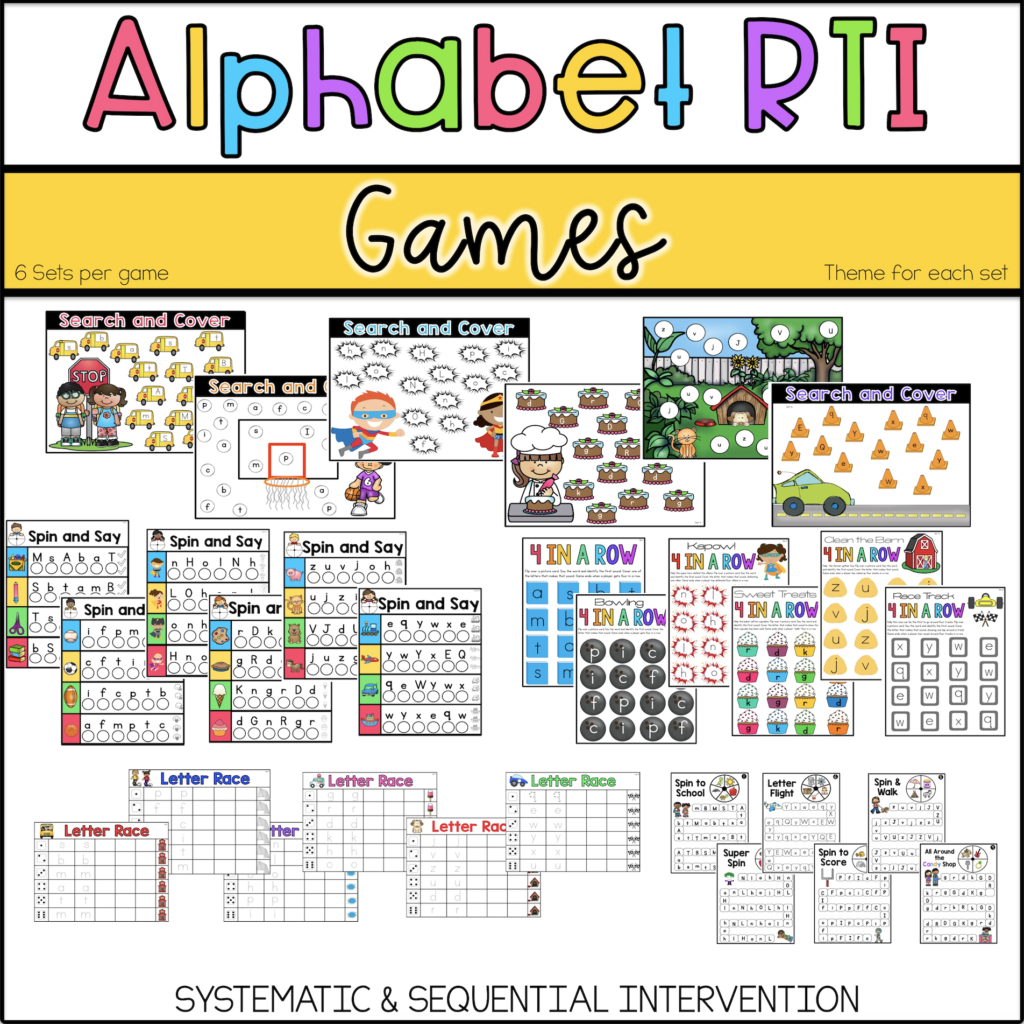
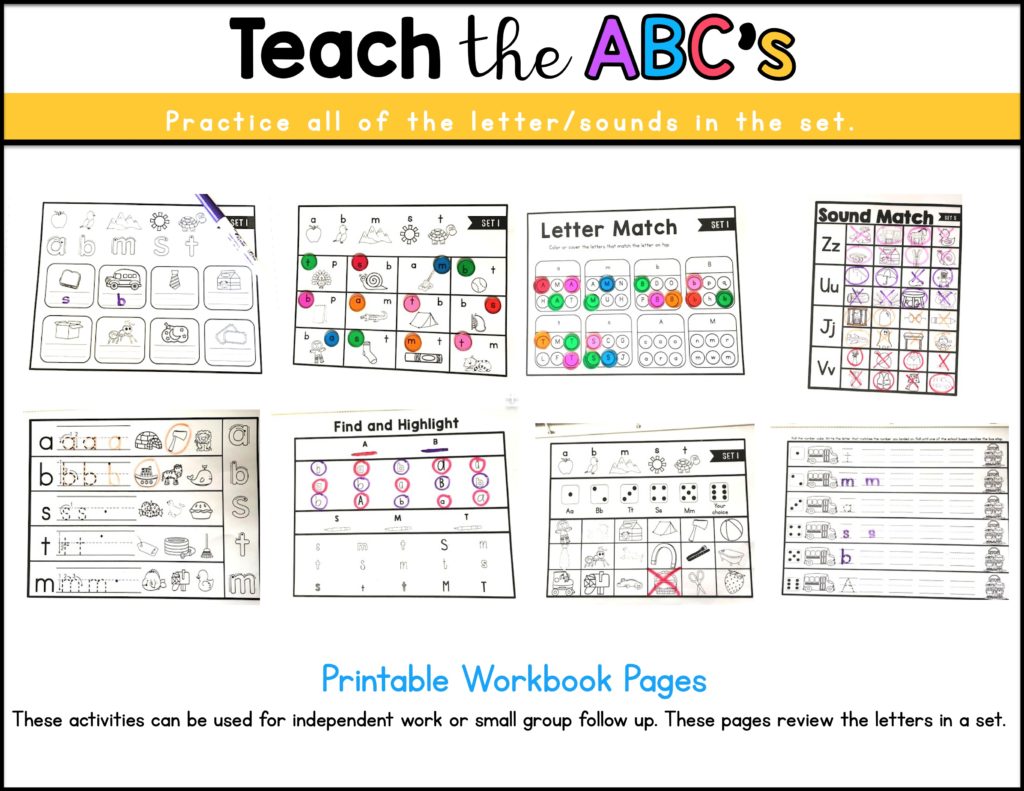
- The bottom row from the slide above shows pre-made alphabet games for each set of letters. They follow my same sequence. Click here for those alphabet games.
- I also have a student workbook for additional practice with each set of letters. This is great for independent practice or small group guided practice.
Tip #6: Break up Instruction Time
Another thing I’ve read is that it helps to have several small chunks of instructional time rather than one big chunk of time for teaching letters-sound associations. This makes a lot of sense because we do lose our little kinders attention pretty quickly.
As you can see, there are so many things you can do for every sound-symbol pair. I was happy to read that it’s better to break it up into several shorter sessions because that means you can actually do all of those ideas, just at different parts of the day!
Tip #7: Integrate Decoding and Spelling
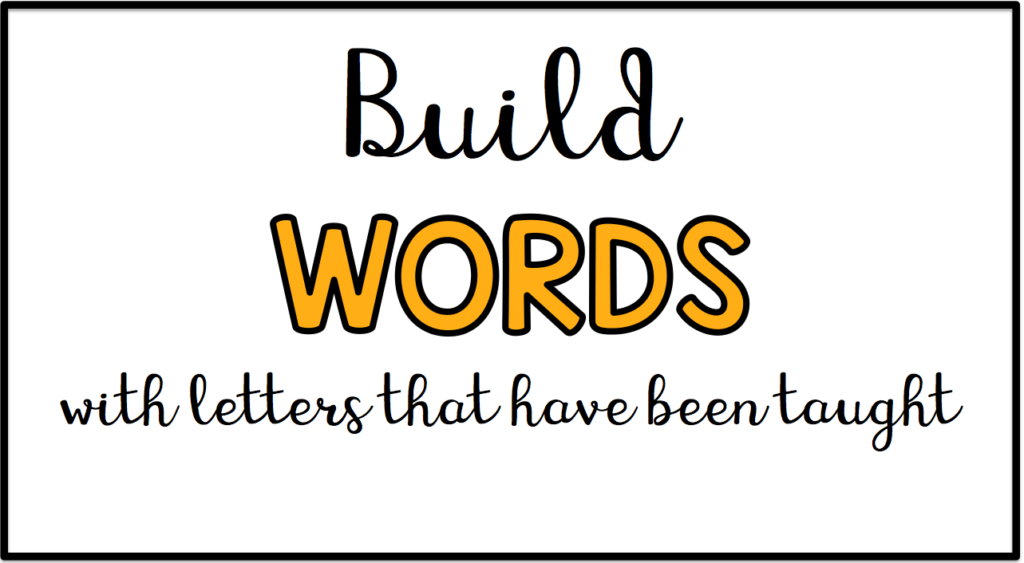
This is my favorite part! Once students have mastered a few sound-symbols correspondences and developed phonemic awareness skills, they can begin the mapping words with the letters they know. They can practice blending (reading) and segmenting (spelling) words with the few letters you have taught.
For example, after teaming the letters a, b, m, and t, you can already make these real words: mat, at, bat, am, bam. You can also make nonsense words with only two letters together, like ma (pronounced with short a), ba, ta, and ab. I go into this in detail in this resource.
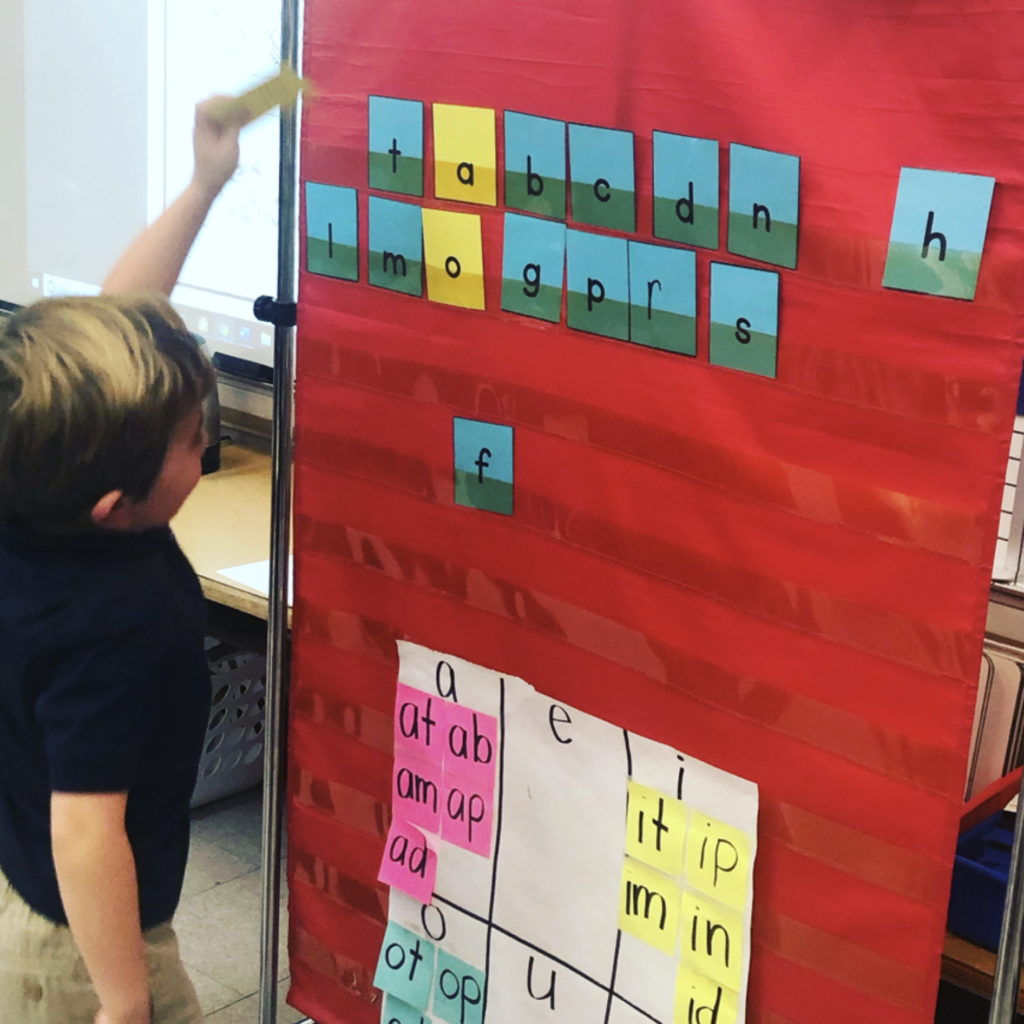
This is what my pocket chart looks like after teaching four sets of letters. This is a student building a word with the letters we have learned so far. The kids love to spend their time making words for their classmates to read. No joke, this photo was taken during a break time!
By employing this approach to phoneme-grapheme mapping instruction, the relation between isolated letter-sound mapping and decoding is made explicit. In other words, teachers quickly demonstrate to students that the knowledge of letter sounds is used for decoding words. (Click here for this research-based article.)
- Side note: You should begin phonemic awareness activities right away in kindergarten. It only takes 10-15 minutes per day.
- I also determine who needs more intervention with phonemic awareness and provide additional guided instruction for them. That way, they are more likely to be ready when it comes time to build words. Not all of your students will be ready to decode and encode words after Set 1. That’s okay! Hearing you model phoneme blending and segmenting is all good! In small group instruction, you will pull back with them and meet them where they are at. But with the whole class, they can still build conceptual understanding and develop phonemic awareness skills and letter-sound knowledge.
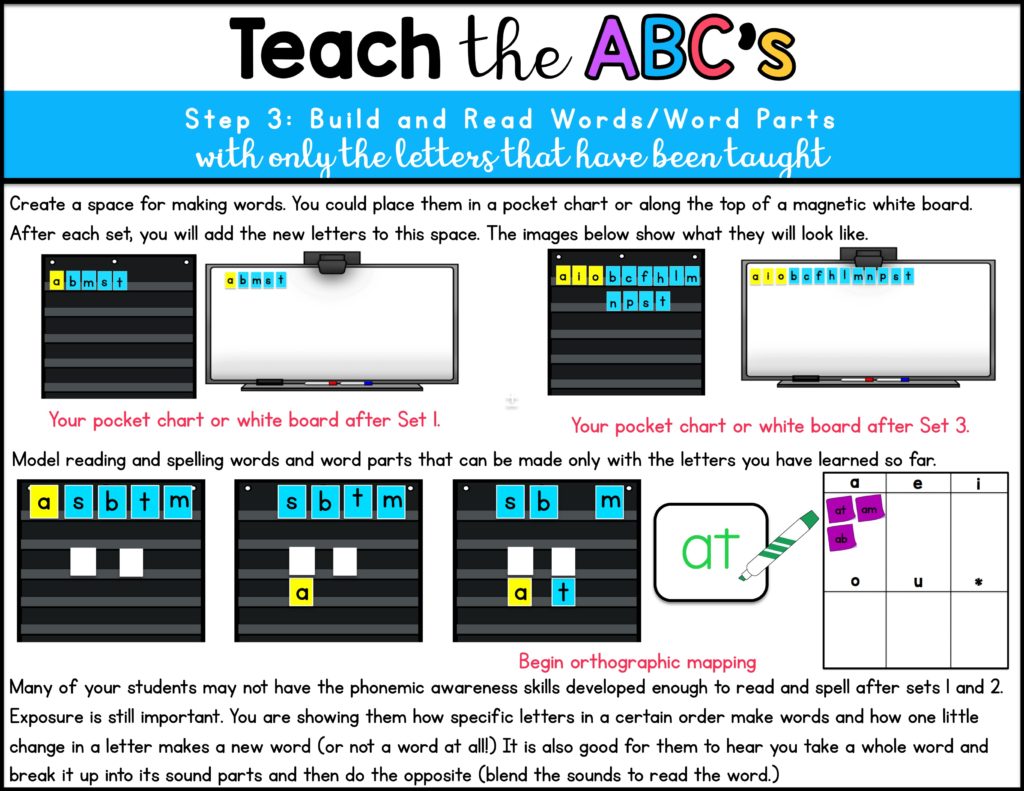
A big part of my alphabet instruction is integrating word reading and spelling. The picture below shows how I set up for word building, decoding, and orthographic mapping. The top left two pictures show what it will look like after teaching Set 1 letters. The two pictures on the right show what it will look like after teaching Sets 1, 2, and 3.
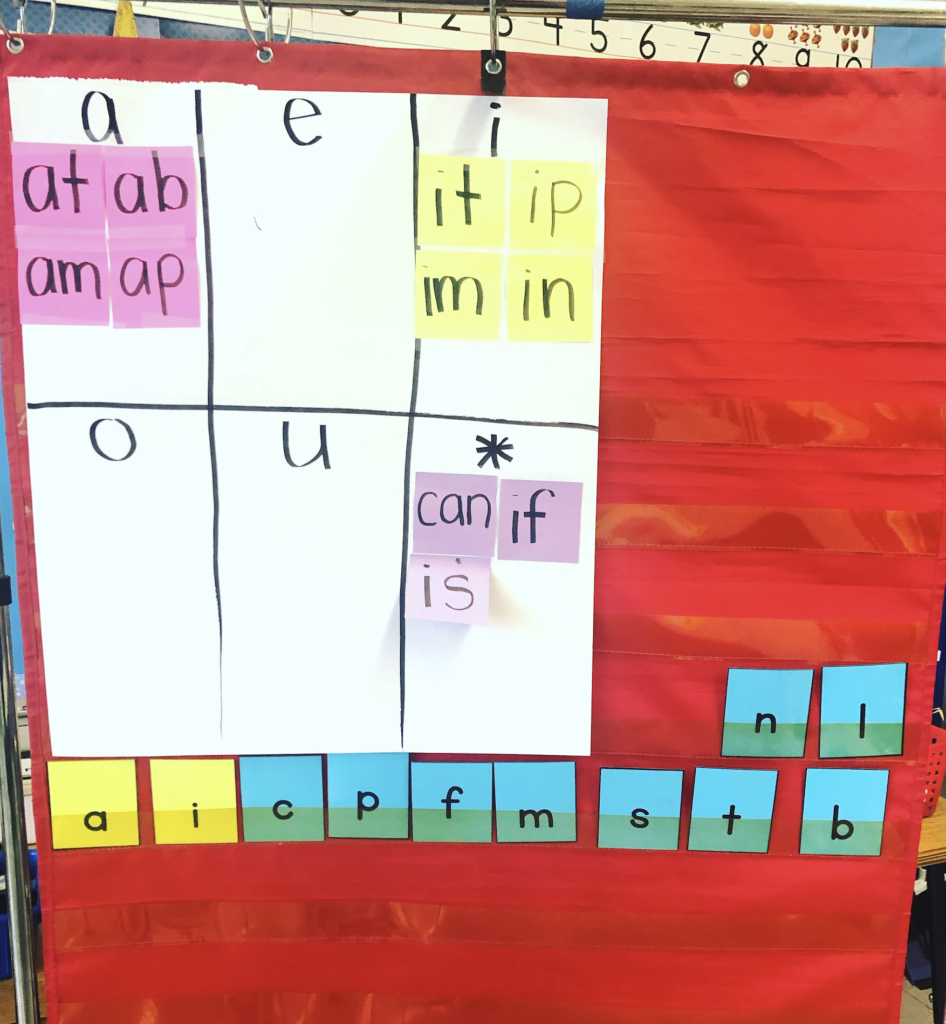
We spend time mapping words and word parts. The sticky notes show the word parts (rimes) that we had mapped up to this point. Here is a video of my students reviewing these word parts that have been mapped.
Click here to read my post about orthographic mapping.
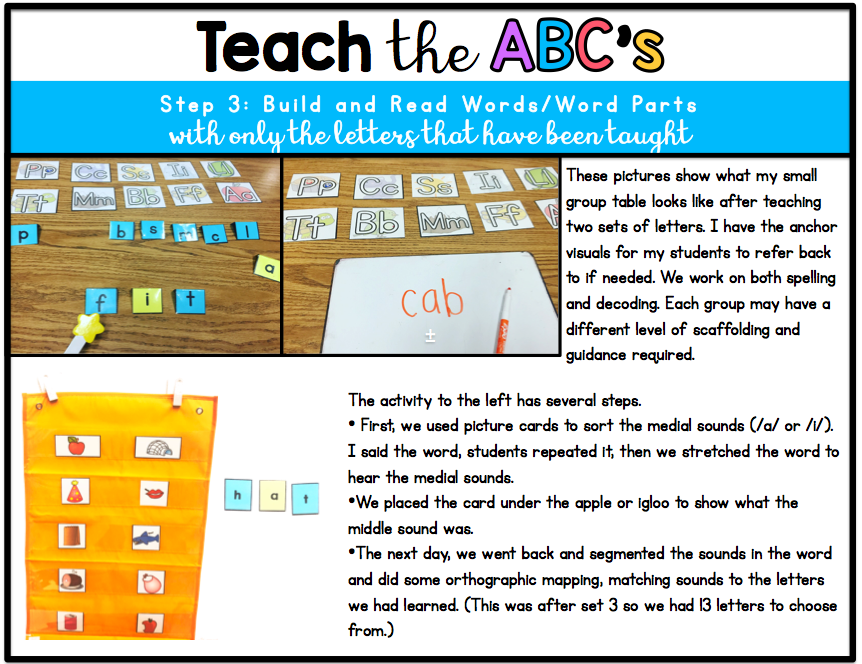
This resource goes into more detail about how to do this. It also provides a list of words you can make after teaching each set of letters.
Below is a page from the teacher guide of this resource. It shows word parts to map and new words that you can spell and read from letters in that set combined with letters that have been taught already.
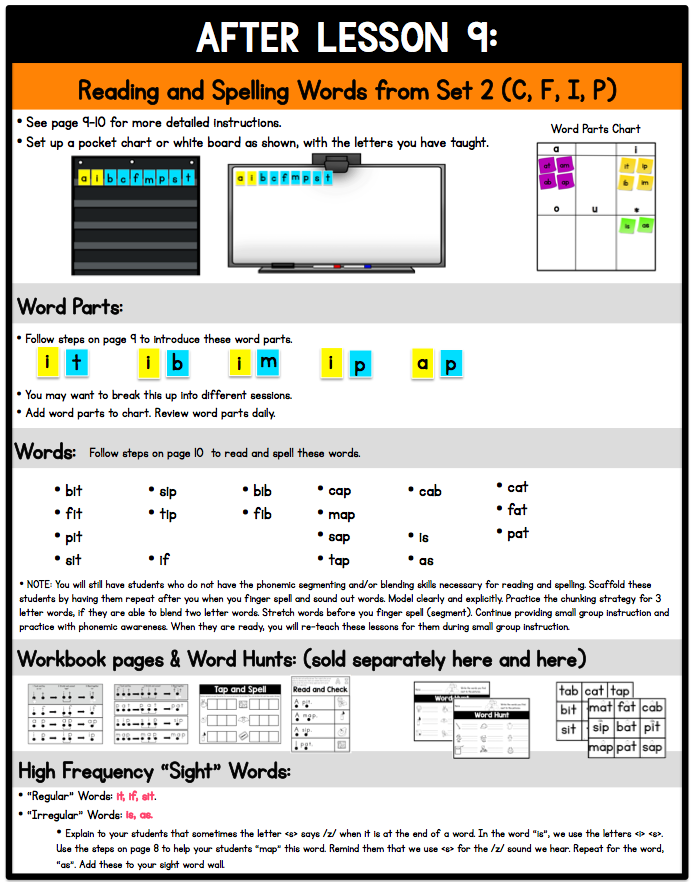
Side note: I should note that although at this point I am only teaching the most common sounds for the letters, I do teach that the sound /z/ can also be represented by the letter s. This comes up after Set 2 because you can make the word “is” and “as”. I want my students to know that those super familiar and common sight words can still be mapped, but they need to know that often when they hear /z/ at the end of a word, it is often the letter s. Later in Set 5, they will learn that the letter z says /z/ at the beginning and middle of words. (In first grade, they will learn the words fuzz, buzz, fizz, and jazz have double z because of the FLOSS rule, but other than that, most English words do not end in the letter z. But I digress!) Double side note: They also need to know that s says /z/ often when it is used as a suffix. I teach the suffix -s later in kindergarten after they are able to blend and segment three phoneme words well.
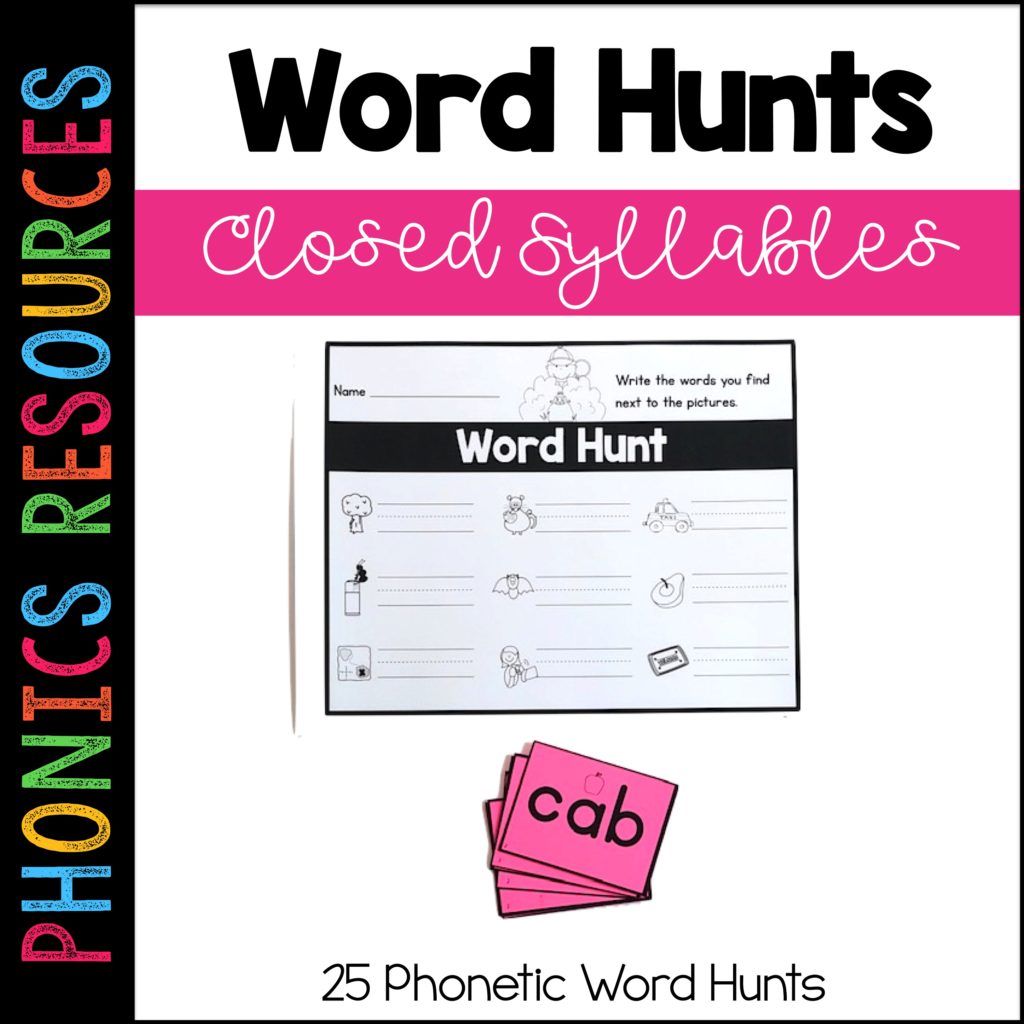
Another great activity to do is a Letter or Word Hunt. These word hunts follow my sequence. In other words, students will go on a word hunt for words that use only the letters that have been introduced for each set.
(Letter hunts are coming soon.)
Tip #8: Assess Regularly
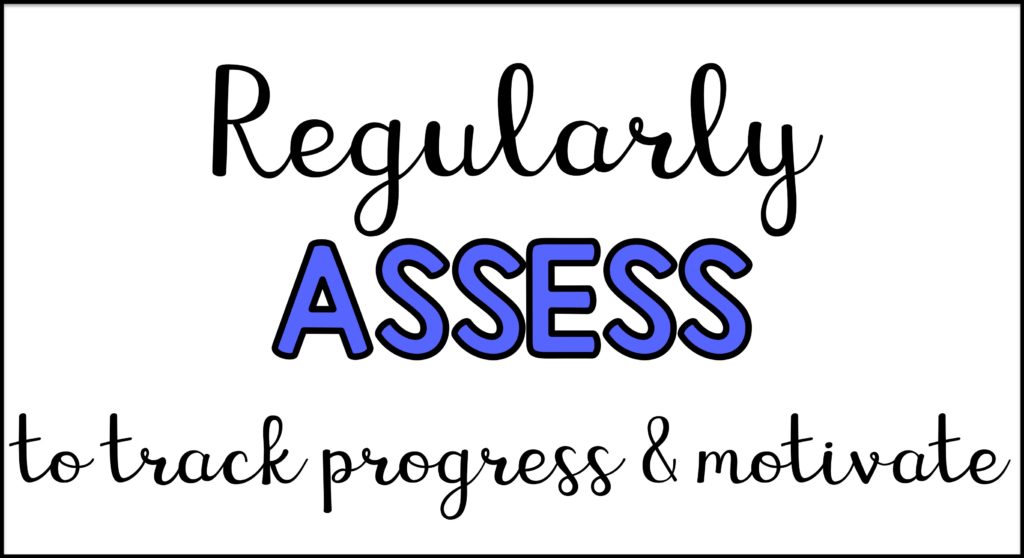
Below is an example of a more formal assessment you can use to see what letters and sounds your students know. It is a FREE download!
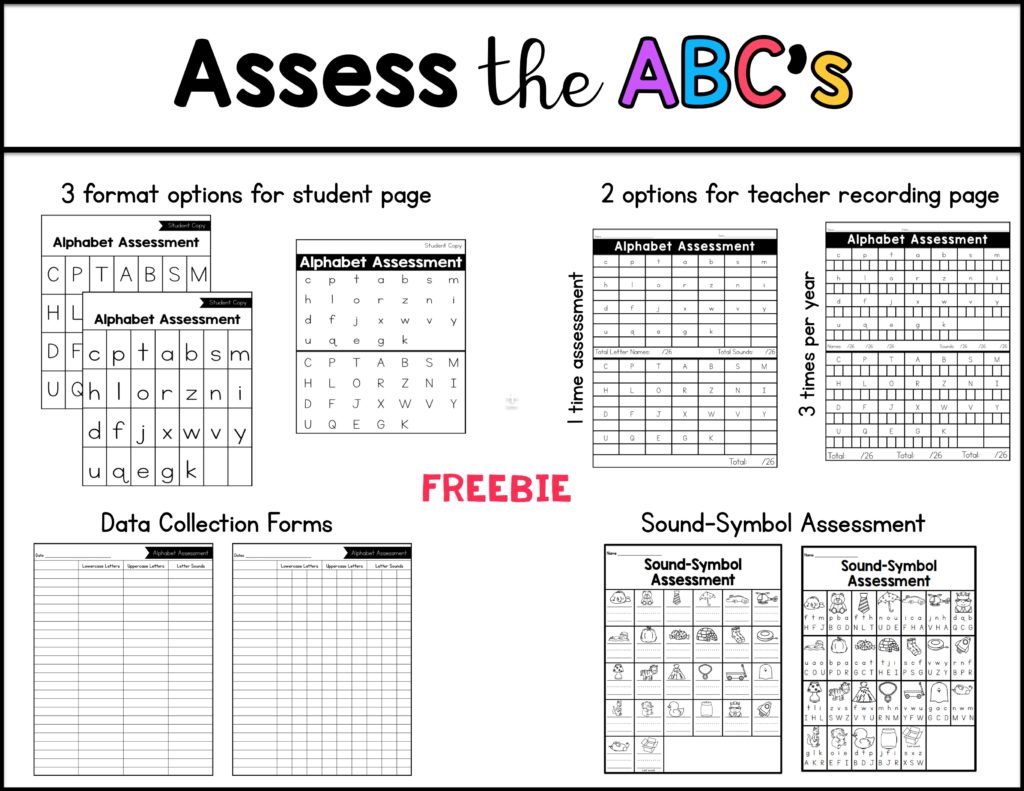
For your students who need a little more motivation, consider using certificates like the ones shown below. These are are given to a student after mastering each set of letters.
- You don’t really need to do this with all of your students (management can be tough), but I like to use them with my intervention kids because it really does take them so much effort to master each set of letters.
- I feel like it gives them more manageable goals, too.
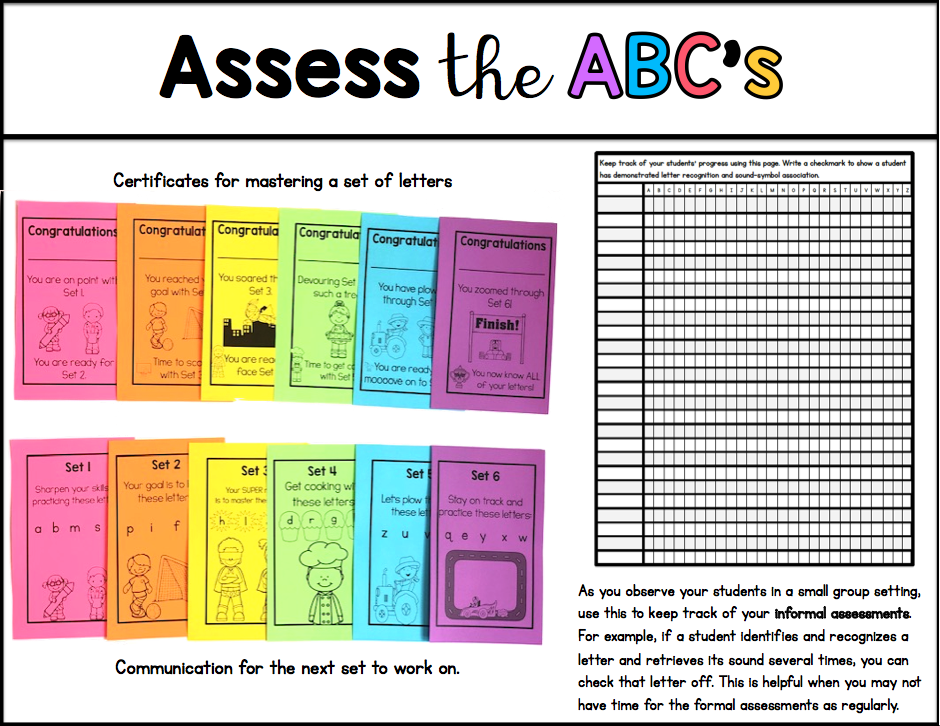
If you don’t have time to formally assess several times, consider using a checklist like this one. When you are working with your small groups, keep track of who demonstrates proficiency with sound-symbol awareness and letter recognition. In many ways, I feel like this is even better than a formal assessment!
Storage of Materials
Here are a few ways to store all of the materials.
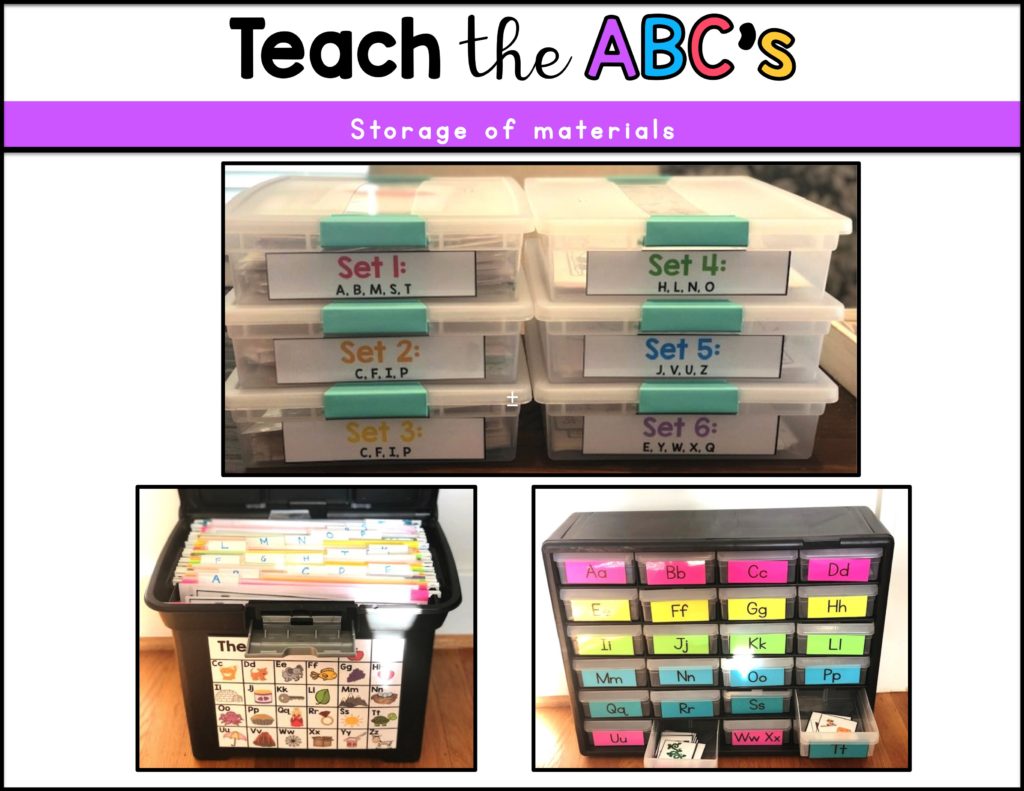
- I used to store initial sound cards in the little drawers shown on the bottom right.
- I also stored any full page materials for each letter in these hanging files (multi-sensory mats, teaching posters, and Alpha scenes).
- All games, letter hunts, and word hunts that belong to each set were kept in the bins pictured on the top. But then I needed more space and realized that ALL materials could fit in the bins shown on top. It’s a tight squeeze but if you don’t have a lot of room in your classroom, it works. However, if you like to keep things easily accessible to grab and go, you may like to use all three options.
Sound-Symbol Resources
If you are looking for materials to help you systematically and explicitly teach the letters of the alphabet, you may want to take a look at these resources:
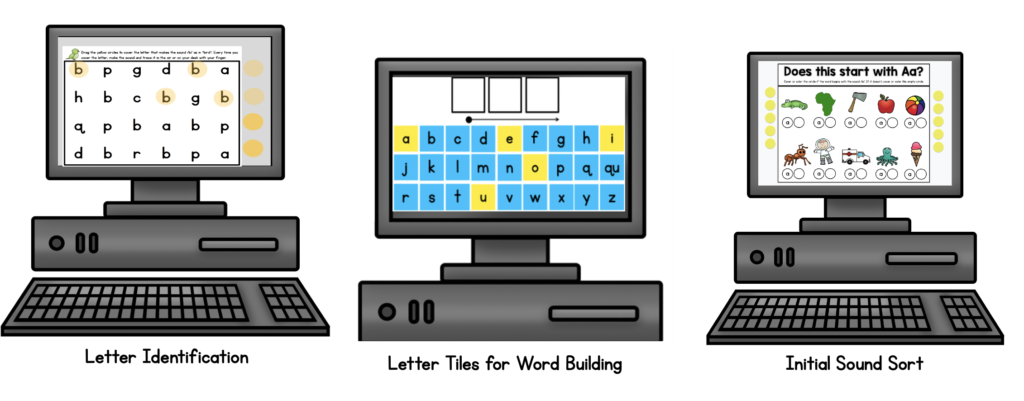
This first resource will take you step-by-step. This goes over the process of introducing lettesr. It also includes visuals, a few activities to supplement your alphabet instruction, and details about the sequence I use. There are Google Slides for the Teaching posters, moveable letter tiles, and a letter search activity.
I recently updated this to include some options using Google Slides. The picture below show these items.
Printable Student Activities
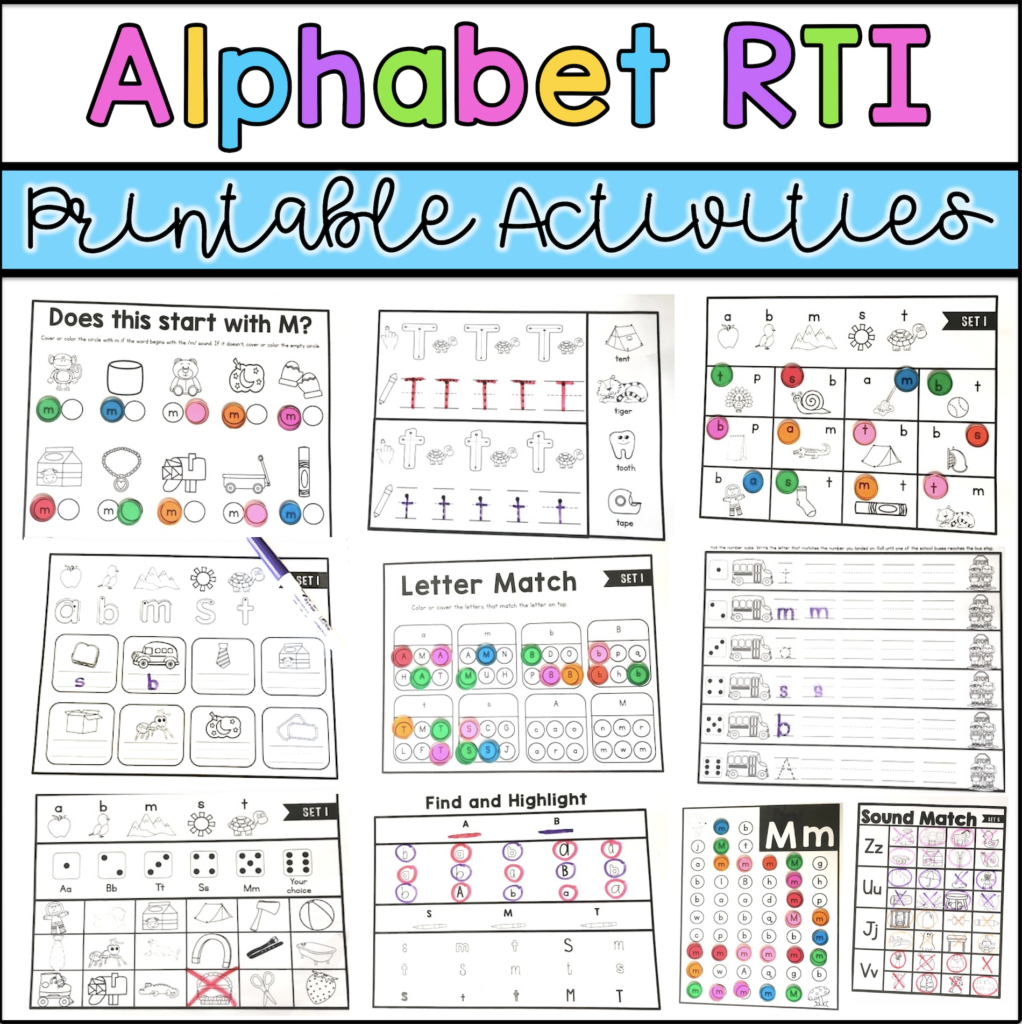
This resource has printable practice for students. There are activities for individual letters and several pages for each set.
Alphabet Games
I love including games and so do my students! This set of games follows my sequence, so there are six sets of each game.
Alphabet Sound Scenes
This activity is the first thing I do to introduce each letter-sound relationship. It lends itself to many other activities too! I end up integrating rhyming, counting syllables, and other phonemic awareness skills.
You can find a BUNDLE of all of these alphabet resources HERE.

Next Steps
After your students have developed phonemic awareness and know sound-symbol correspondences for all of the single graphemes, you can move on to multi-letter graphemes. I move on to digraphs th, sh, ch, and wh next.
My Systematic Phonics Unit 1 shows the next step after teaching the alphabet.

In this unit, I do more with CVC words because I find my students need more time developing the blending and segmenting skills in order to be proficient enough to apply these skills comfortably. This unit starts with CVC words (focusing on each vowel sound separately and together), then moves into digraphs, blends, and teaches some basic phonics rules.
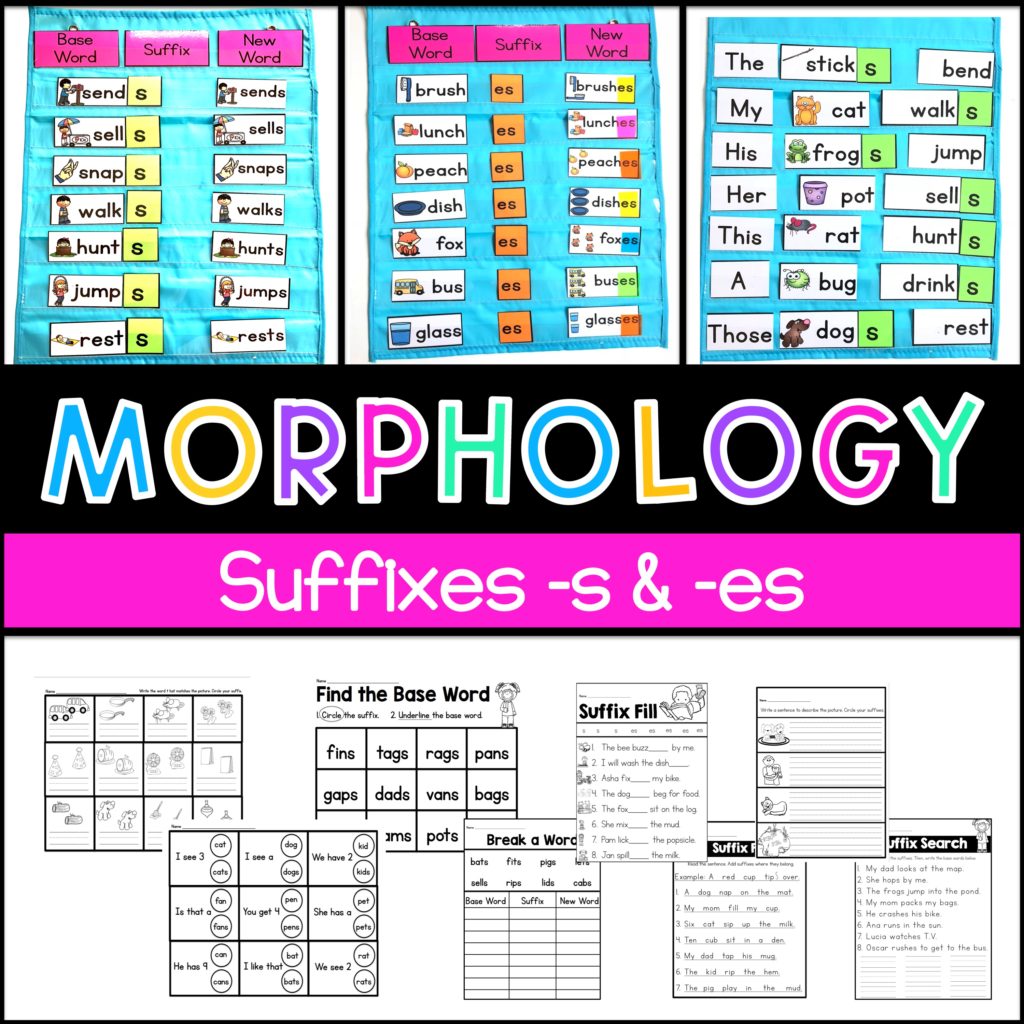
I also teach the suffixes -s after CVC words and the suffix -es after digraphs. You can get morphology resources here.
I’m also in the process of updating my sight word packs to be aligned with this systematic approach. I wanted to apply what I’ve learned from all the experts so it follows the science of reading. You can read about those here.
I hope this post was helpful! Please feel free to ask questions or comment with things that have worked for you. Have a great week!
More Blog Posts
To see more posts about how to teach reading, click here.
