When you hear someone say silent e words, do you automatically think of words where the silent e makes the first vowel say it’s name? Did you know that silent e does so more than that? The silent e has many jobs! I did not know there were so many jobs of the silent e when I started teaching. In fact, I didn’t know this even after teaching ten years! When I started learning some of the “secrets” to our language, I had so many aha moments. I call them secrets because it feels like they are secrets sometimes. Why aren’t these rules taught to all teachers in education programs? Why wasn’t I taught this? That mystery I cannot solve, but I can shed a little light on the other jobs of silent e.
The Jobs of the Silent e
As I mentioned above, there are several jobs of the silent e. Read on to learn more about each job.
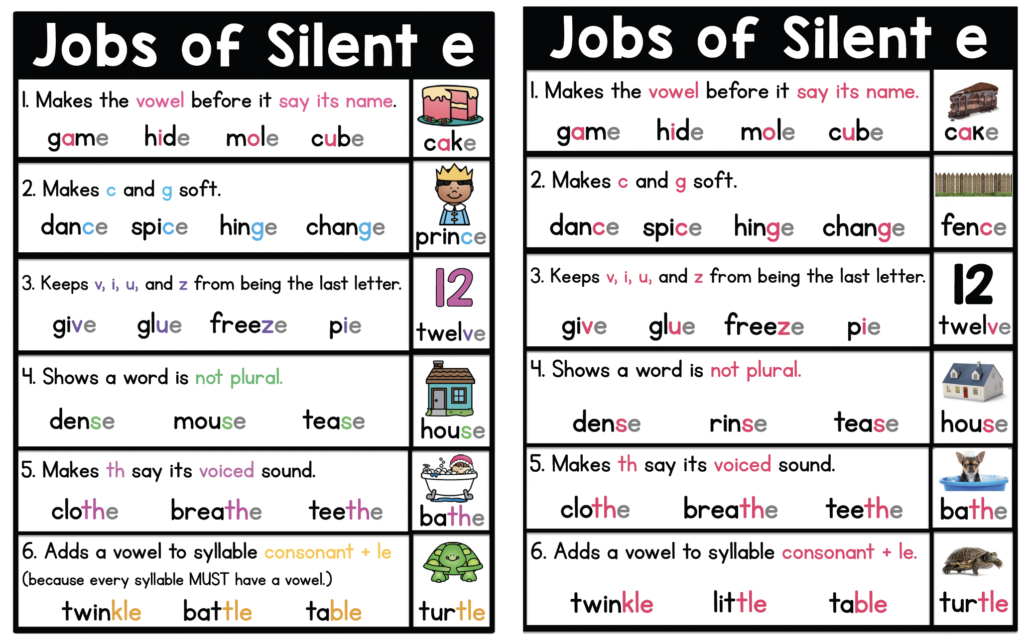
Click here to download this FREE resource about the Jobs of the Silent e!
Silent e Job #1: Silent e makes the first vowel long
This one is the classic job that we all know about. For a long time, I thought this was all that silent e did! When you see the pattern VCe (Vowel-Consonant-e), then usually the <e> will be silent and will make the first vowel say its long sound. More accurately, when you see this pattern, the <e> serves as a marker to tell the reader that the first vowel will most likely represent the long vowel sound.

Silent e Job #2: <e> makes <c> say /s/ and <g> say /j/
Okay, the “correct ” way to say this is the <e> shows the reader that the <c> will represent the /s/ sound and <g> will represent the /j/ sound, but that is a mouthful!


This is another shift for students. They are used to saying /k/ when they see <c> and /g/ when they see <g>. Now we need to give them plenty of practice seeing <ce> and saying /s/ and seeing <ge> and saying /j/.
Notice that I put the <e> in the box with the <g> and <c>. This isn’t something that you must do, but I think it helps students to see that the <ce> go together to spell /s/ and the <ge> go together to spell /j/.
This is also a good time to teach -dge vs. -ge. Students will learn that English words do not end in <j>, so when we hear /j/ at the end, we use <ge>. If a short vowel comes before /j/, we use <dge>.
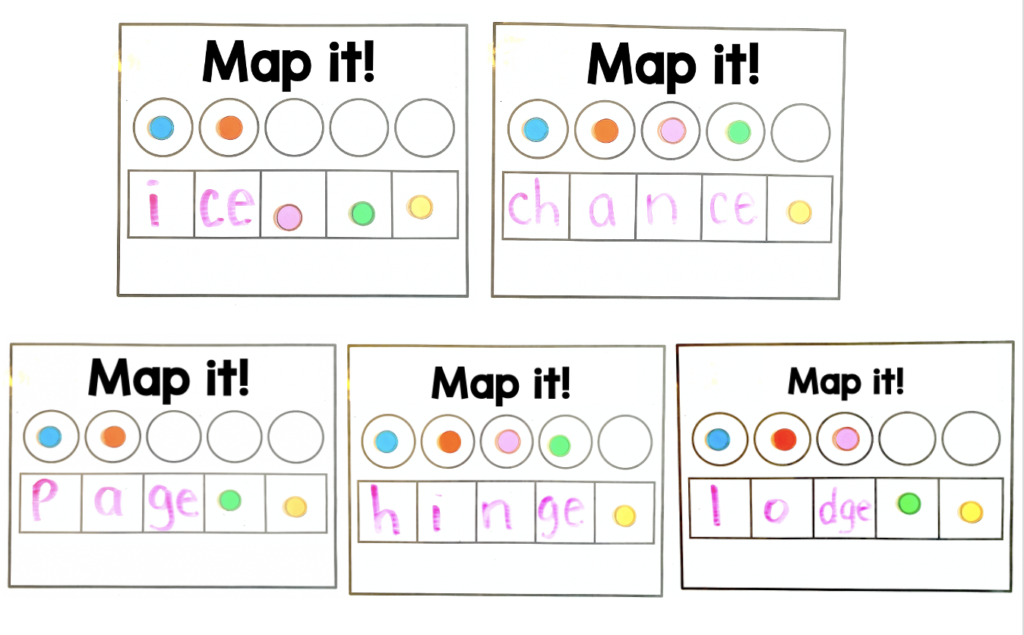
These pictures below show some great word and picture sorts.
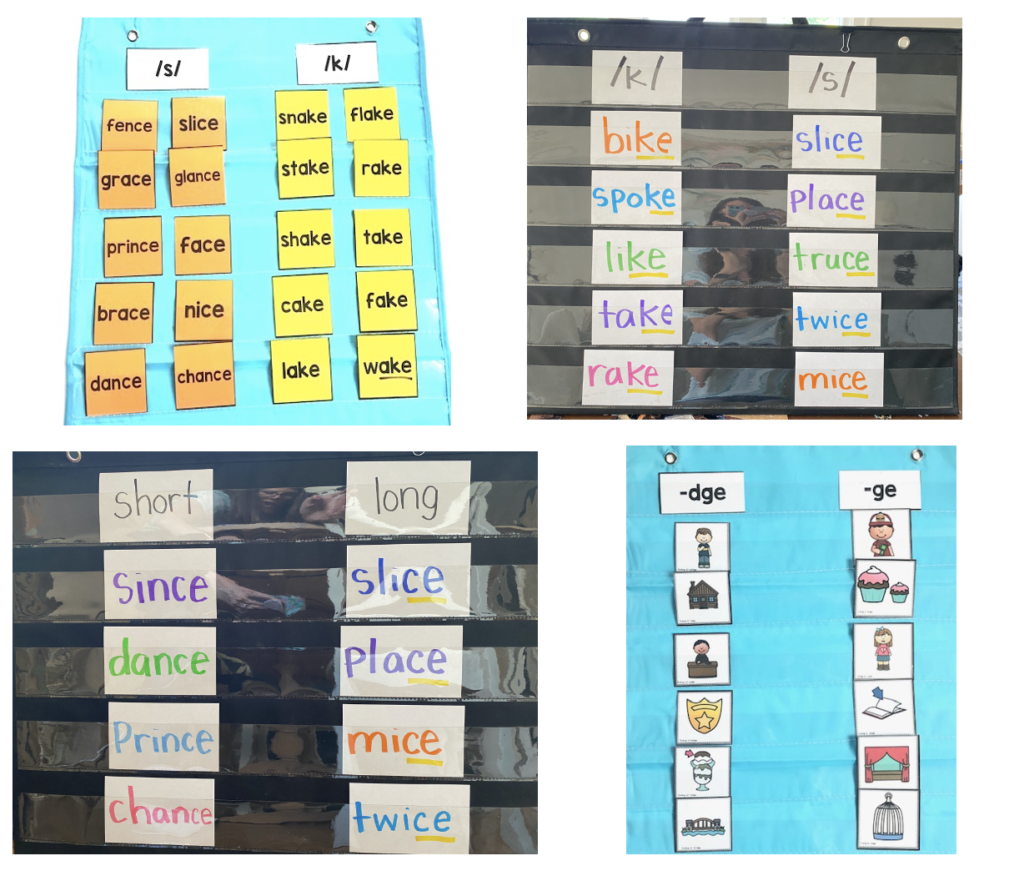
For that first sort with /s/ and /k/, you could also bring in some ck words so students can see <ce>, <ke> and <ck> together. They will learn that when there is a silent e, you never use <c> for the /k/ sound because <ce> spells /s/.
You can also do a short/long vowel sort. This will reinforce that when there are two consonants between the vowel and the <e>, the vowel will most likely be short. I also point out that with all the words under the long vowel column, the silent e is doing two jobs: It’s making the vowel long and it is making the <c> say /s/. You can do this same sort with <ge> words (page, cage, hinge, fringe).
The picture sort shows <dge> and <ge> words. I do this to give students practice with listening for the sound that comes before the /j/ sound. This will help them when they are spelling. I show a picture and say the word. Then, I ask, “What sound comes right before the /j/ sound?” Next I ask them which spelling to use for the /j/ sound based on their answer. If needed, I will remind them of the “rule”. Last, they will spell the words on their white words.
Silent e Job # 3: English Words Should Not End in the Letter V
Another job of silent e is to make sure words do not end in the letter v. That solves the mystery of the high-frequency words have and give. They are not “rule breakers” at all! They are rule followers actually! English words cannot end in the letter v. When you hear the /v/ sound at the end of words, use <ve>. The silent e prevents the <v> from being the last letter.

This can be tricky with reading VCe words because the vowel can be short or long.
- With the word “gave”, the <a> does say its name. (The silent e does two jobs here- to make the first vowel long and to make sure the word does not end in v.)
- With the word “have” and “give” the <a> and <i> do not represent long vowel sounds. (The silent e is only doing 1 job here- to make sure the word does not end in v.)
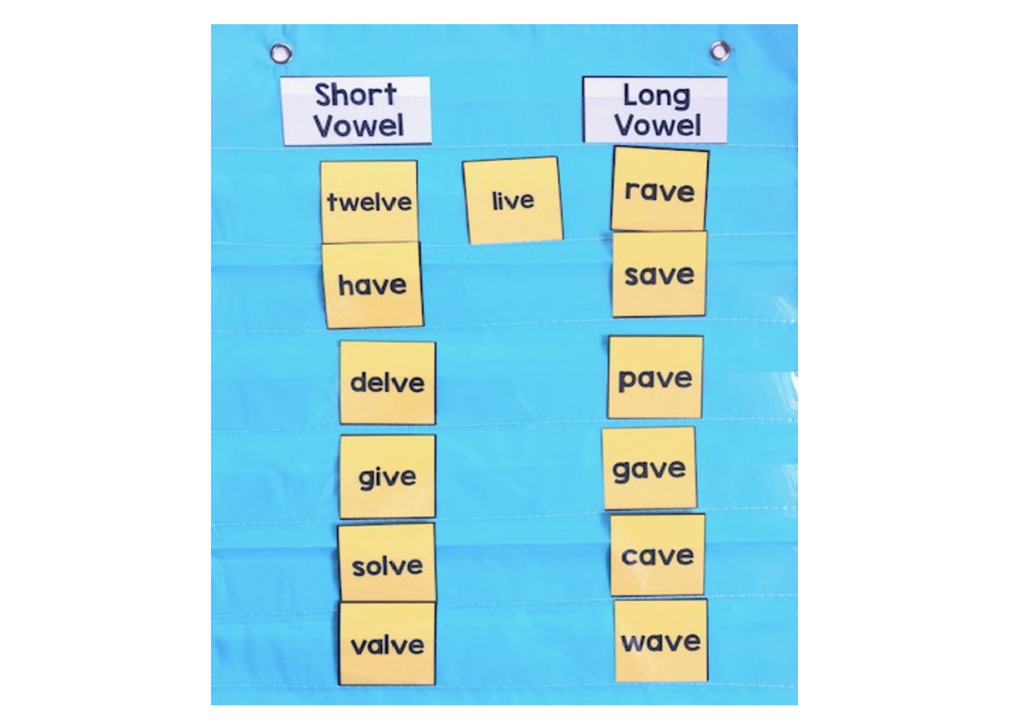
A sort is a great way to practice decoding these words. When students see two consonants between the vowel and the <ve>, they can assume that vowel is short. If there is one consonant (the VCe pattern), then they can try the more common long vowel sound first, and then if needed try the short sound. This flexibility with vowel sounds is really important and will come in handy later when reading multi-syllabic words.
Side note: Actually this rule applies to z, i, and u also. Words are not supposed to end in these letters. That’s why snooze, ooze, sneeze, breeze, pie, and blue have an e after it. I’ll be honest, the <i> confuses me because isn’t that what <y> is for? I can’t elaborate on that one, but supposedly that is the rule. If you can shed light on that, I’m all ears! I do not teach those rules at this time though. I stick to just the -<ve> at this time. Later when we come across the few words that end in <ze> I’ll tell them the rule. There aren’t many for a while so I let it go for now. I don’t want to overload! (I end up just teaching <ie> and <ue> as graphemes to learn which solves that. )
Silent e Job #4: Adding e to words that end in the letter s.
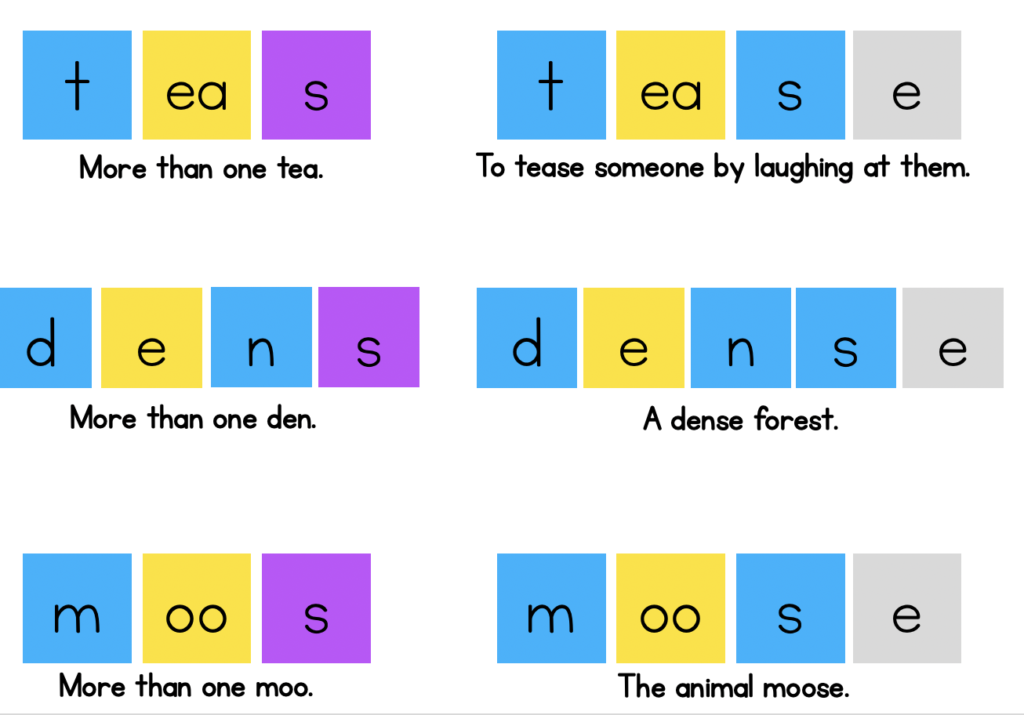
This one is sort of confusing. Have you ever wondered why the word house and horse have an e at the end? Well, it’s because usually when the letter <s> is at the end of a word, it is a suffix. Other times, you’ll see it doubled due to the Floss Rule (dress, pass, miss). The <e> is added after words that end in <s> so that the reader will know it is not meant to be plural. Some examples are below. Exceptions are smaller high-frequency words like has, his, is, as, us. Those are more function words, though.
This is called the Plural Canceling Rule. In the examples below, I show words where the <s> is used as a suffix and then words where the <e> is added to show that the <s> is simply a letter in the base word representing a sound. Another good example is “laps” and “lapse”.
Silent e Job #5: Add e to make sure every syllable has a vowel
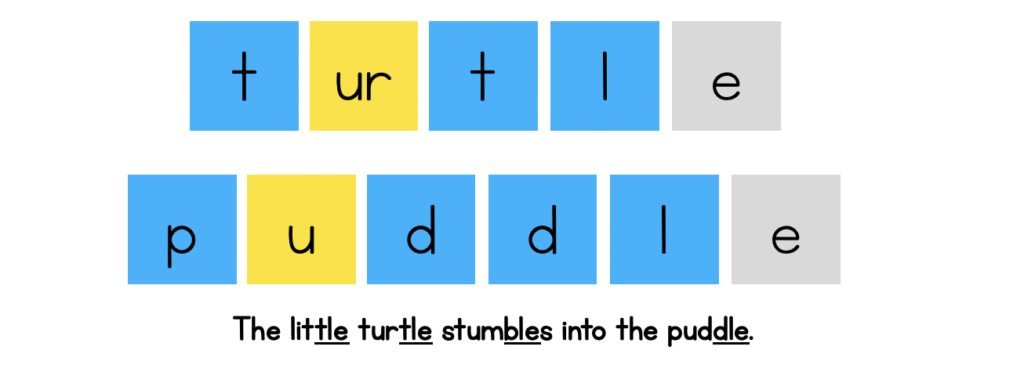
Every syllable must have a vowel sound. In fact, that is what makes a syllable a syllable. A syllable revolves around a vowel sound. Therefore, every syllable has a letter or letters (a grapheme) that represents that vowel vowel sound. It all makes sense, right? Well… there is one type of syllable that isn’t so cut and dry. There is a type of syllable that comes at the end of words and they just have one consonant then the letters <le>. Examples are -tle in “turtle” and -ble in “table”. This is the only type of syllable where the vowel sound is not very prominent. I can’t really hear it at all, but perhaps it’s just a weak schwa sound in /ul/. Anyway, in the case of the syllable-type Consonant -le, the <e> is there so that there is a written vowel. Every syllable needs a written vowel, so <e> comes to the rescue again.
Click here for information about syllable types and here to read about the schwa.
Silent e Job #6: Adding e after -th gives th its voiced sound
I don’t spend much time on this, if any, but I’ll tell you to be thorough. When silent e comes after the grapheme <th> at the end of a syllable, the <th> makes its voiced sound (bathe, teethe, clothe vs. bath, teeth, and cloth). I briefly tell my students about this, but honestly there are not that many examples at this point and they are already used to be flexible with the <th> sounds so I don’t worry too much about this one.
Silent e Job # 7: Other jobs
Silent e is also used to help distingue the meaning of two words, like bye and by. Then there are unknowns like come and are, which are likely explained if we look into the history. If you know why those are there, I’d love to hear why!
Reviewing the Jobs of Silent e
Here are a couple of activities you can do to review these jobs.
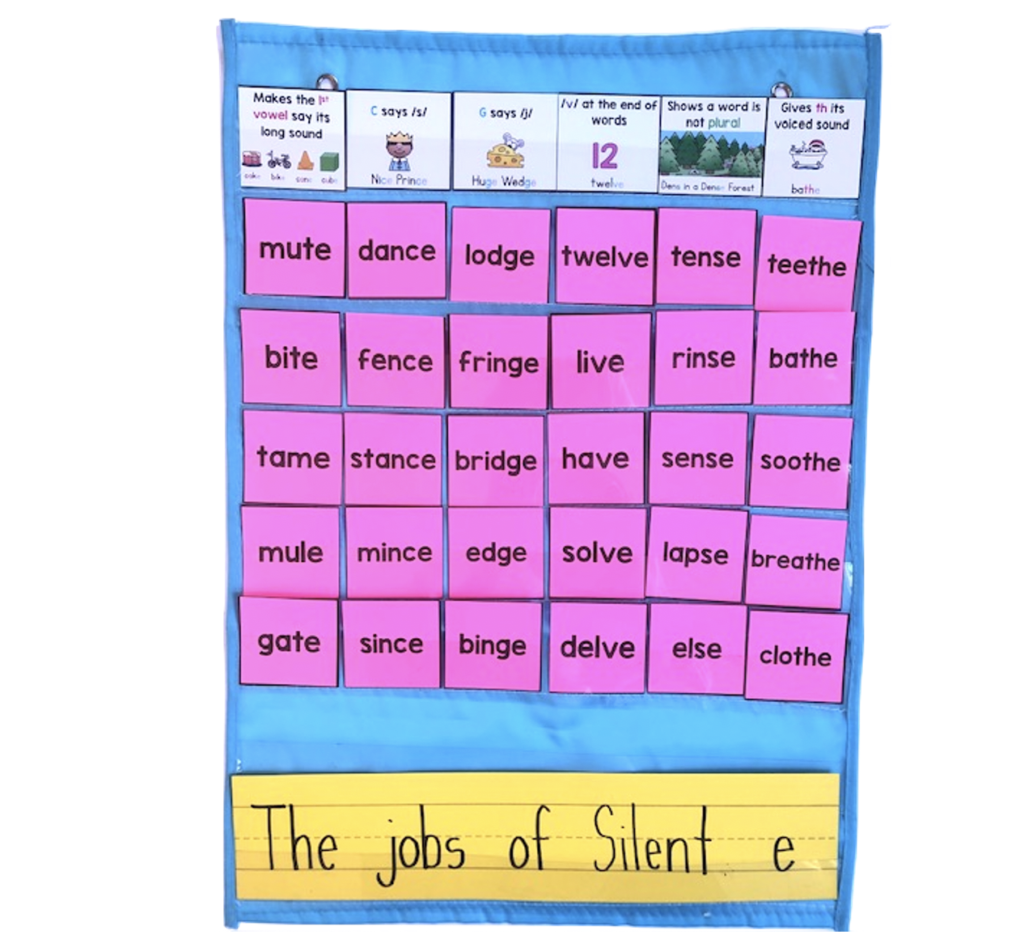
The Many Terms for Silent e
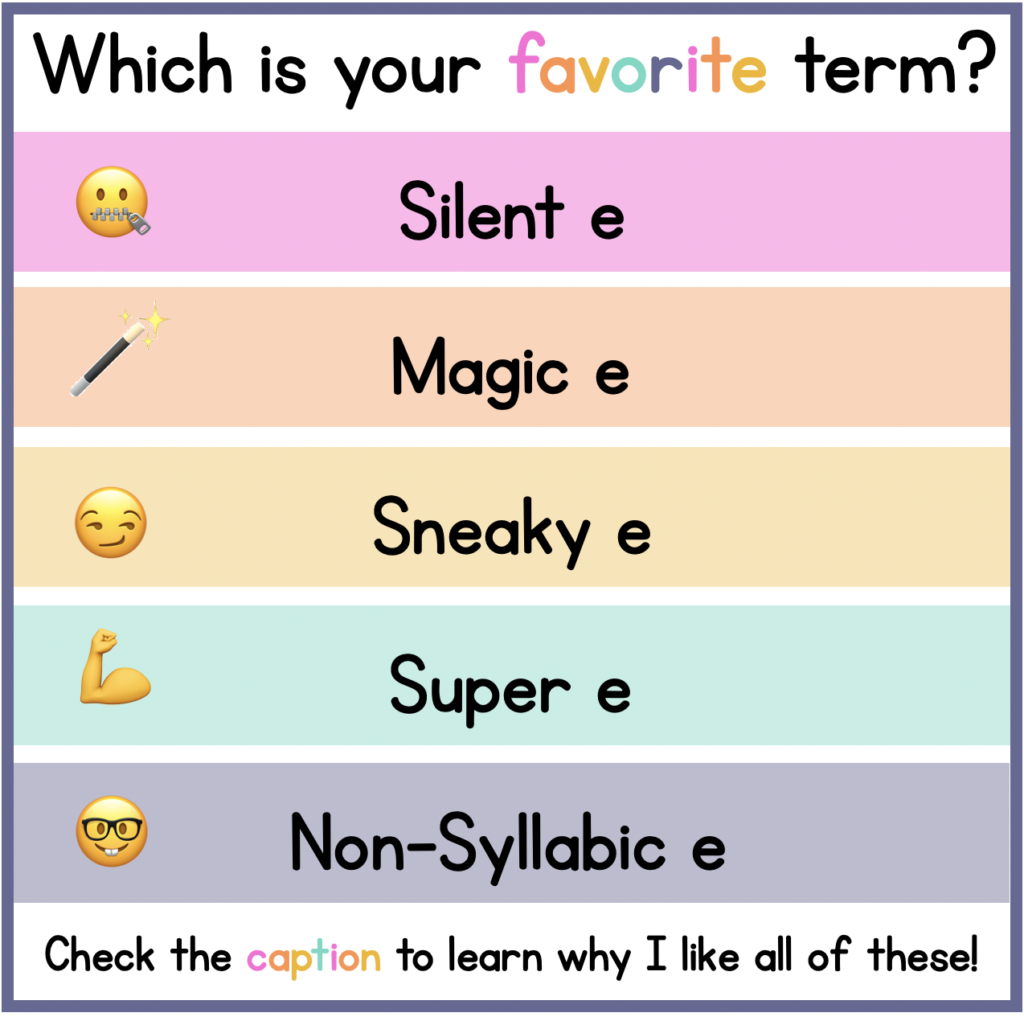
There are a lot of different ways that people refer to this final non-syllabic e. To be honest, I don’t think it matters which term you use and I could justify all of them. (I’m sure there are hard-core SoR teachers that disagree, but that’s okay.) Now that you’ve learned the jobs of silent e, I’m going to connect those jobs to these terms.
- Silent e: This is probably the most used term. I think it’s a helpful term because the <e> is, well, silent! That is the first thing we need to communicate to our students because, prior to teaching this, students have only worked with letters that represent sounds. It takes some practice to remember that <e> does not make a sound.
- Magic e: I like this term too because you can connect the “magic” to the many jobs of this e. It can make another vowel long (but its magic is only powerful enough to reach over one consonant, not two) and it can make the c and g soft.
- Sneaky e: If you think about it, it is sneaky! It sneaks in to make sure rules aren’t broken. It sneaks in to make sure words don’t end in v, i, or u. Then it sneaks in again for consonant le words so that there is a written vowel in the word. It even sneaks in for the “plural canceling rule” so that we don’t get mixed up about whether the s is a suffix or part of the base word.
- Final Non-syllabic e: I think this is the term linguists use and prefer. I like this one because it emphasizes the fact that the e does not create its own syllable. Syllables revolve around vowel sounds. If there is no vowel sound then there is no syllable. When the e doesn’t represent a sound, it is a marker instead. It isn’t there to represent a sound, it’s there to tell the reader something, (or as I tell the kids- to do one of its jobs). Any time I can remind students that syllables revolve around a vowel sound, I go for it!
- Super e: This e is like a superhero. It’s always helping other letters. This term can also connect back to the jobs of the e. It can also help remind students that although it’s a strong super e, it’s not strong enough usually to jump over two consonants to make a vowel long- only one consonant.
Teaching the Silent e
I love teaching the silent e! Keep in mind this is the first time that students will be exposed to a letter that doesn’t represent a sound. Prior to this point (at least in my scope and sequence), letters all represented a sound or combined with other letters to represent a sound (like with <th> and <ck>). This is the first time that a letter will serve as a marker to give the reader information.
Introducing the Silent e
I used to introduce this concept by starting with a CVC word and then adding the silent e. After reading more about the orthographic mapping theory, I now buy into the idea that we should start with the familiar pronunciation first, then break it down and show how the letters match up. For the “silent e”, this is actually super helpful for building conceptual understanding.
This is the procedure I use for introducing silent e words:
- Say a familiar word and have them break it down the same way they have been taught with other words.
- For example, you may want to start with the familiar word, “like”.
- Students will count three sounds, so you will draw three sound boxes.
- After filling in each box, you can then go back and point out that we want the vowel to make its long sound (or “say its name”).
- Tell them that one way to make the vowel long is to add a silent e.
- Show students how the e goes outside the box because it does not make a sound. Instead, it has a job to do.
- Repeat with other words. (Another example below)
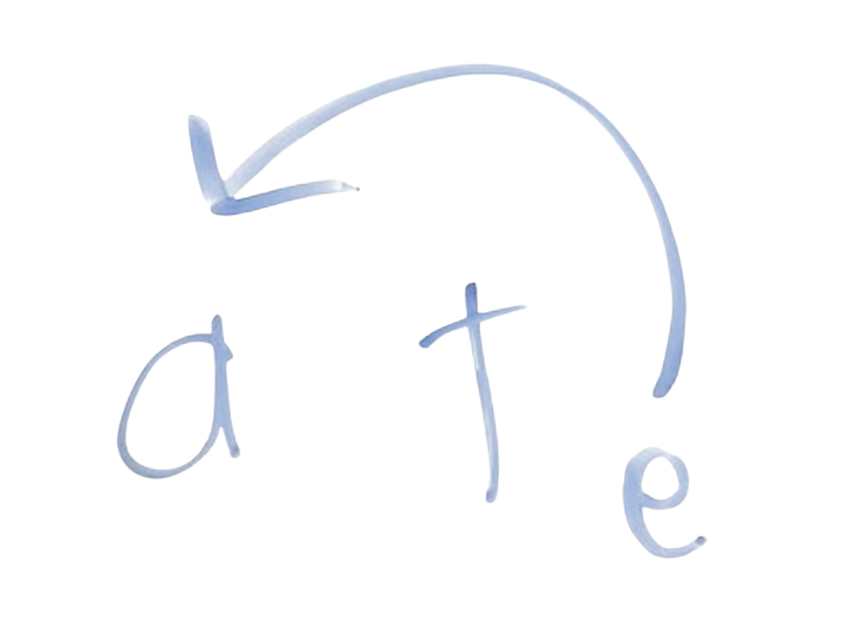
Here we are connecting the sounds to the symbol (letter). It does make so much sense to begin with the whole word in its familiar auditory form and then break it into its parts, and then match it to the graphemes. Whole words spoken orally are familiar to our students. The goal is to anchor the new letter sequences and pattern to the known pronunciation of words.
- When spelling the word “ate”, we will first write the graphemes for the sounds we hear.
- Since they can’t hear the e, they originally just have the letters <a> and <t>.
- I say, “This is the word ‘at’. The <t> closes in the <a> so the a makes its short sound. But I wanted to spell the word ‘ate'”.
- Then, I add the <e> to the end of the word and explain the first job of the silent e. I explain that <e> doesn’t represent a sound, but instead tells the readers something. Here it tells the reader that the first vowel will make its long sound.
- I go on to give more examples and point out the vowel-consonant-e pattern, explaining that the <e> can only do this job when there is this pattern. If there are two consonants, it cannot do it’s job.
This is the first time they have seen a letter that doesn’t represent a sound. It takes some time to get used to seeing a letter and not producing the sound. I explain that the e is silent and has a job to do instead.
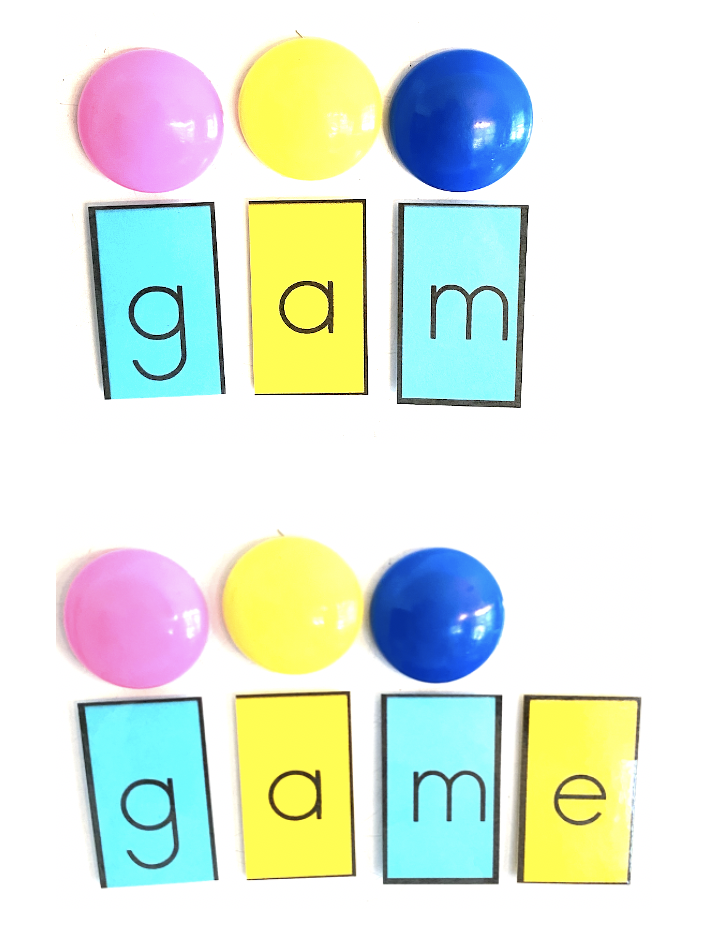
In the picture above, instead of sound boxes, I’m using magnets to represent the sounds. This was a helpful visual for my students. As a group, we segmented the word game by tapping the magnets. (I told them that these magnets represent sounds.) Then, we identified the letters that went with those sounds. Finally, we discussed how the <a> represents a long sound in this word so we need to add the <e>. It doesn’t get it’s own magnet because it doesn’t represent a sound.
Reading (Decoding) Silent e Words
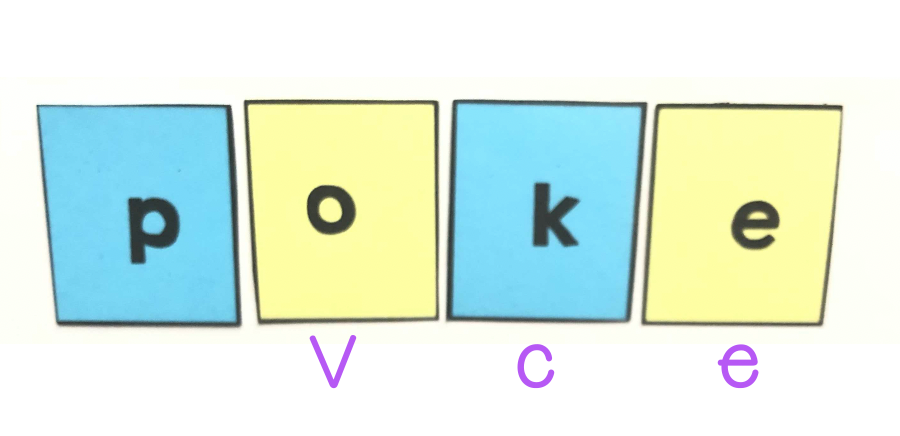
Using colored letter tiles will help your students to see the VCe pattern. During this part of guided instruction (over several days), I build words using letter tiles. I include words with the VCe pattern and words without. We practice looking for that pattern, so they don’t just get in the habit of thinking that when an e is at the end, the vowel will say its name. If there are two or more consonants between the vowels, this is not the case. Also, once you add suffixes in, the e is no longer at the end! After finding the pattern, we say the vowel sound, and then decode the word. Next, we practice reading words without the letter tiles.
You can find colored letter tiles for explicit phonics instruction here. They are free and now include a digital Google Slides option.
This is a great activity to practice decoding words with silent e. Write CVC words onto chart paper. Write the silent e onto a popsicle stick (or glue these adorable magic e’s from Whimsy Workshop.) As a group, read the CVC words, then reread with the silent e.
For independent practice, print out a page for each student to read on their own. Reread for automaticity. (Click here for a premade page.)
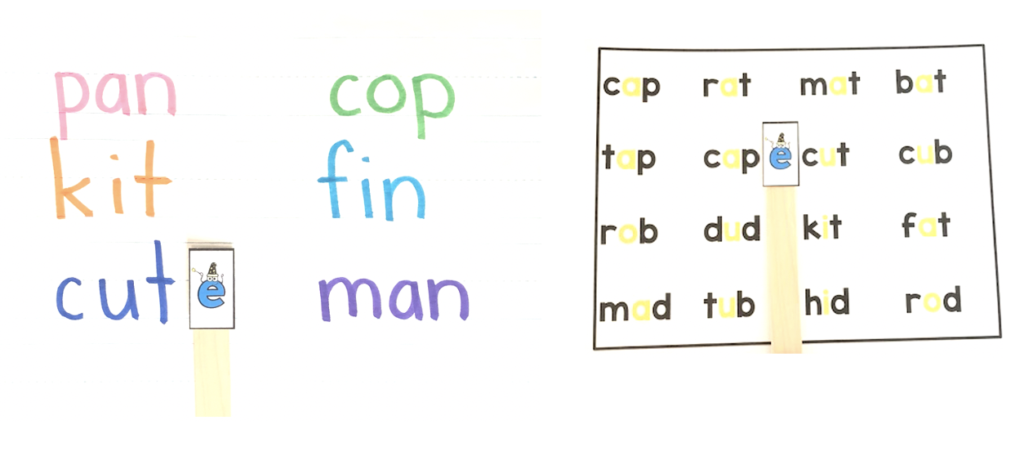
I also like to put the silent e on hearts, shamrocks, or pumpkins to make it a seasonal activity. 🙂
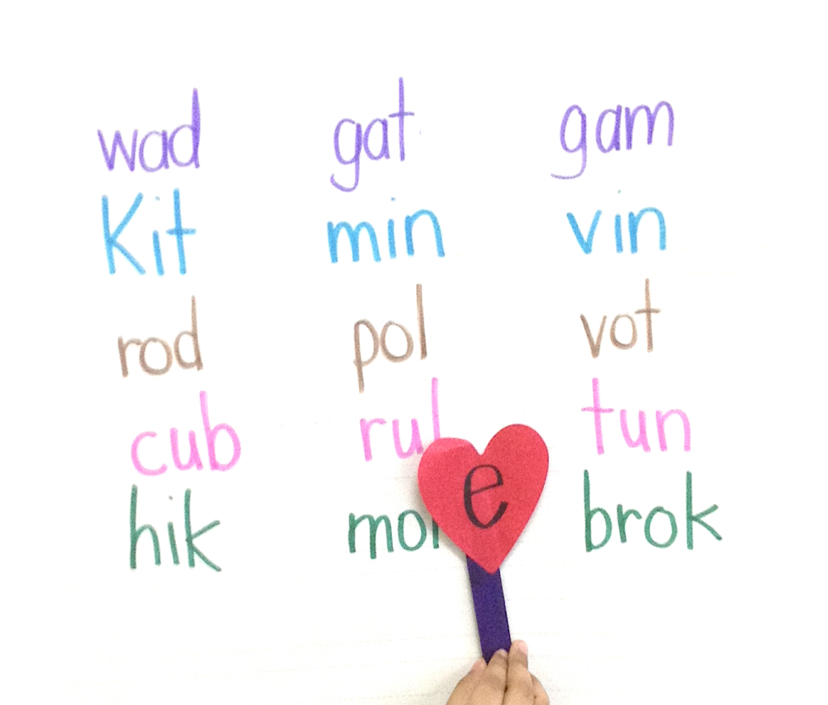
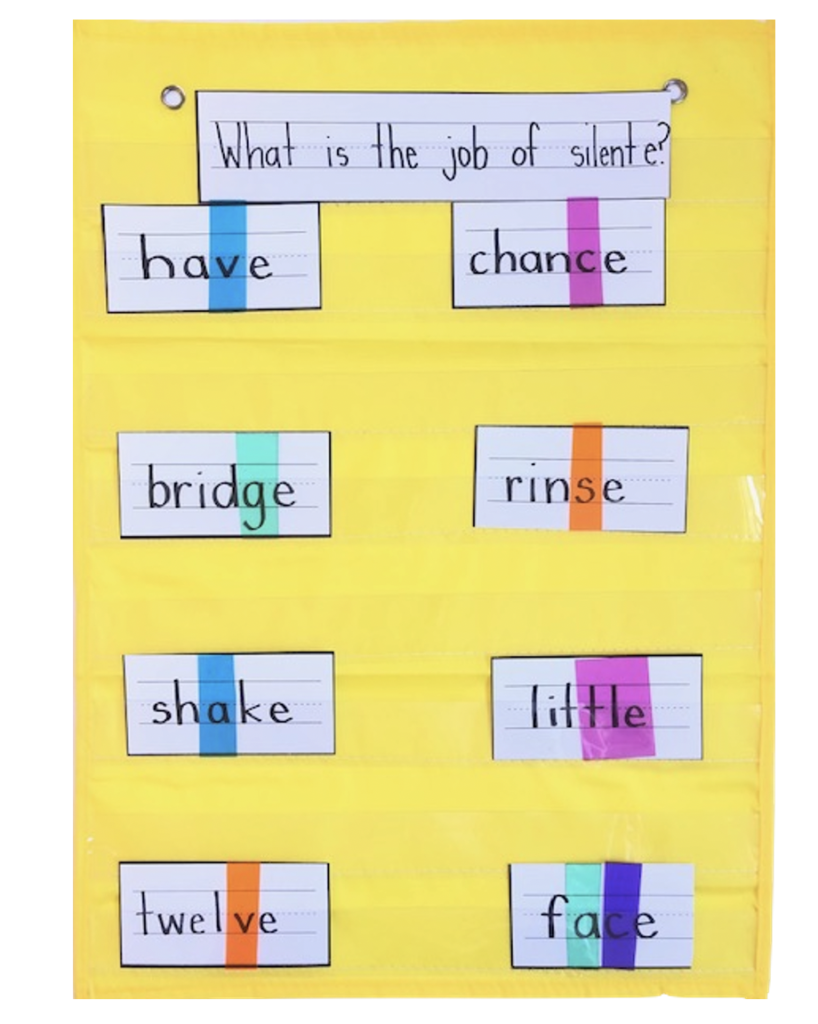
A common problem for students when they are first learning to read words with the silent e is forgetting to use the long vowel sound for the first vowel. The activity shown below is an idea that has helped some of my students in the past.
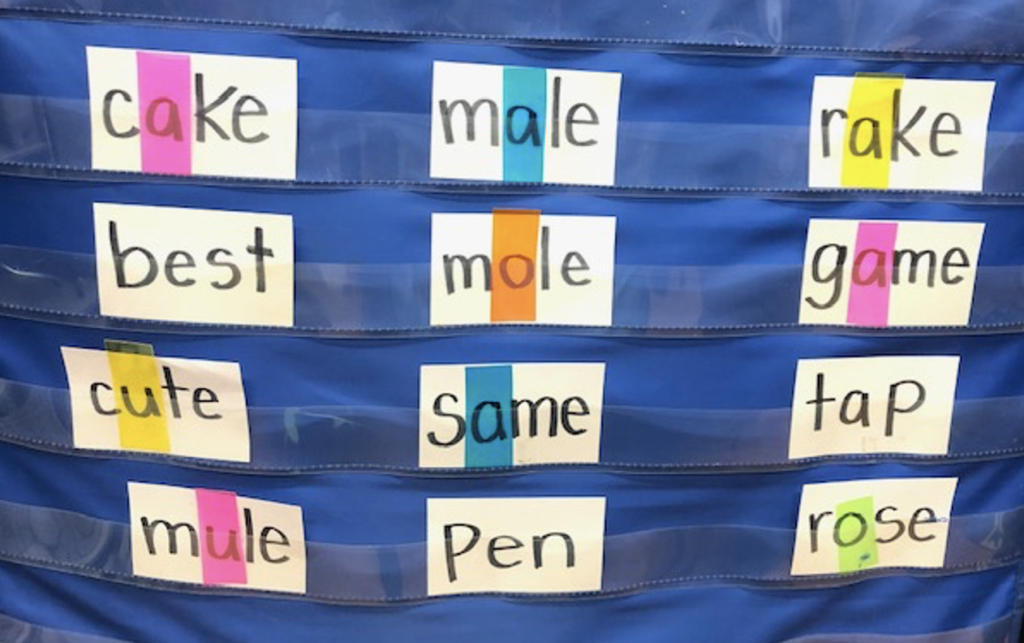
For this activity, I wrote several words on note cards. We studied the vowel patterns to determine which would have vowels that say their name. We took highlighting strips and covered the vowels that would be long vowels. Then we went back and read the words. Highlighting the vowel that is long helps our readers who have a hard time transitioning from short to long vowels. It is also helpful for them to get used to seeing those patterns. (The highlighting strips are just colored transparencies from Amazon that I cut up into smaller pieces.)
Mapping Silent e Word Parts
Just like I map word parts for CVC words, I want to spend some time mapping word parts with the silent e. Below are some ways that I did that. (Read a blog post more in depth about orthographic mapping.) Mapping word parts can help with automatic recognition, which leads to more fluent reading. After mapping a word part, I add it to a class chart, as shown above left. We review these daily. Choose a student to point to the word parts and lead the class in reading them quickly. There are also games you can make using those word parts.
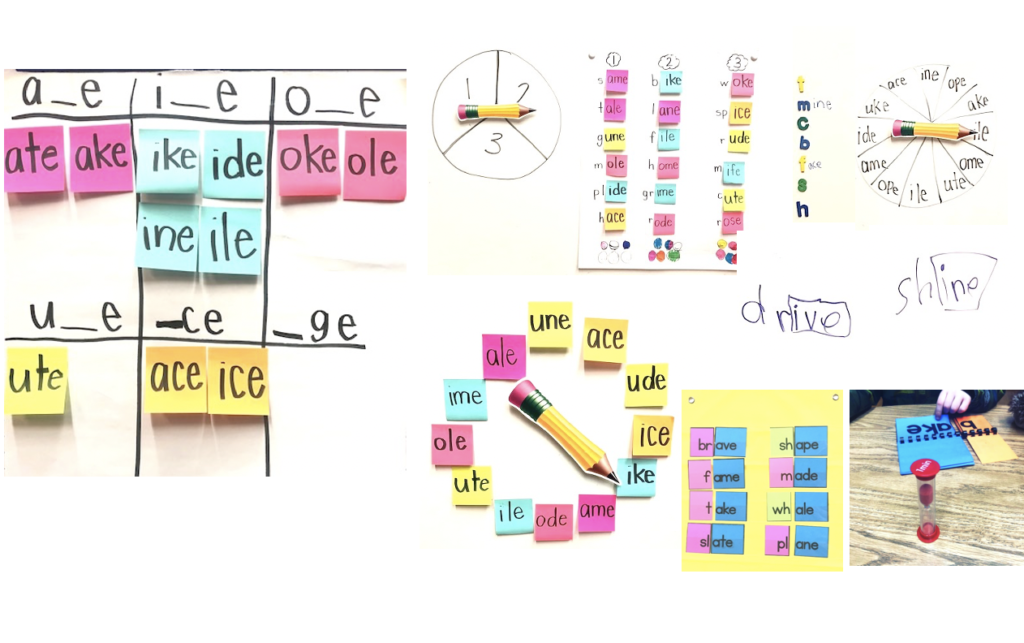
Providing Practice to Master the Silent e
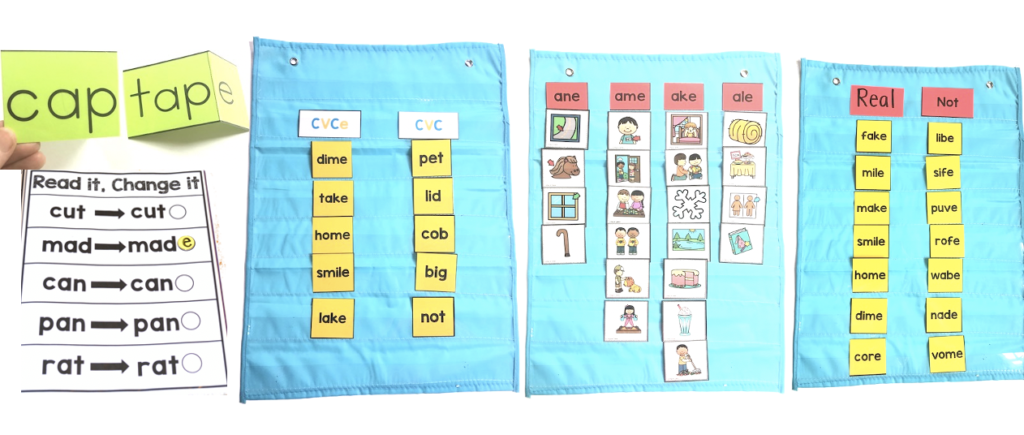

- Practice changing short vowels to long vowels after adding a silent e. Write words on index cards. Fold before the e. Read the word. Then unfold the e and reread the word with the vowel now long.
- Sorts:
- Sort word cards CVC vs. VCe
- Sort picture cards: Short or Long Vowels, then spell on white boards
- Use picture cards to listen for the word family ending. Have students spell the word on whiteboards.
- Sort real vs. nonsense
- Give students practice reading silent e words within phrases and sentences. This is very important! Don’t just work on reading words in isolation. They need plenty of opportunities to read connected text.
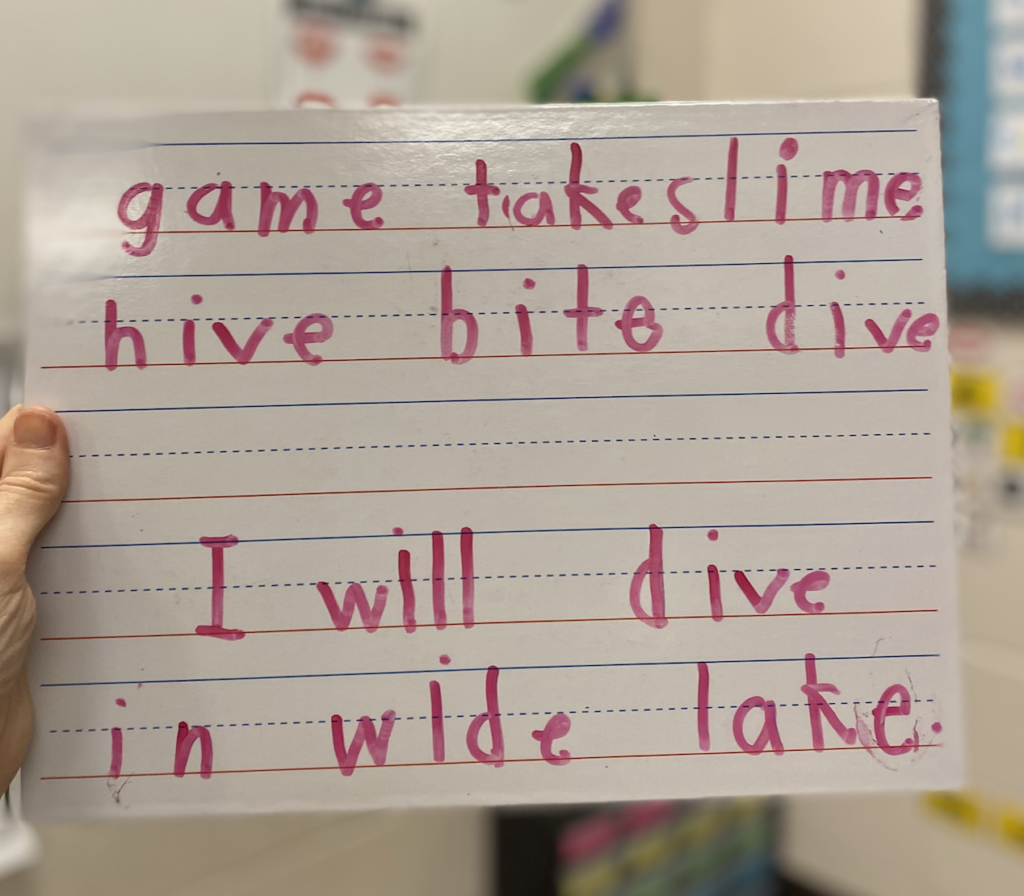
Dictation is also a really important component to my small group time. I can give corrective feedback when needed and it’s a great informal assessment. Below, I can see that this student forgot a word. So, I can help this student get in the habit of rereading their sentence as they are writing it and after they have written the whole thing.
Incorporating Morphology
When you’re teaching the silent e, it’s essential you also practice adding suffixes to those base words! It can be tricky for a couple of reasons:
- When you add the suffix -s, kids have a hard time seeing that silent e. They are so used to looking for it at the end of the word and when you add the suffix -s, it’s sort of hidden. Provide practice reading words with the suffix -s, where students practice finding that VCe pattern.
- Before adding vowel suffixes like -ed and -ing, you need to drop the e. Again, kids need to practice reading and spelling these words so they get used to identifying words that have a long vowel.
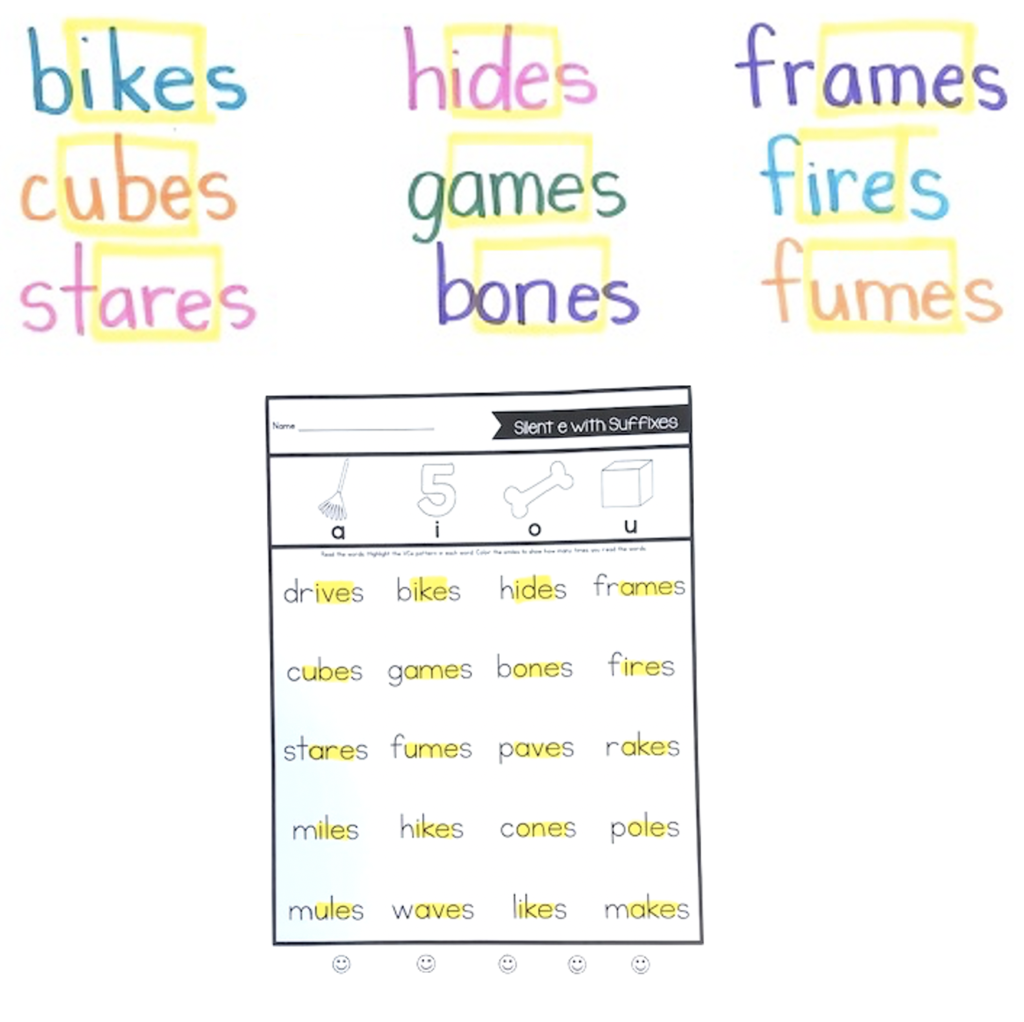
To practice reading silent e words with the suffix –s, I write several words on chart paper. Then I call on students to identify the VCe pattern. We read the word family together. For example, “i-k-e, ike”. I use a highlighter to box those letters. Then we go back and read the whole word.
For independent practice, give students a word list. Have them highlight the VCe pattern, read that word part, then read the whole word.
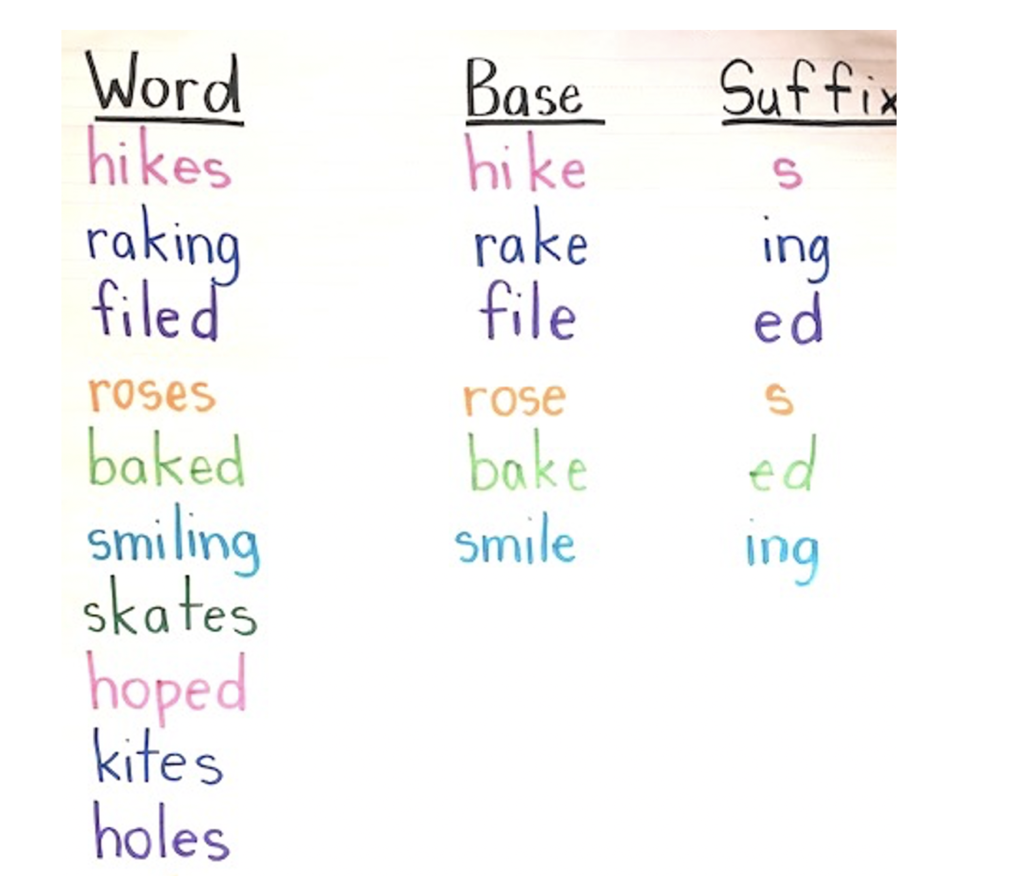
Below, you are doing the opposite. Read each word. Identify the base and the suffix. Have students write their answers on white boards before you add it to the chart.
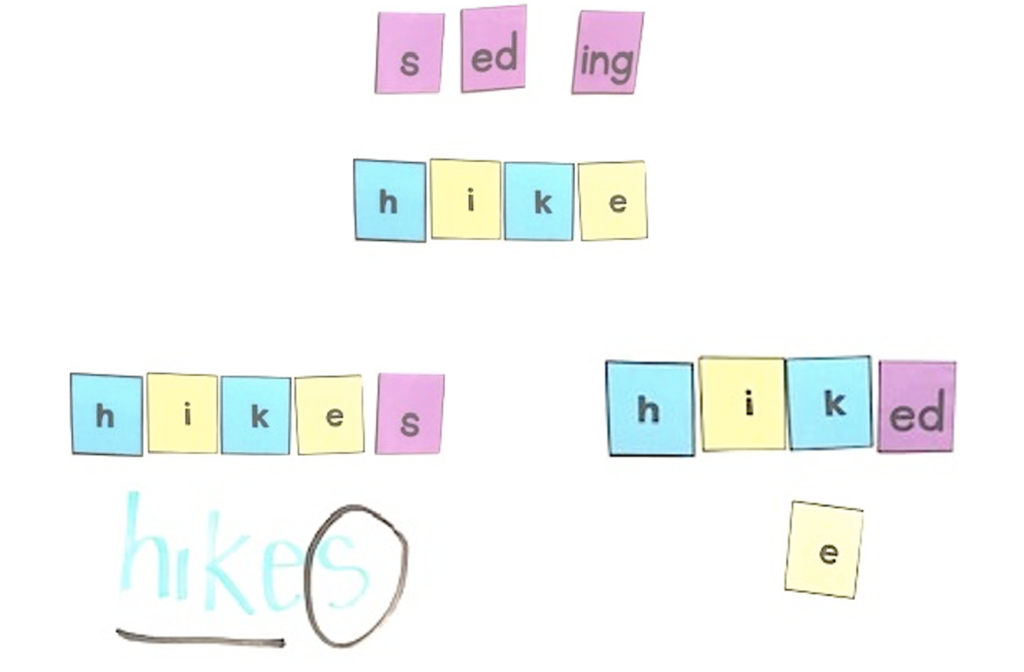
Letter tiles also help to teach students how to add suffixes to silent e. When adding -s, nothing changes, but when adding vowel suffixes like –ed and –ing, you need to drop the e.
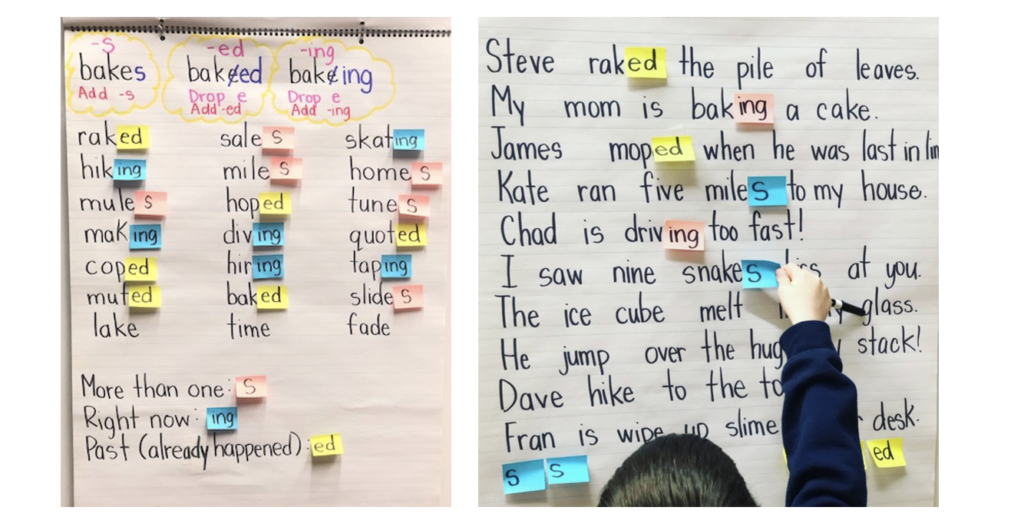
The picture below shows an activity that I do every year to help solidify students understanding. At the same time, they are reading and rereading decodable sentences with the target skill, hopefully leading to automaticity at the word level and fluency at the sentence level. Students read the sentence and then choose the correct suffix. They also have to decide whether or not they need to cover the silent e or not.
Silent e Resources
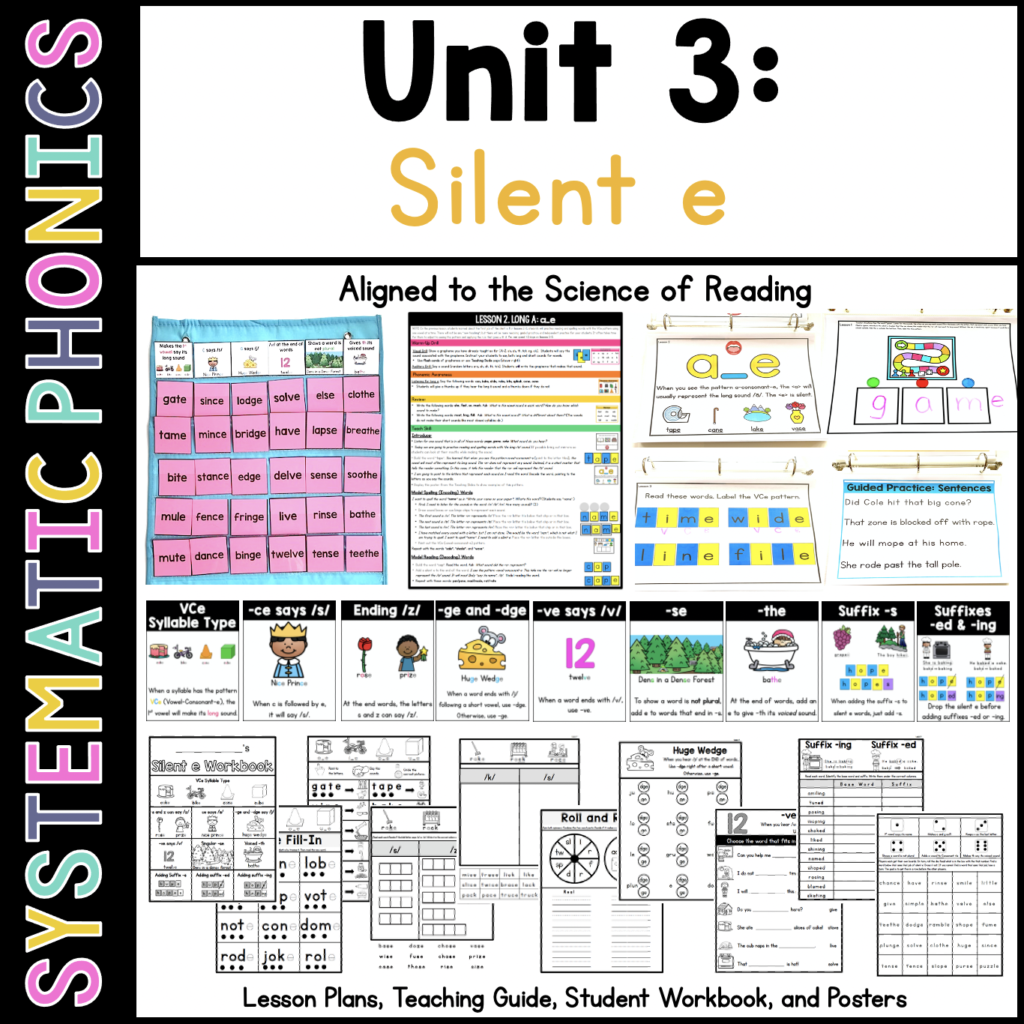
If you’re looking for a resource that has detailed lesson plans, practice for students, and great visuals to lead you though your lessons, then my Systematic Phonics unit 3: Silent e is for you! It has very detailed lesson plans, posters, student workbook pages, a teaching guide (printout or Google Slides), 4 decodable books, and a word sort. Click here for this Silent e unit.
Supplemental Resources for More Practice
Over the years I’ve created tons of other resources because my students needed them. It takes most students a bit of practice before they master the silent e, but for my students with dyslexia, it can take quite a while! I wanted to give them a variety of activities that vary with the level of difficulty. Below you’ll find links to some individual resources. All of my silent e resources are bundled together at a huge discount. Click here to get that deal!
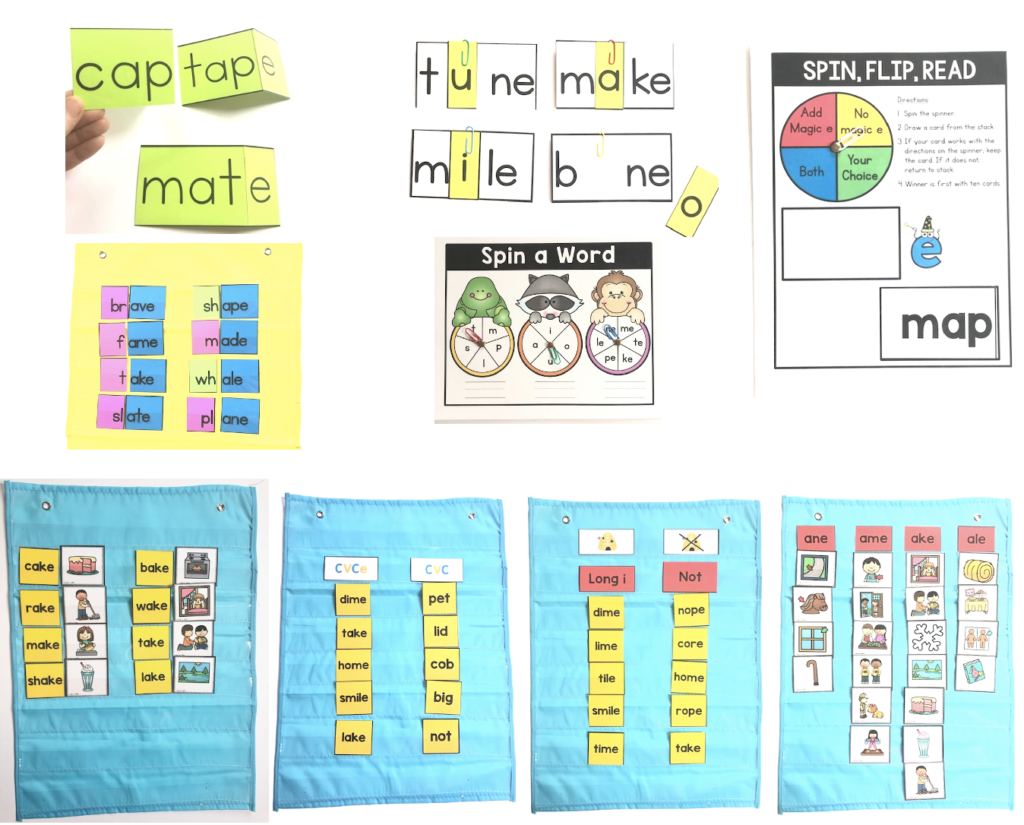
Phonics Cards: This resource has the activities shown below. I love to use word and picture sorts to reinforce my teaching! You can get this here.
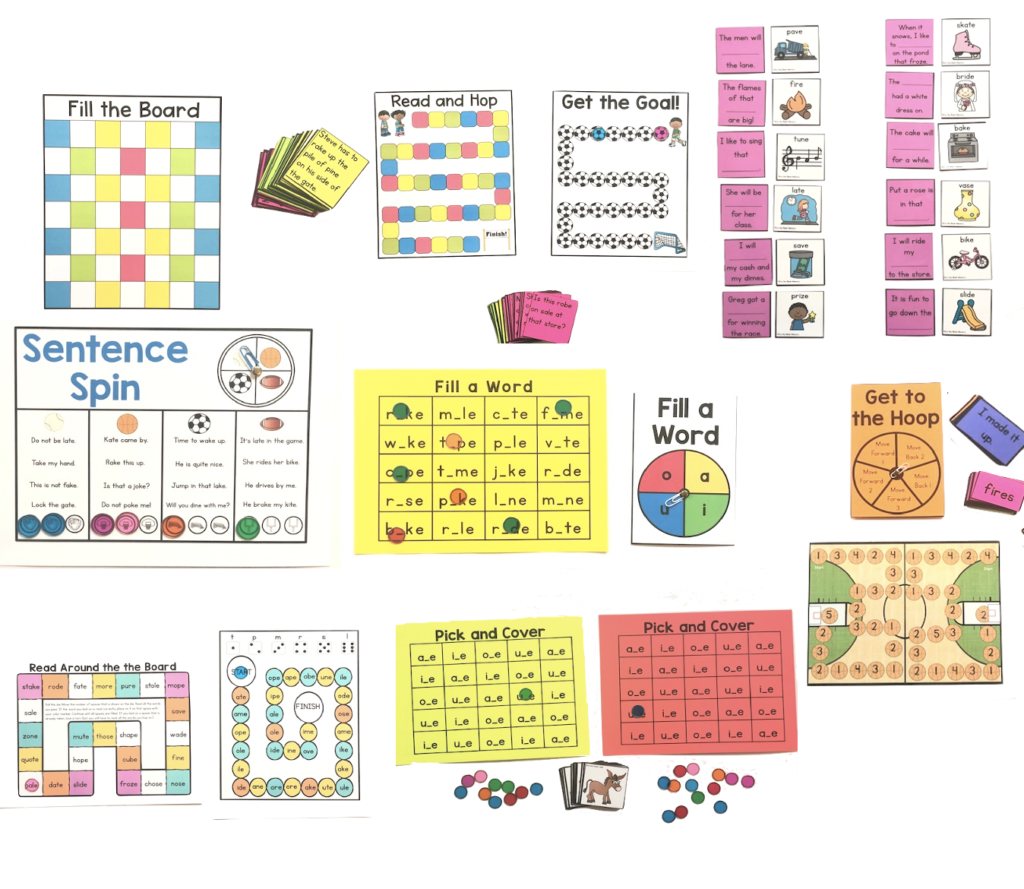
Phonics Games: Reaching automatic word recognition takes time and practice. Using games helps to make this practice a little more bearable. 🙂 You can find these games here.
Decodable Phrases
Working with phrases is a good stepping stone for students who are struggling with automatic word recognition. Sometimes they are not quite ready for sentences, but we want them to do more than just read isolated words.
Silent e Phrases: This resource has a printable, digital, and pocket chart component. The “printable” pages have phrases to match to a picture, then there is a sentence with those same phrases. The pocket chart activity is matching phrases to the picture. The digital is the same. Click here for this resource.
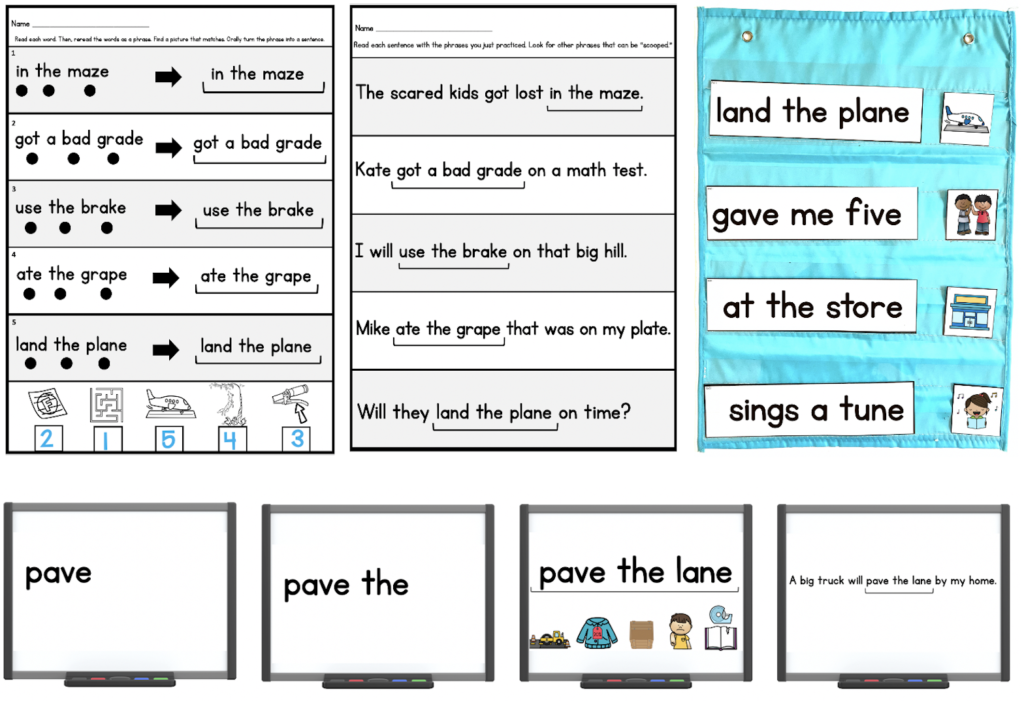
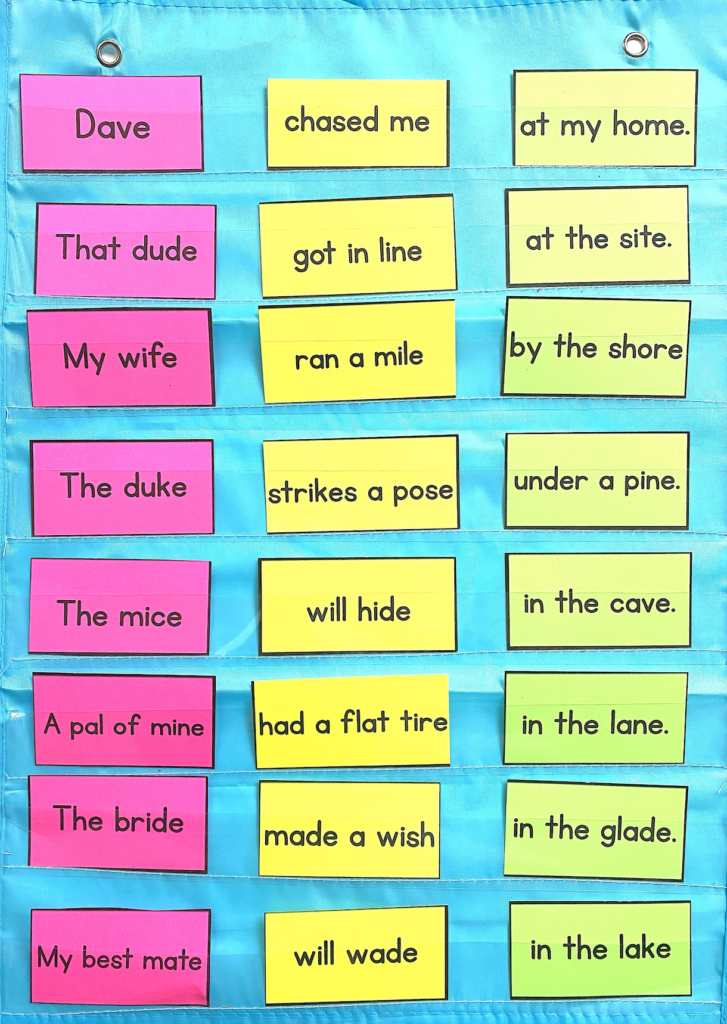
Phrase Mix and Match: The resource below is another favorite of mine! Students will mix and match the phrases to create different sentences. It’s a great way to get students reading and rereading. It also sets the stage for later when students begin to look for meaningful phrases within sentences. Click here for this resource.
Decodable Sentence Activities:
These are some of my favorite resources because they allow for more practice decoding words within a sentence. Reading words in isolation isn’t enough! The goal is fluency with connected text.
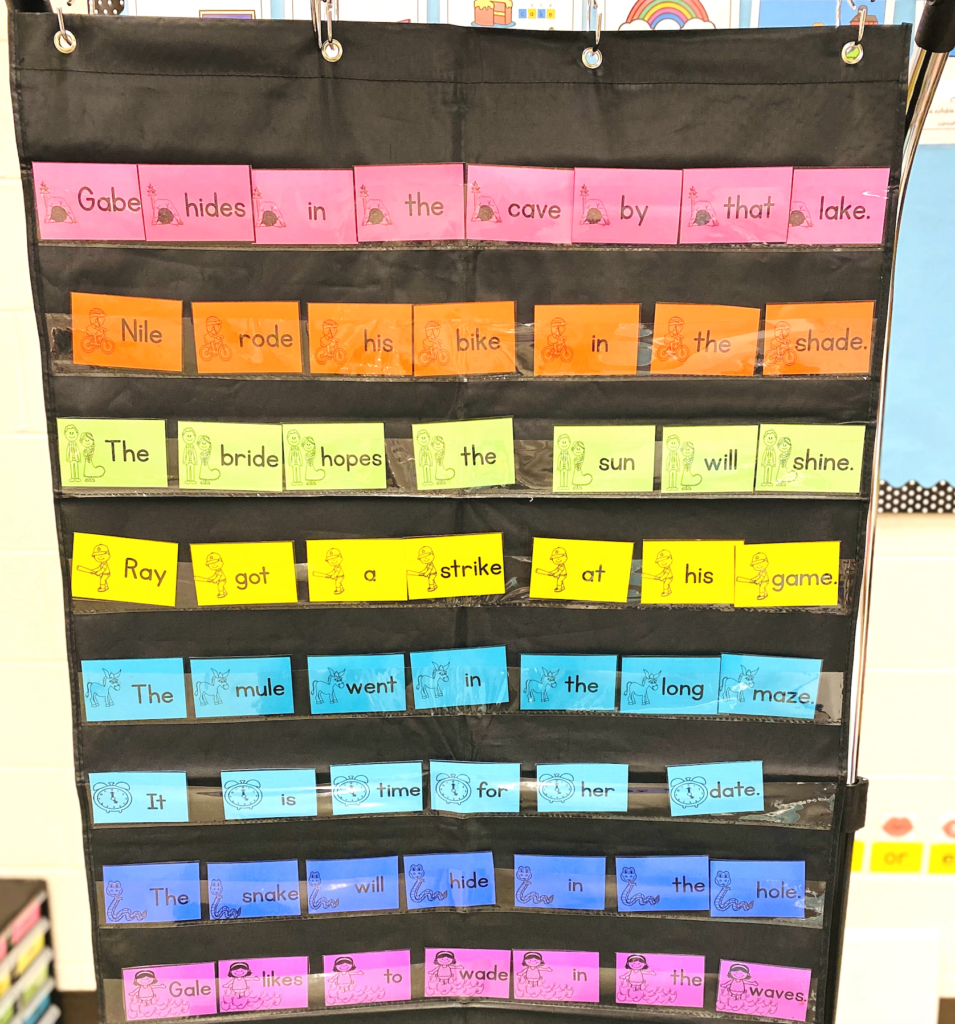
Sentence scramblers are a super fun way to practice decoding words with silent e and also get some repeated reading. Students read each word, then try to figure out the order the words go in to make a complete sentence. Click here for the silent e Sentence Scramblers.
Click here for Silent e Spin a Sentence.
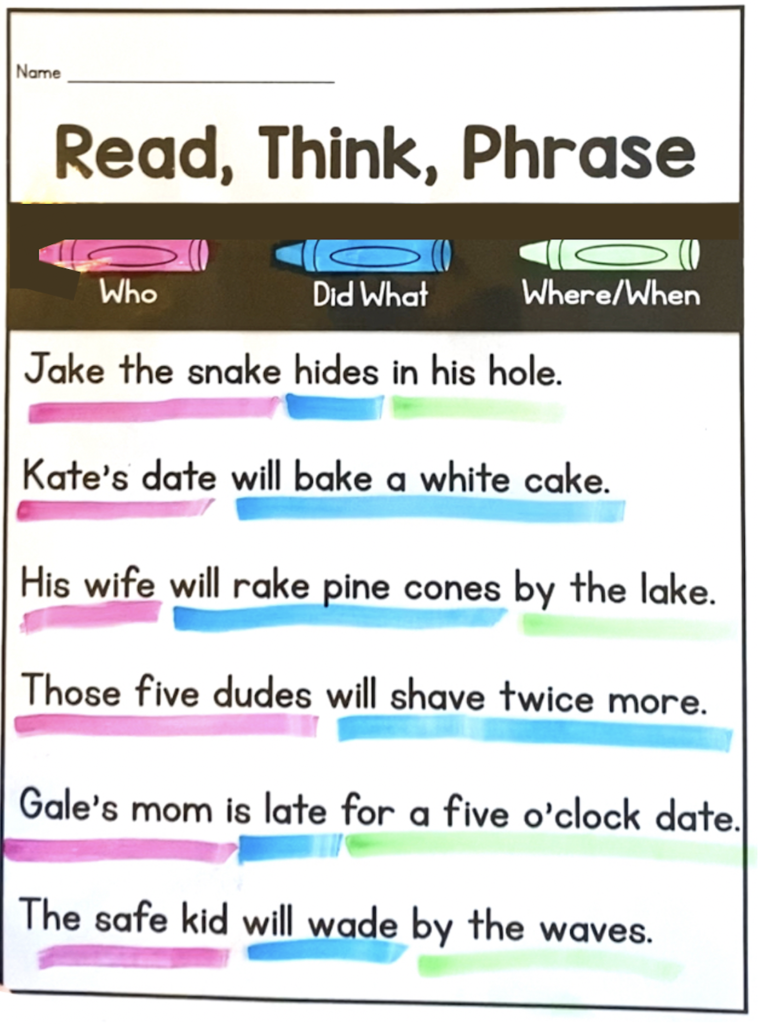
These printable decodable sentences are perfect for working on fluency and accuracy. After reading the sentence, students reread and then find the subject (who/what), the action (did what) and a detail phrase. Last, they reread the sentence, pausing between each color (phrase). This is great for working on prosody. Teaching students how to find meaningful phrases helps with both fluency and comprehension! Click here for decodable sentences.
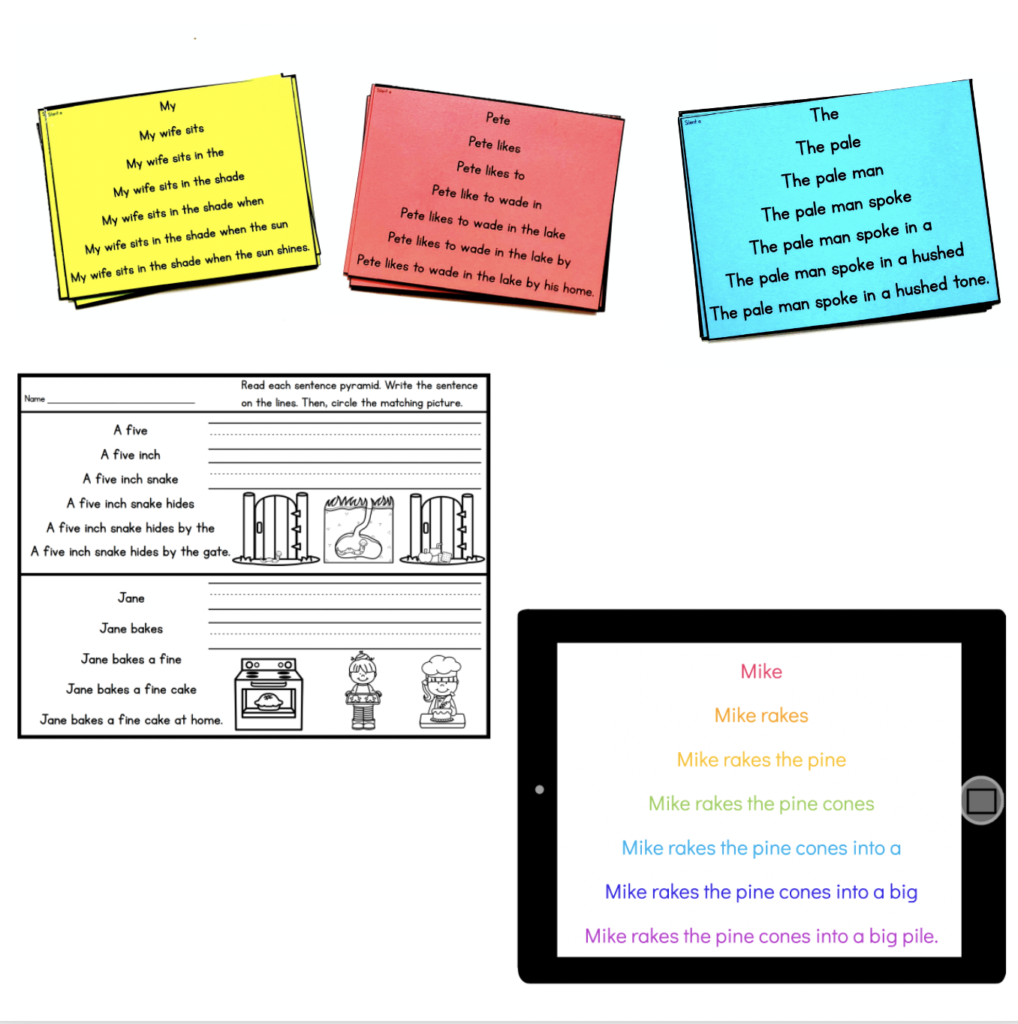
Decodable Sentence Pyramids are another great way to develop automaticity and work on fluency and decoding. Each line adds a new word to the sentence, allowing for students to reread over and over. Click here for Decodable Sentence Pyramids.
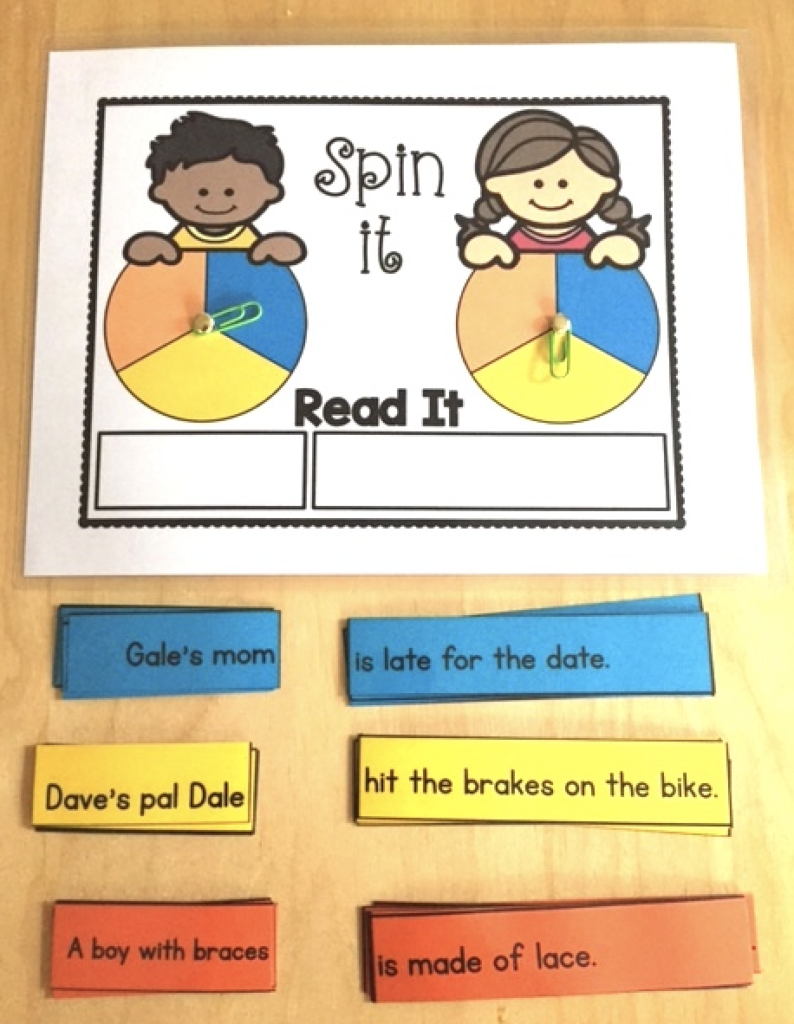
This sentence spin is a great small group or center activity. Students will mix and match the subject and predicate to create different sentences.
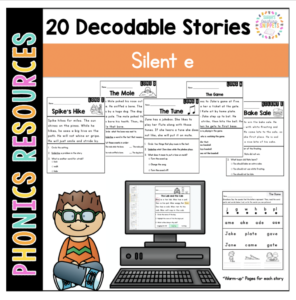
Decodable Books and Passages:

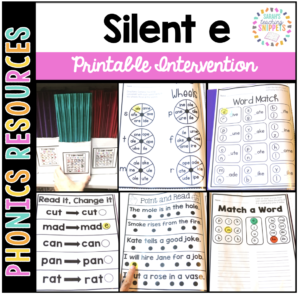
All in one resource: This resource is similar to the workbook pages found in my Systematic Phonics Unit 3, but there is just a lot more! This set is geared toward those students who need more practice. It is packed with variety of activities that you can use in small group setting, independent practice, and homework. You can find this here.
Storage
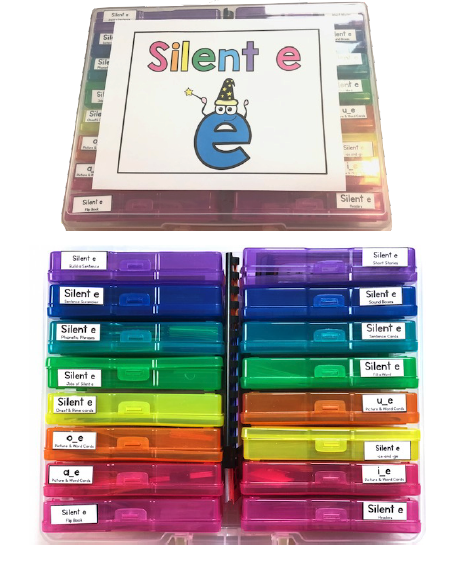
This is how I store my resources. I love these bins!
Click the affiliate link below to snag these bins!
