Hi everyone! With the sudden pivot to distance learning and the need for digital resources, I started making Boom Decks through Boom Learning. Think of Boom Cards as a digital learning app. It is incredibly user-friendly and engaging for kids. Since I started creating Boom Cards, I’ve had a lot of questions about them lately.
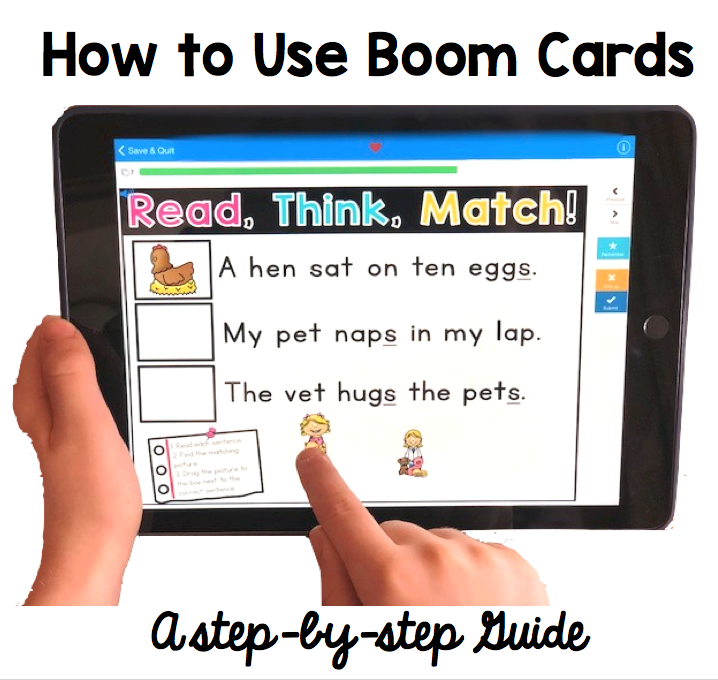
Quick facts about Boom Cards:
- What are Boom Cards? Boom cards are self-grading digital task cards called “decks” with instant feedback.
- What platform can I use? You can play boom cards on iPads, computers, interactive whiteboards, Chromebooks, iPhones, Android tablets/phone, and Kindle Fire. You do need a modern browser (updated in the last three years) and internet connection.
- Is it free or paid? There is a free option where you can assign decks to your students using “Fast Pins”. There are 3 paid membership options (all SUPER reasonable prices) where you can assign decks, monitor progress, and create classes with all of your students.
- Can I use it with Google Classroom? Yes! There is a link you can post on Google Classroom, SeeSaw, Moodle, Canvas, etc. (See Step 4)
I wish I would have found Boom Cards sooner! Students can get the practice they need to develop their reading skills. Obviously nothing replaces the instruction and guidance of a teacher or parent. These activities do not replace instruction. I also believe our youngest students need to turning pages and manipulating things. However, these can provide an additional way to practice new or review skills that requires no prep and no paper! They are my favorite digital learning tool!
Reasons why I love Boom Cards:
- They are engaging and interactive. Bonus? They are colorful without using your ink and they require no prep and no paper!
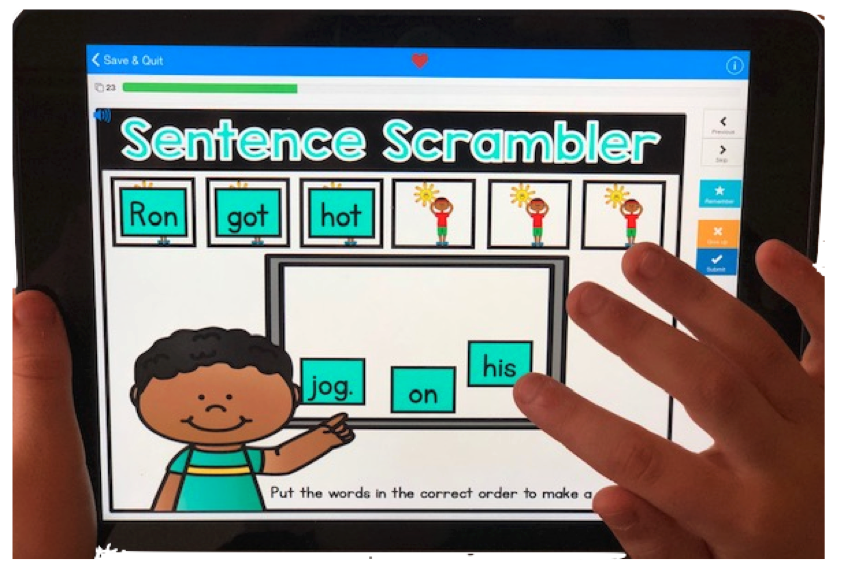
2. Another great thing about Boom Cards is they are self-checking with instant feedback, so the student has the opportunity to take another look and try again.
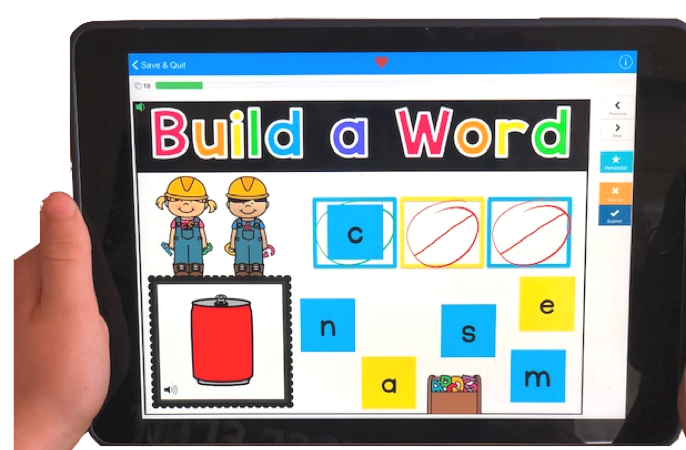
3. As a teacher you can track how they are doing, too. This makes that independent learning time so much more meaningful and effective! They are held accountable but you don’t have to do any grading!
Getting Started with Boom Cards
Curious about how to get started with Boom Cards? Follow these steps! Disclaimer: I am not in any way tech-savvy and I’m actually very new to Boom Cards myself. I’ve just had so many questions since I started making these that I decided to take a deep dive and give a step by step directions based on the questions I’ve been asked. Hopefully it helps! 🙂
Step 1: Set up your account
The first step to getting started with Boom Cards is to get a free account. (More about other membership options later!)
Here are the steps to setting up your account:
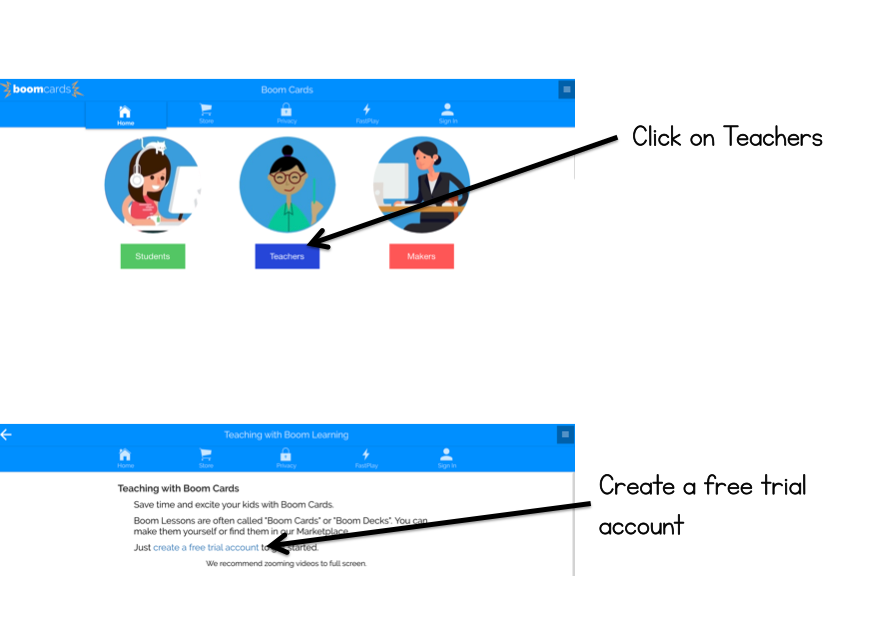
Go to https://wow.boomlearning.com/
Follow the rest of the steps to create your free account. (Later, you may want to upgrade to a very reasonably-priced Basic, Power, or Ultimate plan so you can track student progress!)
2. Adding Decks to your Library
Once you have an account, you can find Boom Cards on the site or access the ones you’ve purchased on Teachers Pay Teachers.
Here is a free resource to get you started. Follow these steps to get it in your library. You will follow the same steps when you purchase something on TPT. Click HERE for your FREE Boom Deck.
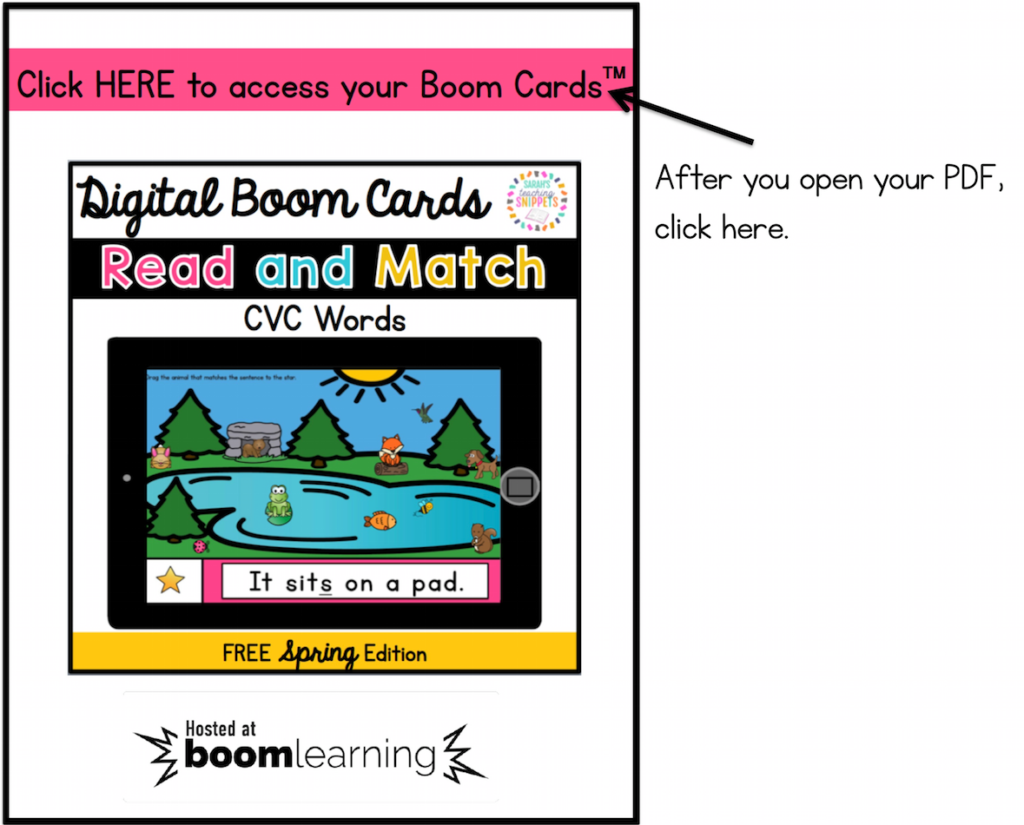
Download that PDF and this is what you’ll see when you open it. Click on that pink strip.
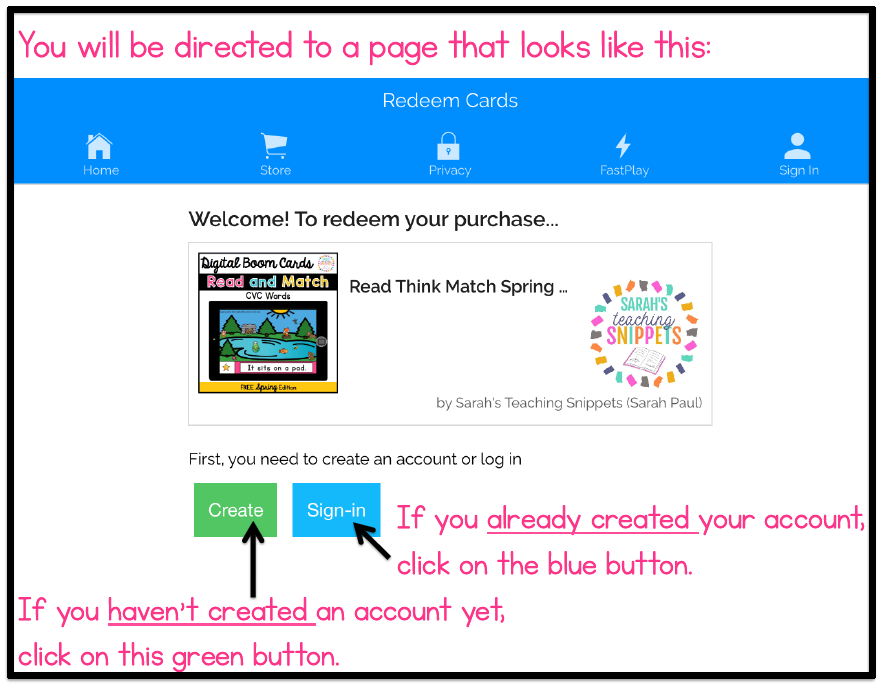
Next, you will follow the steps to create an account or simply sign in (depending on if you’ve already set up your account or not in step 1).
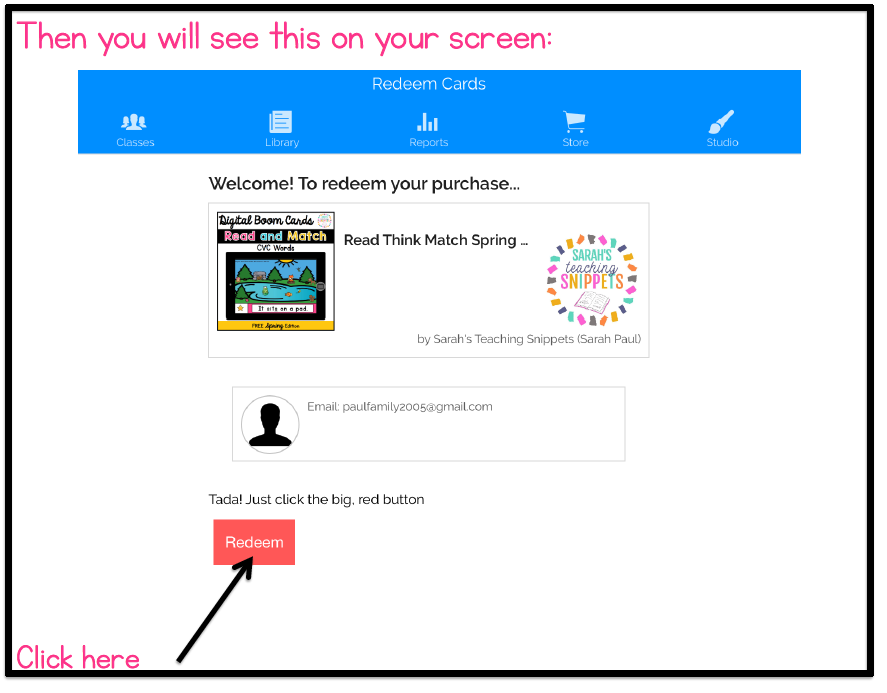
NOTE: If this is your first product you are “redeeming”, you will have two additional windows asking if it’s you and then asking to agree to to terms.
Then this deck will automatically be put in your library!
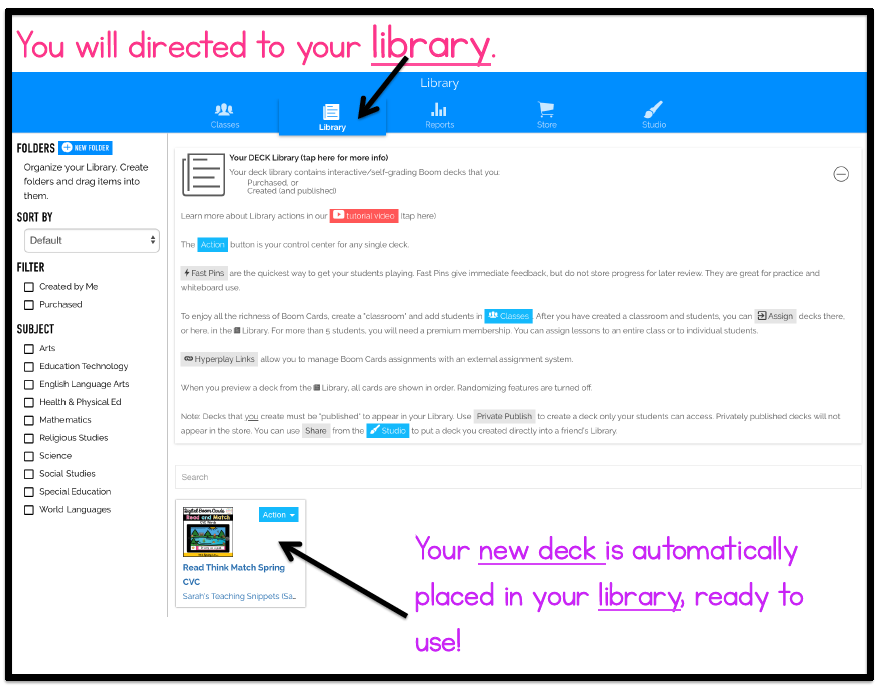
Here is where we run into our first choice and in the beginning I was a little confused with this. So this post will be like a “Choose your Own Adventure” book. 😉
- If you know you just want to stick to a free account, then skip to Step 4A where you will learn about Fast Pins.
- With a Free Account, you get up to 5 students in your classroom, but you can assign any deck via a Fast Pin to all of your students. See Step 4A to learn more about this option.
- If you want to add more than 5 students and you want progress monitoring, you will want to get a Basic Membership so you can add in all of your students. It’s an amazing deal actually, but for now during this time of Distance Learning, it’s FREE! Follow Step 3 to Create your Classroom and add in your students.
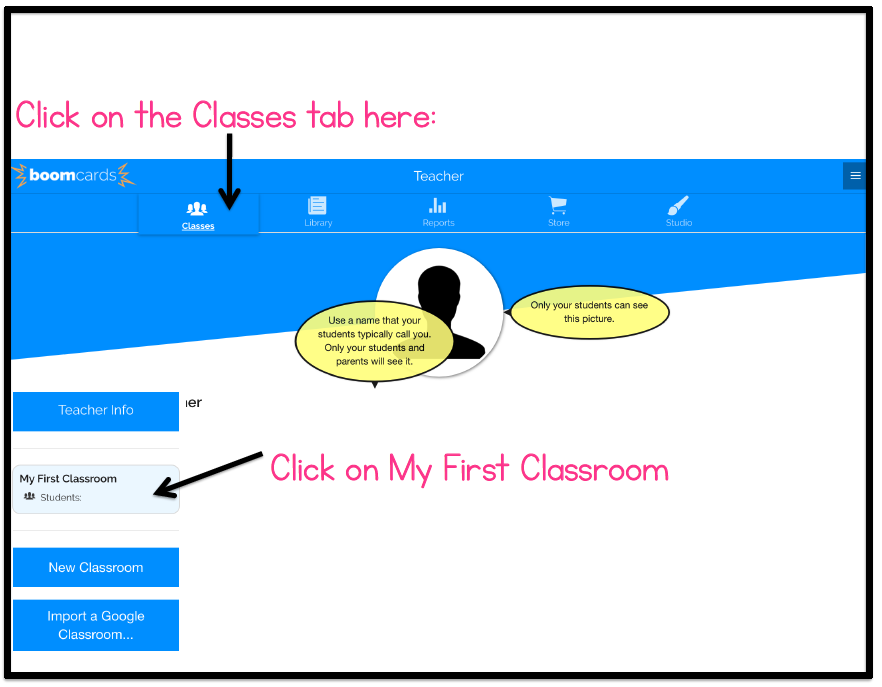
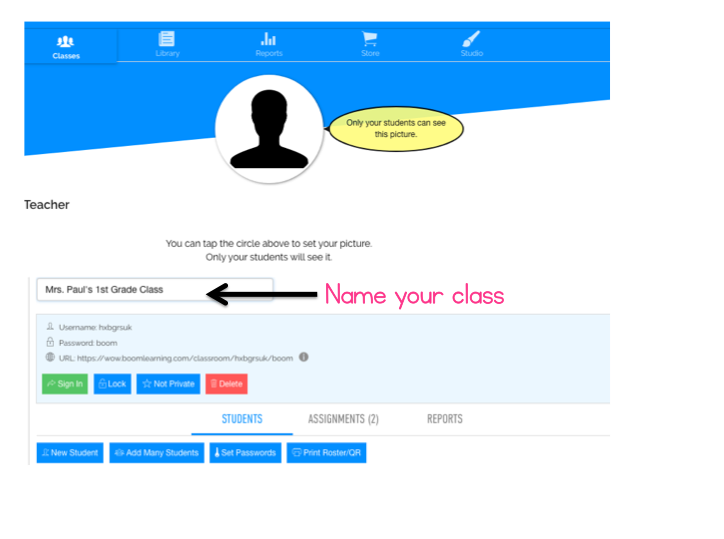
Step 3: Create your Classroom and Add Students
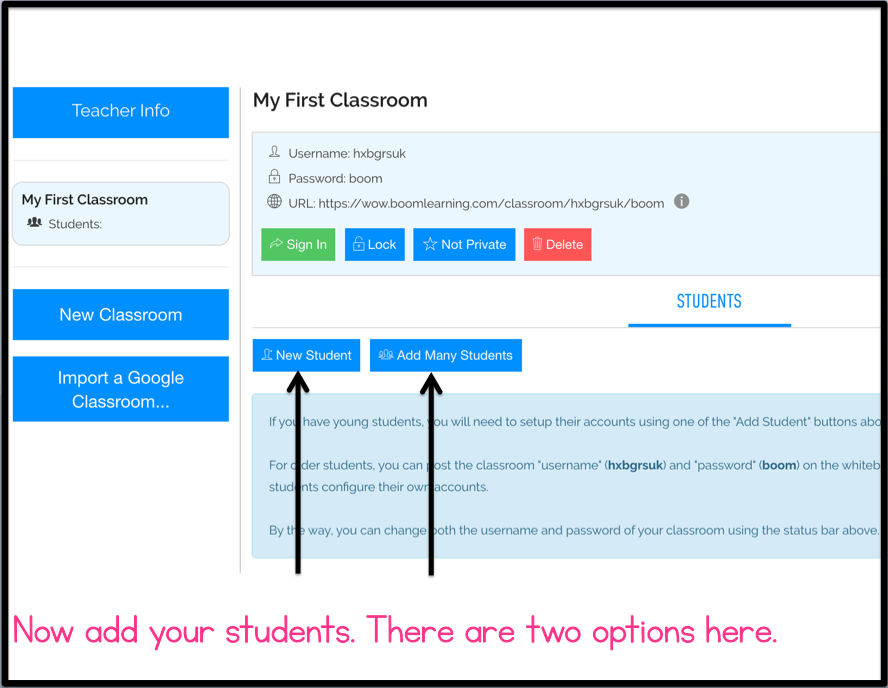
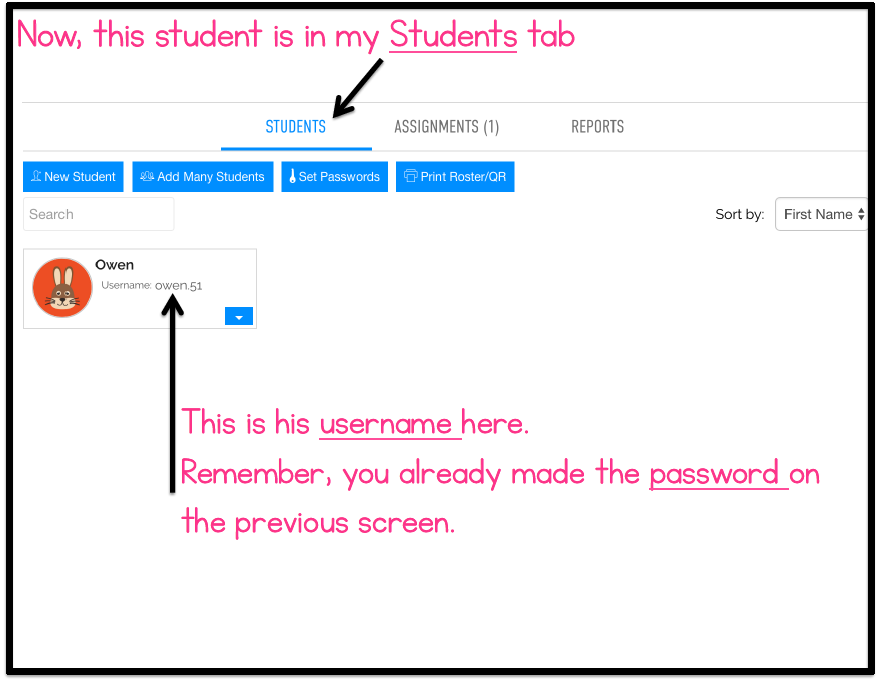
You will be prompted to type in their name and a password.
Step 4: Assigning Decks to your Students
There are three choices for how to do this:
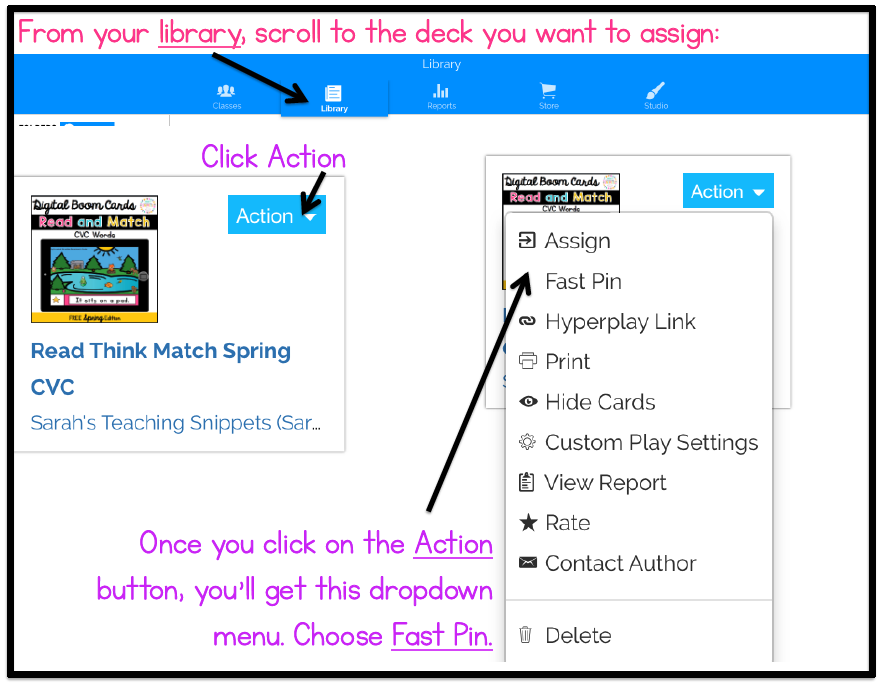
- A. Fast Pin (No log-in or password needed for this option.)
- B. Hyperlink (log-in and accounts required)
- C. Assign from your library (log-in and accounts required)
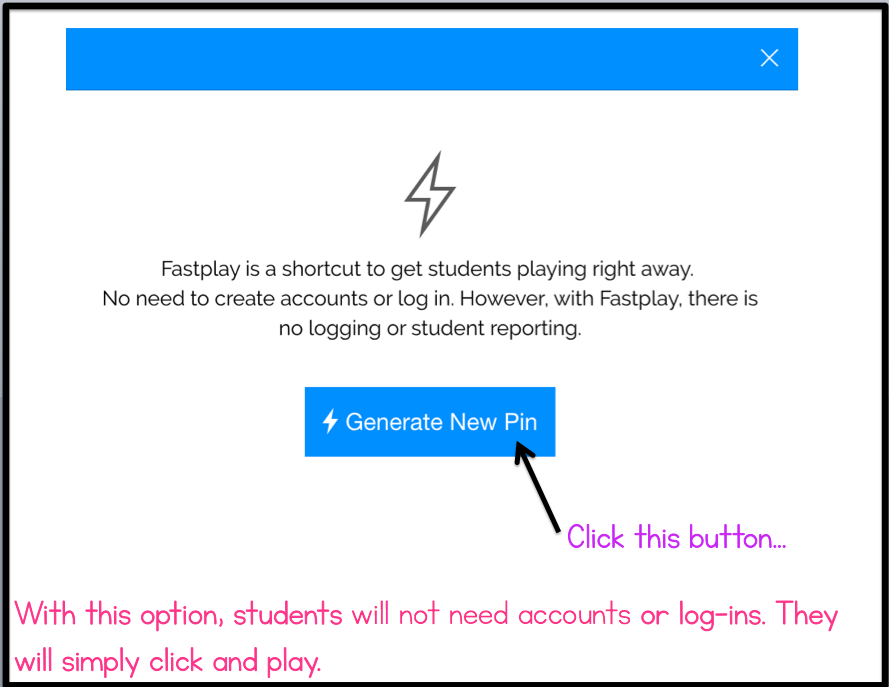
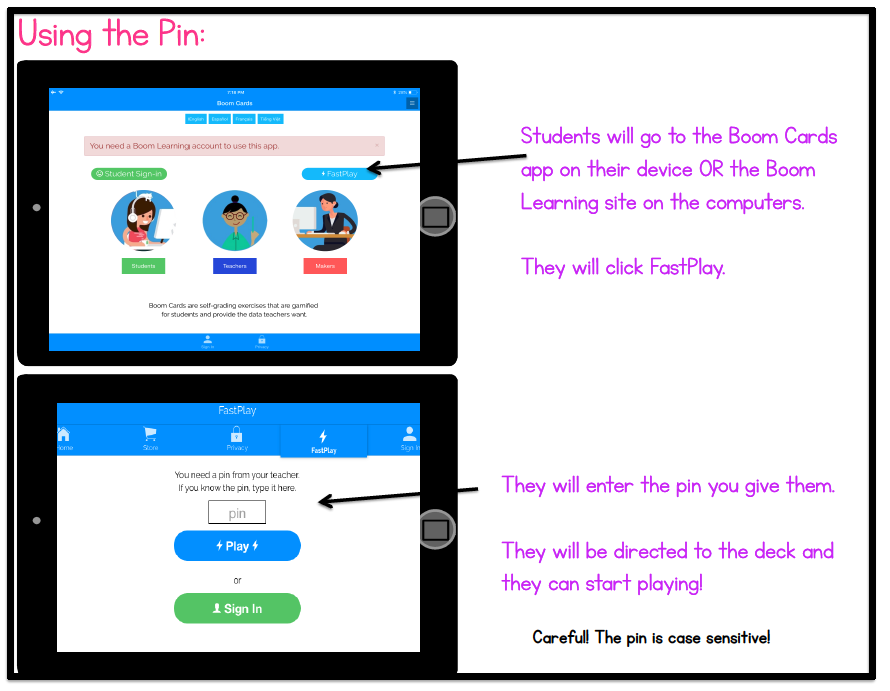
A. Fast Pin
With the Fast Pin option…
- Students will not need accounts or log-in info
- Students will simply click and play.
- Teachers will NOT be able to track student progress
- Students will have 14 days to use the link (But then you can just create a new Fast Pin)
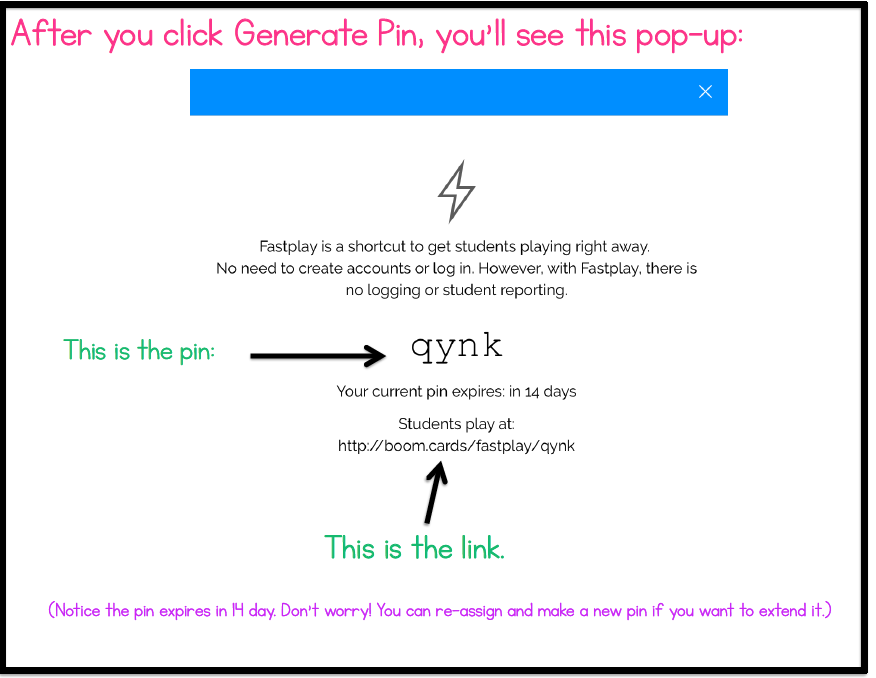
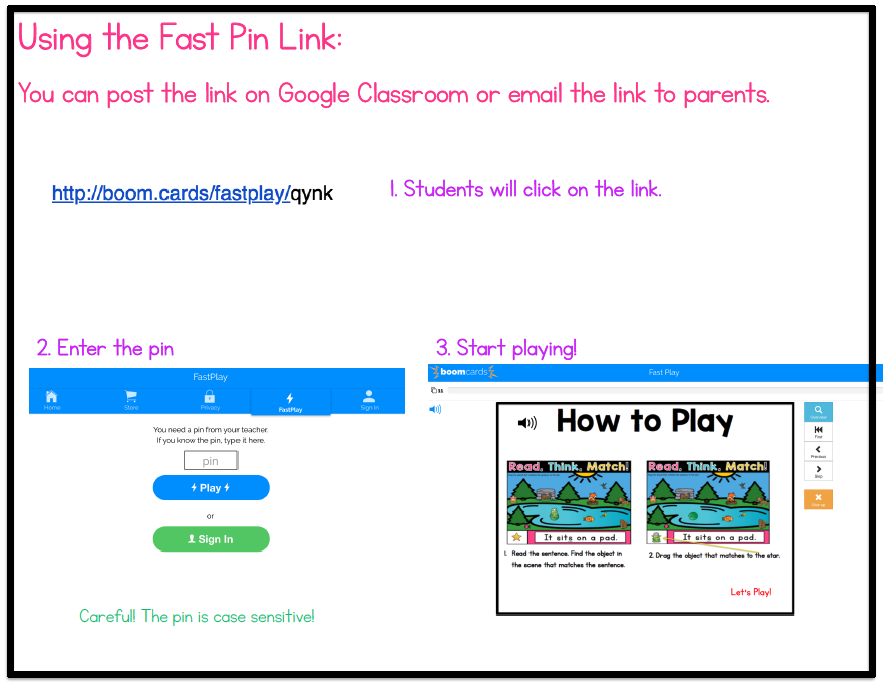
NOTE: If they copy and paste that whole link (not just the part in blue), then they don’t have to enter a pin.
Students can also just use the pin without the link if they have the app already downloaded.
B. Hyperplay Link
HyperPlay Link allows you to post a link in Google Classroom, Canvas, Moodle, Seesaw, etc. or via email. (You can also post your Fast Pin link in those places but ,with Hyperplay, the link doesn’t expire.)
With Hyperplay Link…
- Students will be prompted to log in.
- You can monitor students’ progress.
- The decks will stay in their “assignments” as long as you want them there.
I think this is a great option right now because you can see how your students are doing with these skills! This option makes sense if you choose to upgrade to a Basic account because you can add up to 50 students! Right now during this time of Distance Learning, the people at Boom Learning are offering FREE Basic memberships!
Here is how to assign a deck through the Hyperplay Link:
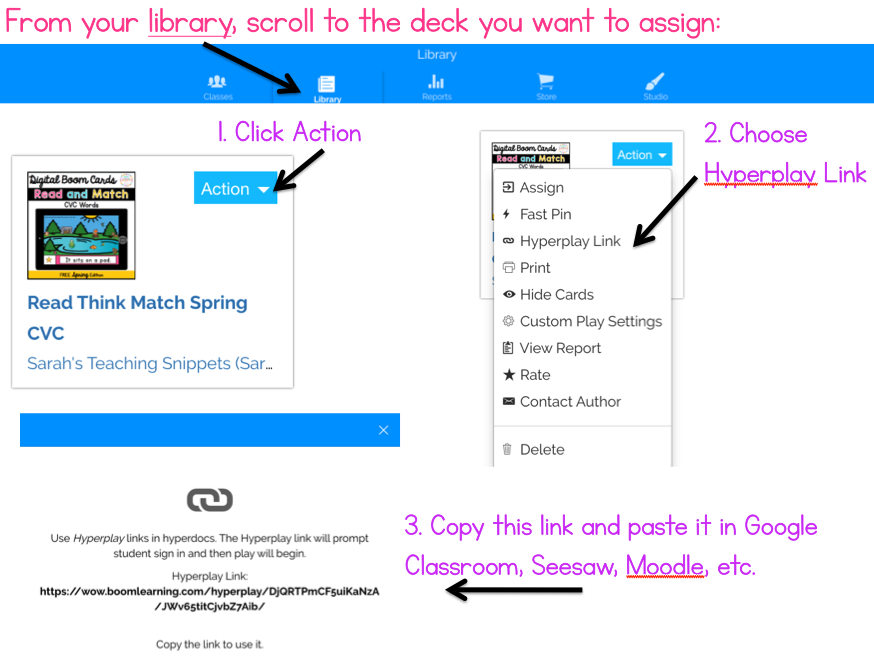
Students will be prompted to sign in with their username and password.
C. Assign from your library
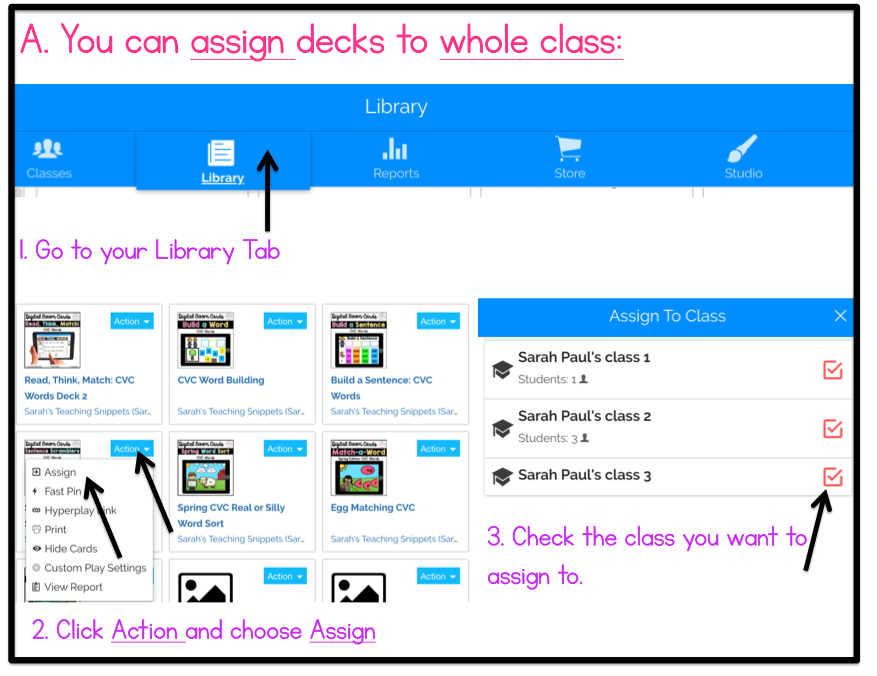
With an upgraded basic account (free right now), once you’ve added all of your students, (see step 3), you can assign decks to the whole class or to individual students. Students will log in and see the Boom Card decks that have been assigned to them. This is a great option if you want to give students access to multiple decks that they can pick and choose from.
You can assign Boom Card decks to your whole class or to individual students.
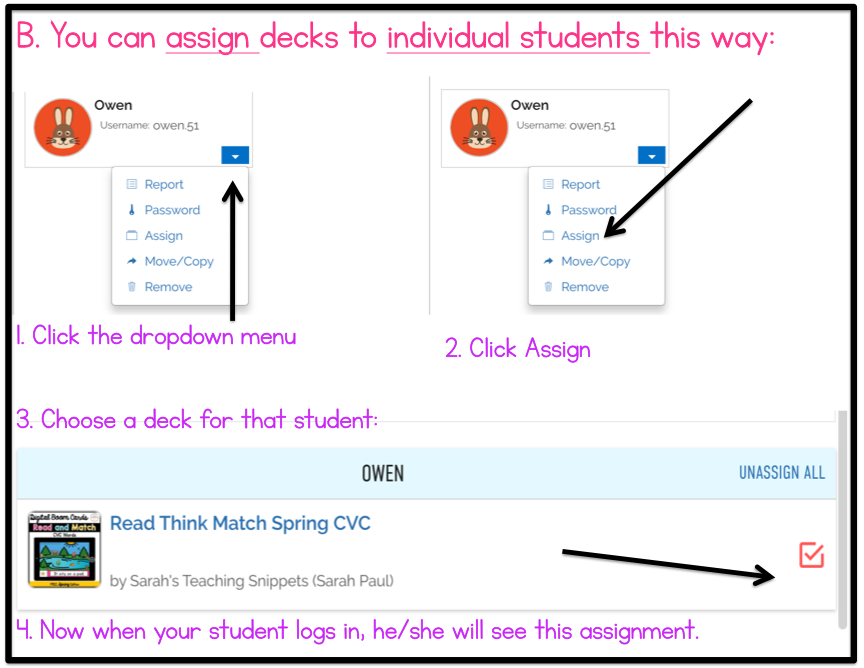
After you have assigned decks to students, they will be in their “assignments” ready to use! They will stay there until you “unassign” them.
Guiding Parents
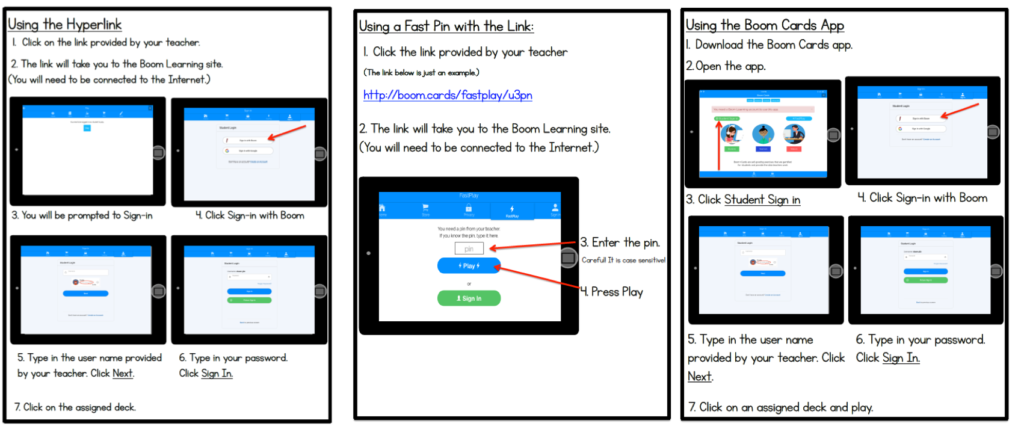
I made a PDF to guide parents when getting started with Boom Cards. There are four pdf files in the zip. Choose the one that you plan on using. For example, if you plan on only using Fast Pins, you would give them the directions page labeled “Using a Fast Pin with a Link” or “Using the app with a Fast Pin”. If you plan on creating usernames and passwords for all of your students, you would share “Using the hyperlink” or “Using the Boom Cards App”. You can download these here.
Boom Decks in my Store:
I just started making Boom Cards, but I plan on making a Boom Cards for most of my phonics and phonemic awareness resources! So far, here is what I have done.
Click HERE to see ALL of these Boom Decks on Teachers Pay Teachers
Click HERE to visit my Boom Store
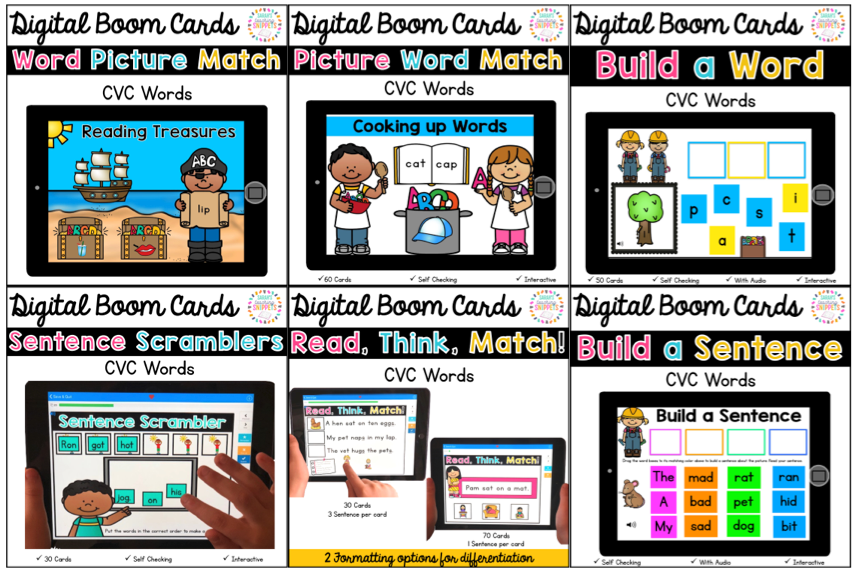
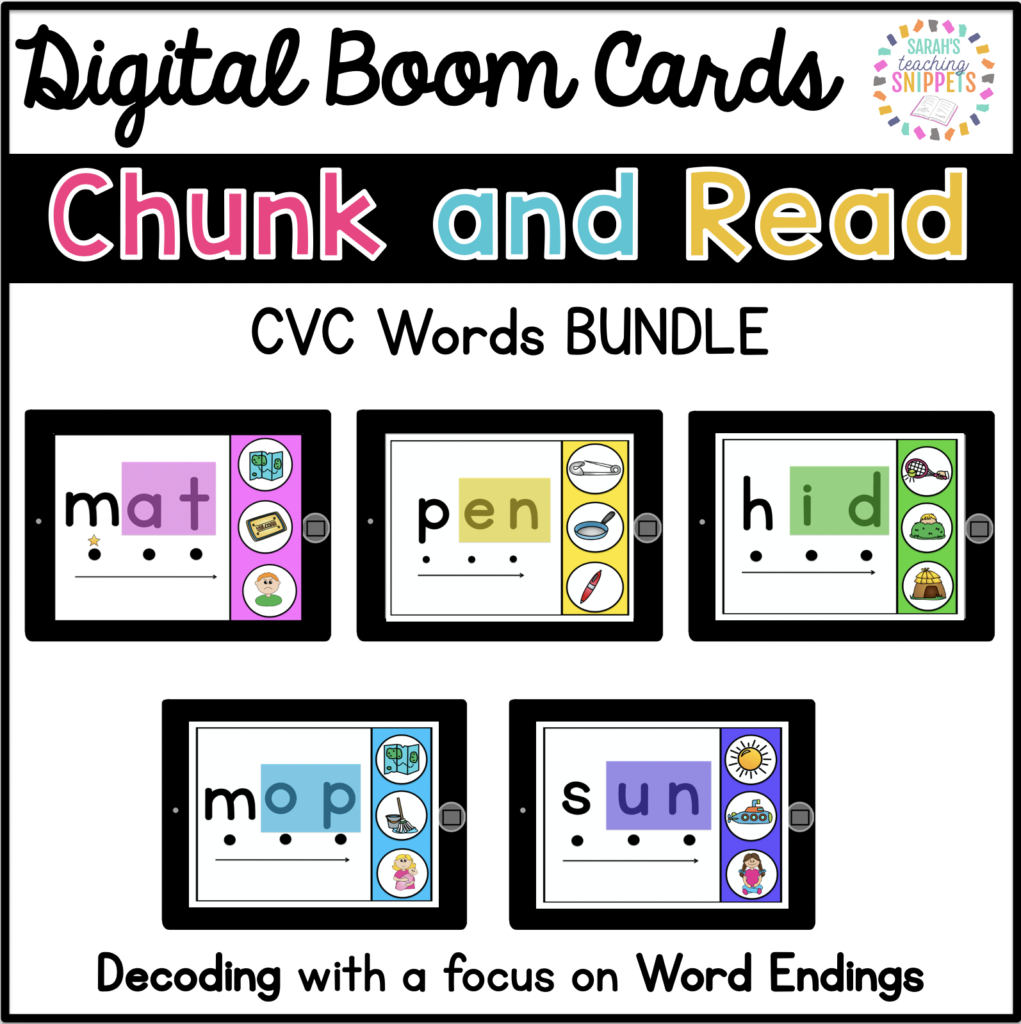
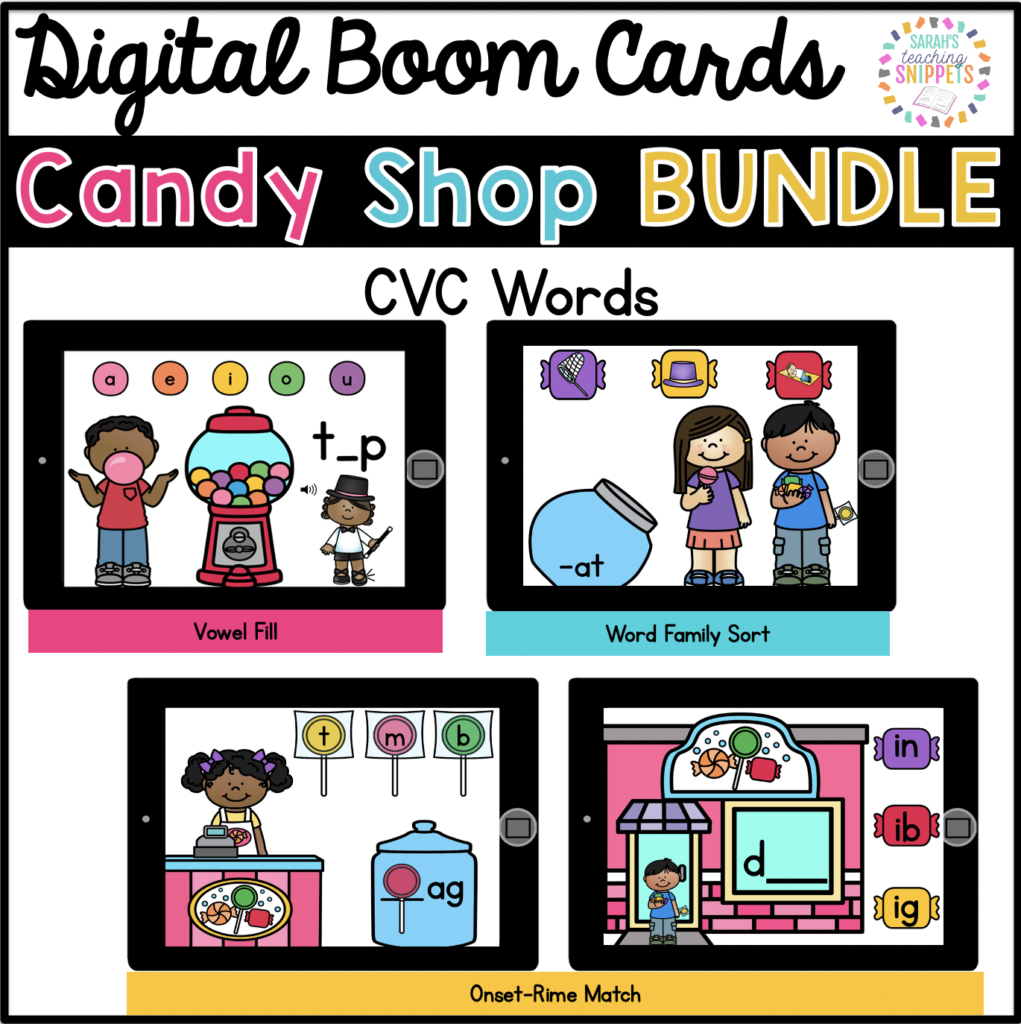
Boom Cards for CVC Word Work
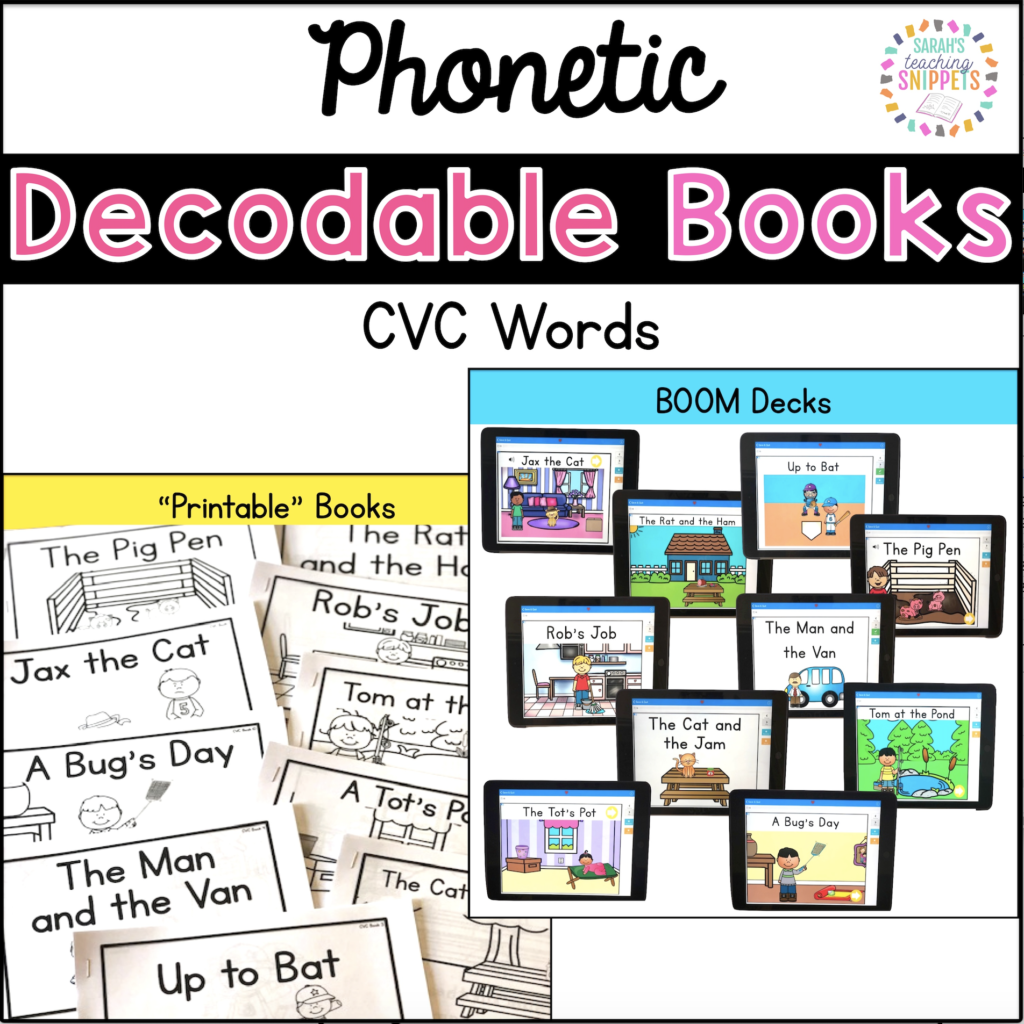
Decodable Readers: CVC Words
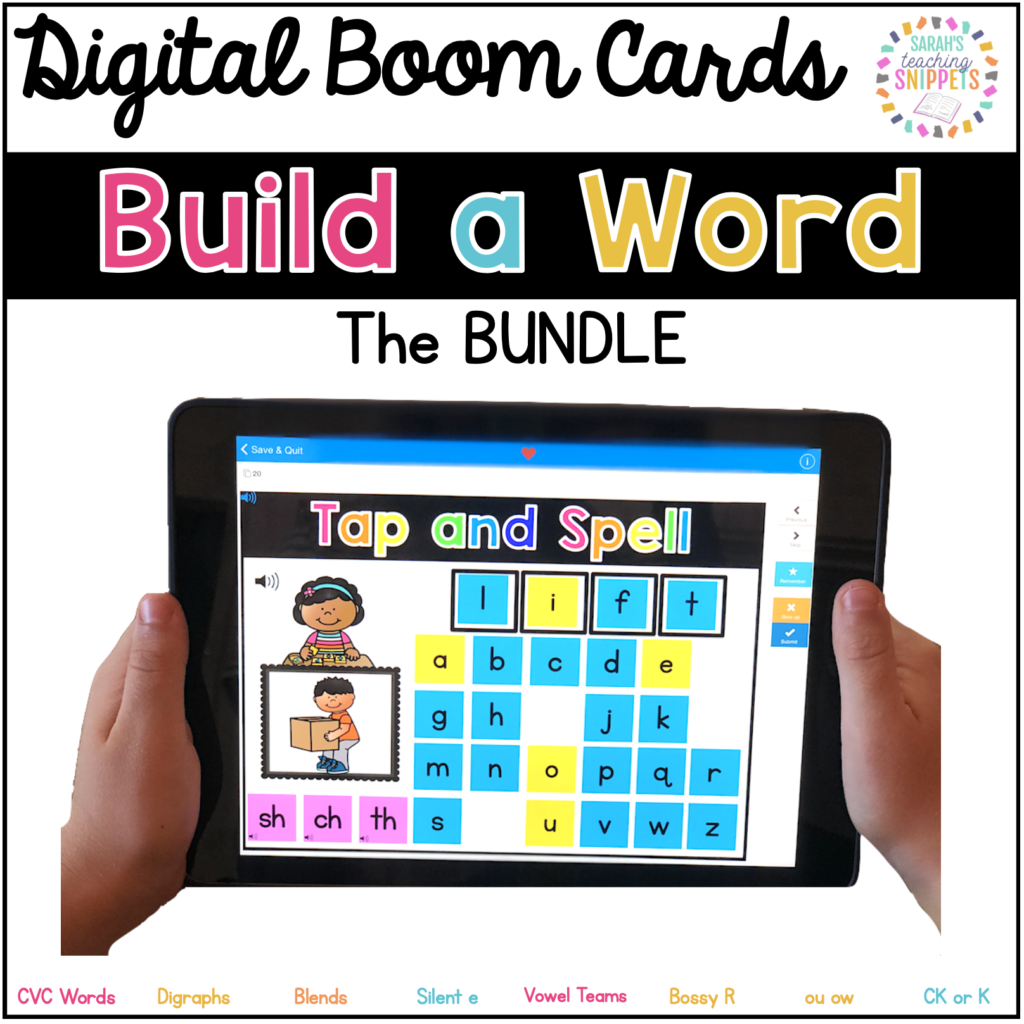
Word Building Boom Cards
I have created several word building decks, set up like sound boxes: Cvc word, digraphs, blends, silent e, ck/k, vowel teams, bossy r, and diphthongs.
Boom Cards for other phonics skills
Click HERE for Consonant Blends Boom Card.
Click HERE for Silent e Boom Cards.
Click HERE for Vowel Teams Boom Cards.
Click HERE for Bossy R Boom Cards.
Click HERE for diphthongs.
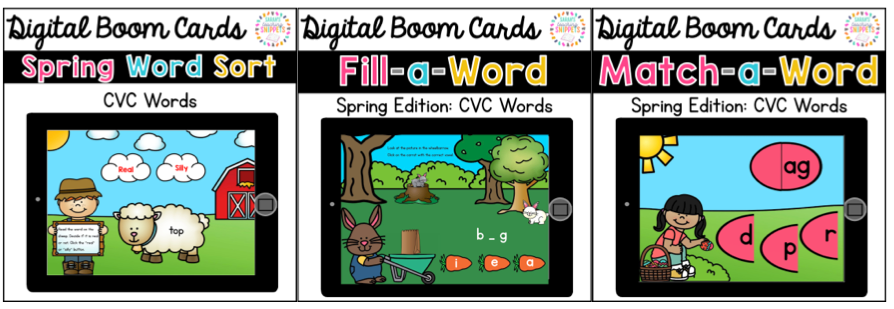
Boom Decks with a Spring Theme
Want to learn more about how I teach phonics in an intervention setting? Click here.
